Configure one Windchill server with two TIBCO servers in High-Availability
Pre-requisite
• Windchill server is installed on a server machine (URL is http://<hostname>:<portnumber>/<Windchill_Web_APP_Name/ For example: http://www.mycompany.com/Windchill>)
• TIBCO server1 is installed on server machine vm-01
• TIBCO server2 is installed on server machine vm-02
• Service instances for both the TIBCO servers are up and running in TIBCO Administrator.
• Make sure that publication goes successful from each of the TIBCO servers (by updating Info*Engine’s OOTB adapter properties appropriately).
Steps
1. Revert the changes made in Info*Engine’s OOTB adapter (as mentioned in pre-requisite information above) back to default values.
2. Go to Info*Engine administration from > .
a. From Create Entry drop-down menu, click JMS Service to create a service pertaining to TIBCO server1.
Service Name: com.mycompany.jmsService1
Runtime Service Name: com.mycompany.jmsService1
JMS Context Provider Factory: com.tibco.tibjms.naming.TibjmsInitialContextFactory
JMS Base URI: tibjmsnaming://vm-01.mycompany.com:7222
JMS Base URI Principal: <principal>
JMS Base URI Password: <password>
Queue Connection Factory: QueueConnectionFactory
Topic Connection Factory: TopicConnectionFactory
JMS Recovery Retry Interval: 30
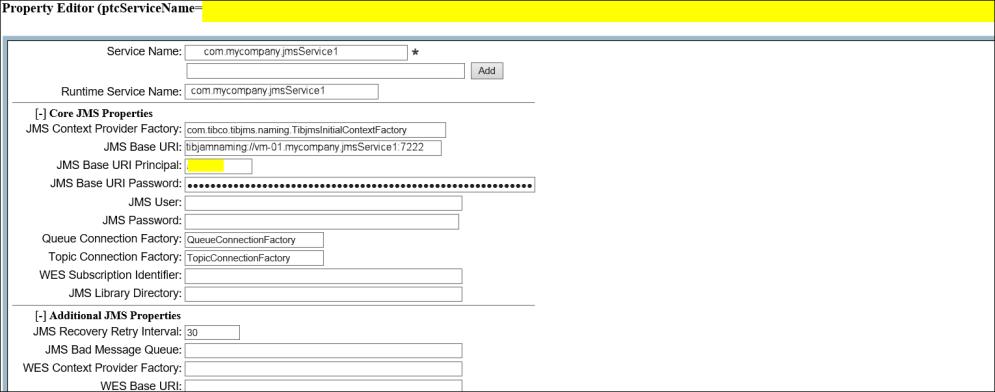
Click Create Property Set.
b. From Create Entry drop-down menu, again click JMS Service to create a service pertaining to TIBCO server2
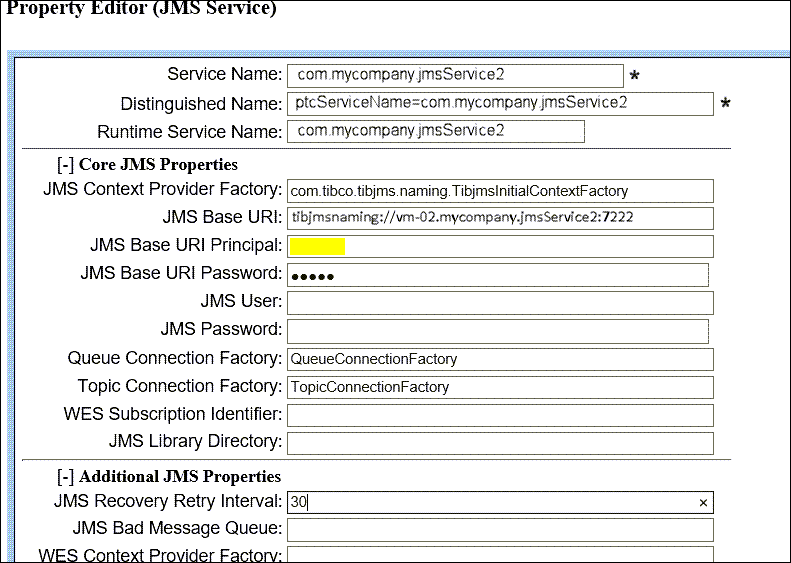
Click Create Property Set.
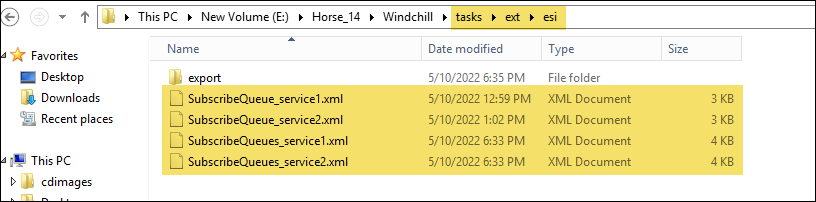
3. Copy the files SubscribeQueue.xml and SubscribeQueues.xml from location WT_HOME\tasks\com\ptc\windchill\esi.
a. Create a new folder ext\esi within the folder WT_HOME\tasks.
b. Paste the files SubscribeQueue.xml and SubscribeQueues.xml in folder ext\esi.
c. Rename SubscribeQueue.xml to SubscribeQueue_service1.xml and SubscribeQueues.xml to SubscribeQueues_service1.xml.
d. Make a copy of SubscribeQueue_service1.xml and SubscribeQueues_service1.xml with names SubscribeQueue_service2.xml and SubscribeQueues_service2.xml.
4. Open file SubscribeQueue_service1.xml in a notepad, add the below line in try block, and then save the file.
<ie:param name="SERVICE" data="com.mycompany.jmsService1"/>
5. Open SubscribeQueue_service2.xml in a notepad, add the below line in try block, and then save the file.
<ie:param name="SERVICE" data="com.mycompany.jmsService2"/>
6. Open SubscribeQueues_service1.xml in a notepad, add below line at #60, and then save the file.
System.out.println("logicName="+logicName+", name="+name+", user="+user+", getService()="+getService()+", newService="+"com.mycompany.jmsService1");
Also, update task.initialize to (this,"ext/esi/SubscribeQueue_service1");
7. Open SubscribeQueues_service2.xml in a notepad, add the below line at #60, and then save the file.
System.out.println("logicName="+logicName+", name="+name+", user="+user+", getService()="+getService()+", newService="+"com.mycompany.jmsService2");
Also, update task.initialize to (this,"ext/esi/SubscribeQueue_service2");
8. Go to the wt.properties file and update property wt.federation.task.startup to ext/esi/SubscribeQueues_service1.xml,ext/esi/SubscribeQueues_service2.xml.
9. Copy ExportToJMSQueue.xml from location WT_HOME\tasks\com\ptc\windchill\esi\export
a. Create a new folder with name export at location WT_HOME\tasks\ext\esi
b. Paste ExportToJMSQueue.xml in folder export and then rename ExportToJMSQueue.xml to Custom_ExportToJMSQueue.xml.
Refer to the below Custom_ExportToJMSQueue.xml file for the required changes to be made.
10. Restart Windchill. Message subscription to queue “com.ptc.windchill.esi.Result” successful should appear twice in the logs
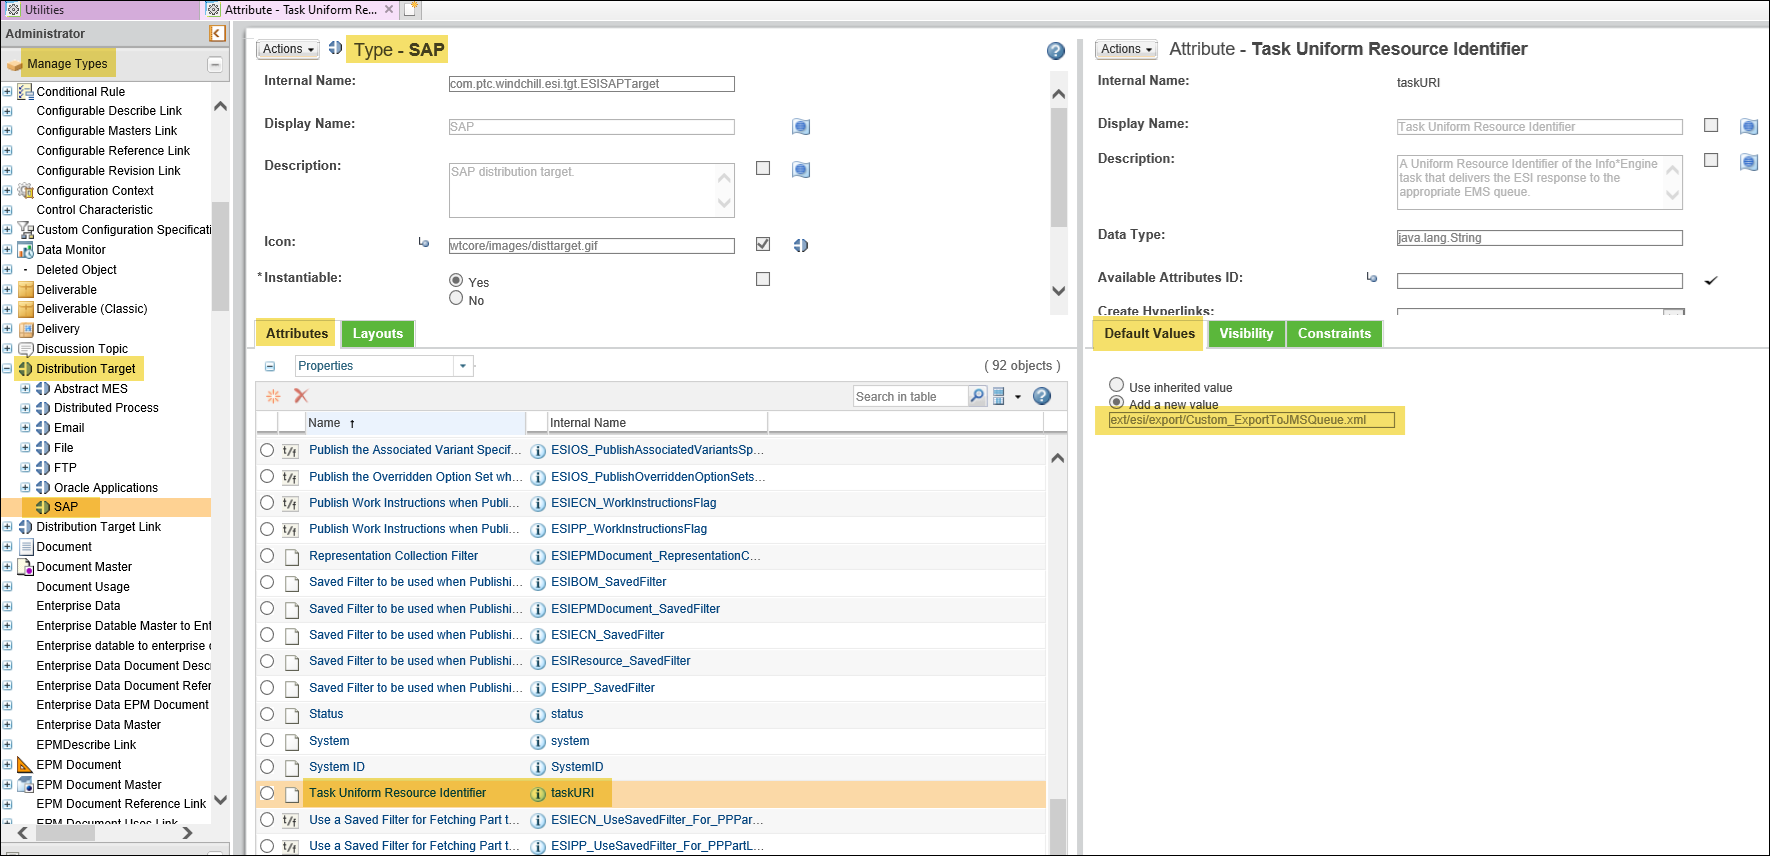
11. Login to the Windchill as a Site Administrator.
a. Then go to > > > > > .
b. In the Actions menu, click Edit. Then click Task Uniform Resource Identifier to view its information.
c. Go to the Default Values tab and update the text field to ext/esi/export/Custom_ExportToJMSQueue.xml.
Once you complete the above steps, creating a SAP type distribution target will automatically set its Task Uniform Resource Identifier value to Custom_ExportToJMSQueue.xml.
12. Login to the Windchill and create a part. Assign appropriate SAP distribution target to the part. Trigger publication using Send to Distribution Target action.
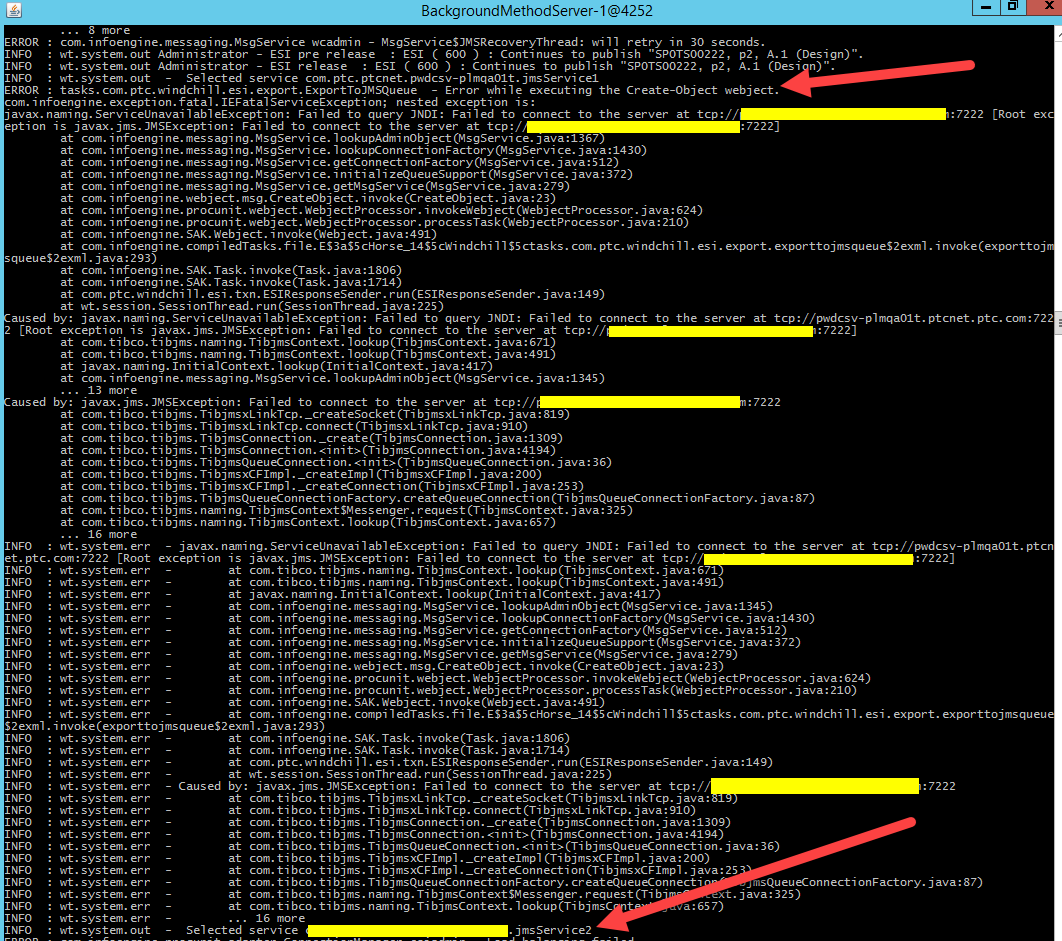
13. Publication will proceed through TIBCO server1 and the same info will be captured in the logs.

14. For testing purpose, stop services of TIBCO EMS Server1. In real world scenario, there could be various reasons why this service stops.
15. Again, create a part. Assign appropriate SAP distribution target to the part. Trigger publication using Send to Distribution Target action.
16. As EMS of TIBCO server1 is stopped, the publication will proceed through TIBCO server2 and the same info will be captured in the logs.
Steps mentioned above are generic guidelines. Customers should first try the above steps in their test environment and apply the changes in production environment as applicable. |