General Procedure
Users can create and configure a tab by visiting an information page for the type you wish to configure. Click the tab with the “+” icon to create a new tab, and configure the tab as needed.
It is important to note that throughout this process the tab is being saved, without any explicit action required. The very act of creating a new tab creates a new tab object in the database. Any actions to the tab, including changing its name, adding content, or deleting it, are immediately saved on the server.
The general procedure for adding and configuring a tab for a specific type is illustrated below. In this example, we will create and configure a tab that will display records:
1. Visit the information page of any document, and create a new tab by clicking the “+” tab:

2. This will create a new tab, named “New Tab 1” (or “New Tab 2” or some variation, depending on how many newly created tabs there are):

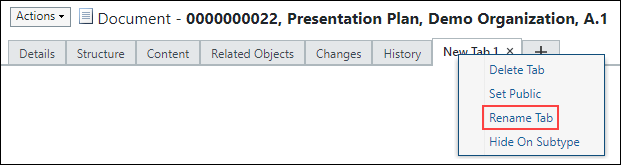
3. You can than rename this tab to something more meaningful. In this case, since this tab will be used to display records, we will rename it to “Records” by right-clicking on the tab itself, and invoking the Rename Tab action:
4. Enter the desired name into the resulting dialog, and you should see the tab’s new name:

5. New tabs are initially added to the right most end of the tab set. You can move your new tab to a different position in the tab set using a left-mouse click and drag-and-drop:

The order set for custom or configured tabs is not retained after an upgrade. |
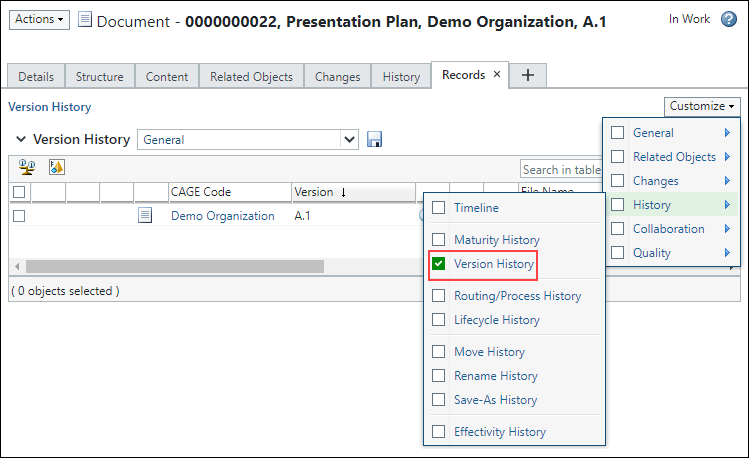
6. At this point, we have created a tab, given it a descriptive name, and moved it to the desired position in the tab set. We have yet to add any content to it, however, so it is not very useful yet. We’ll add content to the tab by clicking the “Customize” link. The Customize menu shows the content items that can be added to the tab. Content items are typically tables or attribute panels. The main Customize menu shows categories of content items. Each category has a submenu showing the content items in that category. You can select all the content items in a category by checking the box associated with the category or you can select individual content items within a category. We’ll add the “Version History” table to our new tab by selecting it in the Customize menu:
7. Now we have a Records tab, with the Version History component added to it. Depending on the administrative role of the user performing this action, this tab and its content will either be unique to the user, available for all users within the organization, or available for all users within the site, for all documents. This is explained in the following sections.
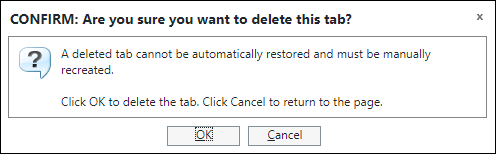
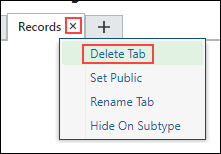
In order to delete any user created tab, you can delete by right clicking on the tab itself and invoking “Delete Tab” action. You can also click “x” on the tab itself.
8. You will get below confirmation dialog, by clicking OK, the tab will get deleted and by clicking Cancel you will be returned to the page.