在 Windchill 中使用 Autodesk Inventor Cable and Harness 模組
在 Autodesk Inventor 的 Cable and Harness 模組支援之下,您可在 Autodesk Inventor 中建立 Cable and Harness 元件,然後在 Windchill Workgroup Manager 中管理元件。如需有關建立例如纜、線、層切面、帶纜的資訊,請參閱 Autodesk Inventor 說明。
欲建立 cable and harness 組件,
1. 在 Autodesk Inventor 組件中,按一下 > > 。
Create Harness 視窗隨即顯示,並已填入 Harness Assembly File Name 與 Harness Assembly File Location 欄位。檔案位置設定為預設 Windchill 工作區。Harness 零件與組件編號依預設自動產生。Harness 零件會取得增量編號,如下圖所示。
|
|
Autodesk Inventor 結構中的 Harness 零件編號不會在使用者介面中更新。
|
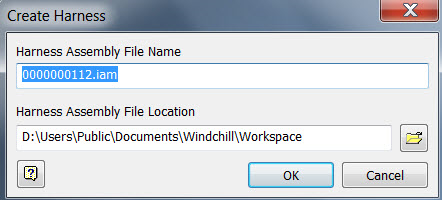
如果 Windchill Workgroup Manager 連接至 Autodesk Inventor,Harness Assembly File Name 將會根據下列規則命名︰
◦ 如果 Windchill CAD 文件自動編號為 ‘ON’,其名稱會遵循自動編號配置 (自動產生編號)。
◦ 如果 Windchill CAD 文件自動編號為 ‘OFF’,或者 Synchronize Number and File Name 偏好設定為 'No',其名稱會遵循 Autodesk Inventor 命名慣例:
▪ 配線零件檔案名稱將為 Cable and Harness.Harness1.ipt。
▪ 配線組件名稱將為 Cable and Harness.Harness1.iam。
◦ 如果您按一下 Cancel 按鈕,然後再重新啟動 Cable and Harness 視窗,則會產生新名稱,且自動編號會遞增。
◦ 如果您按一下 Cable and Harness 視窗中的  ,Inventor 'Save As' 視窗即會出現,且自動編號會遞增。
 ,Inventor 'Save As' 視窗即會出現,且自動編號會遞增。
請勿變更 Harness Assembly File Location 的儲存位置。 |
獨立 Autodesk Inventor 在建立 Cable and Harness 資料時,會建立一個特定的資料夾結構 runtime。當 Windchill Workgroup Manager 連線至 Autodesk Inventor 時,所有元件會都在 Windchill 工作區中建立。 |
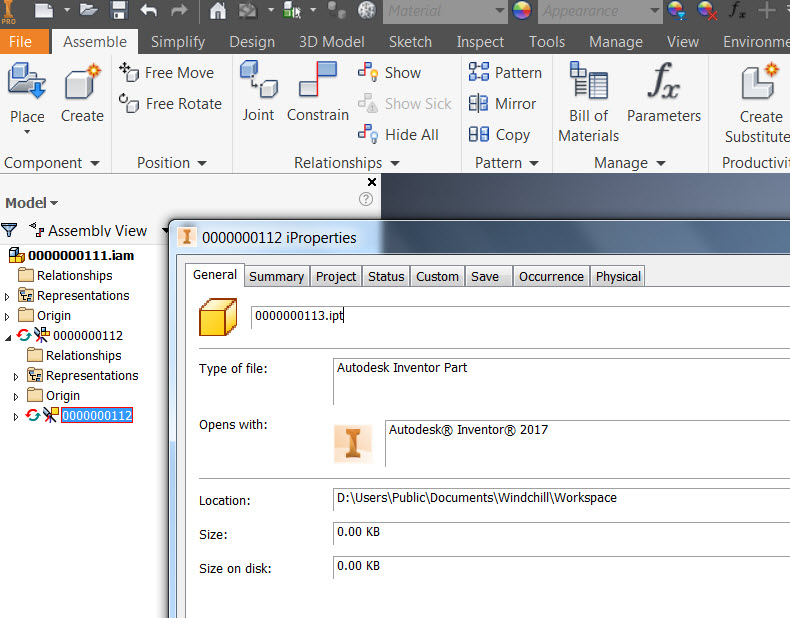
2. 在 Create Harness 視窗中按一下 OK 以將其關閉。組件和零件名稱視自動產生編號而定,如下所示︰
3. 在 Cable and Harness 下,您可以建立纜、線、段、層切面、帶纜和摺 (在帶纜上)。如需有關建立 Cable and Harness 元件的資訊,請參閱 Autodesk Inventor 說明。
4. 建立所需 Cable and Harness 元件後,按一下 Finish Harness and Assembly,並儲存組件。所有 Cable and Harness 元件,例如纜、線、段、層切面、帶纜和摺 (在帶纜內建立) 等,都會依據 Cable and Harness 組件與零件建立。
下圖顯示 Windchill Workgroup Manager 中的結構。
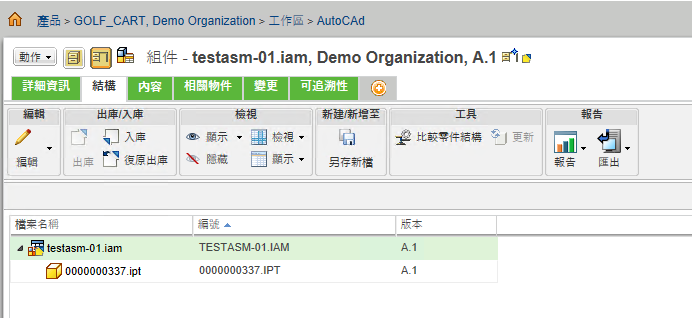
Cable and Harness 資料集的 BOM 支援目前不是 Windchill Workgroup Manager 功能的一部份。 |
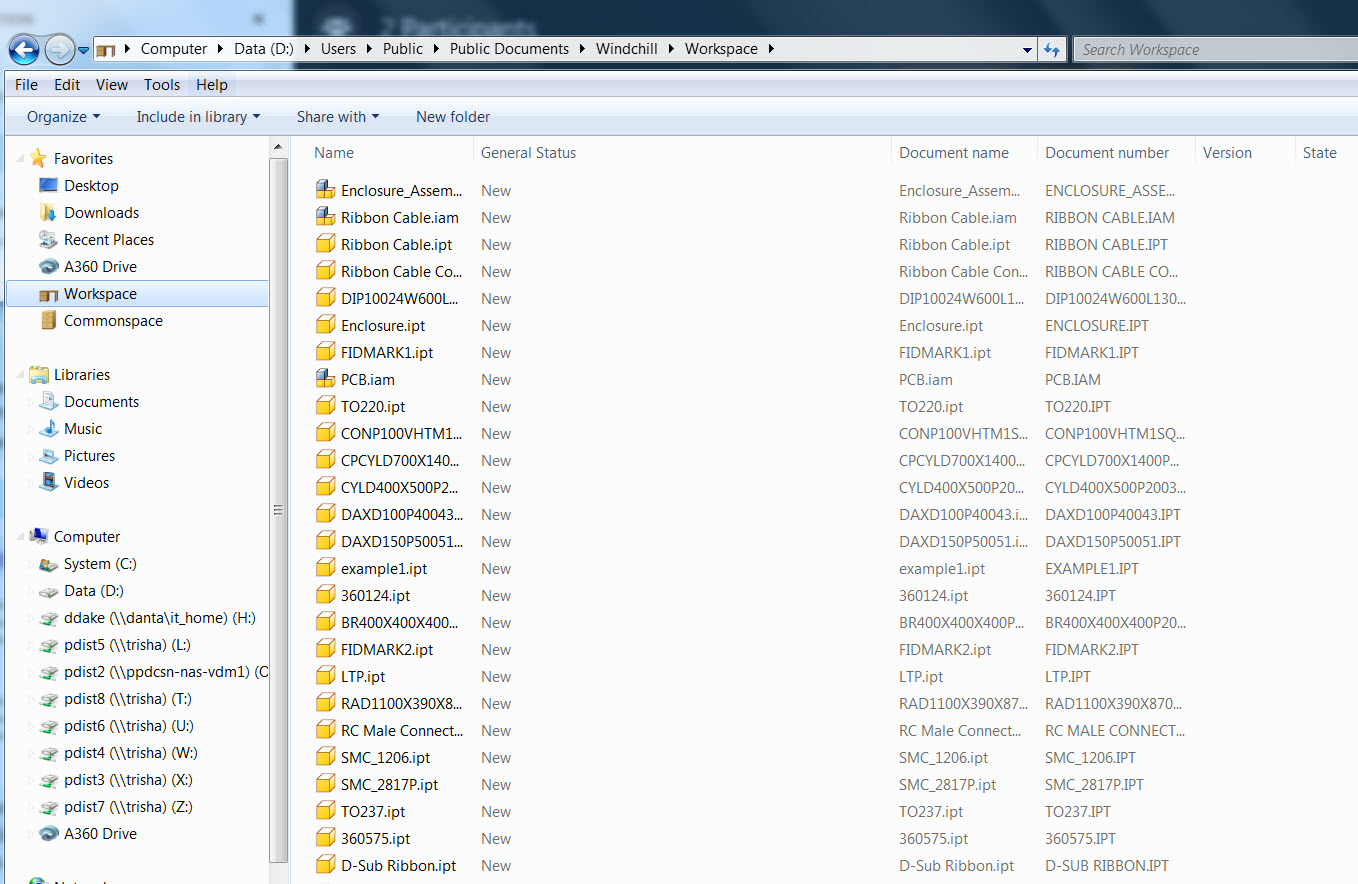
儲存主組件之後,Windows 檔案總管會顯示工作區位置中的所有檔案,如下所示。
限制
• 針對使用 'Save As' 與 'Rename' 指令從 Windchill 建立的 Autodesk Inventor Cable and Harness 組件,Harness 子組件與 Harness 零件的出現位置名稱不會在您於 Autodesk Inventor 中關閉、更新然後重新開啟更新的組件之後更新。
如果使用 'Save As' 或 'Rename' 指令分別將 Harness 零件與組件的名稱變更為 newname_0000007828.ipt 與 newname_0000007828.ipt,Autodesk Inventor 模型樹中的零件與組件名稱不會更新,如以下範例所示。
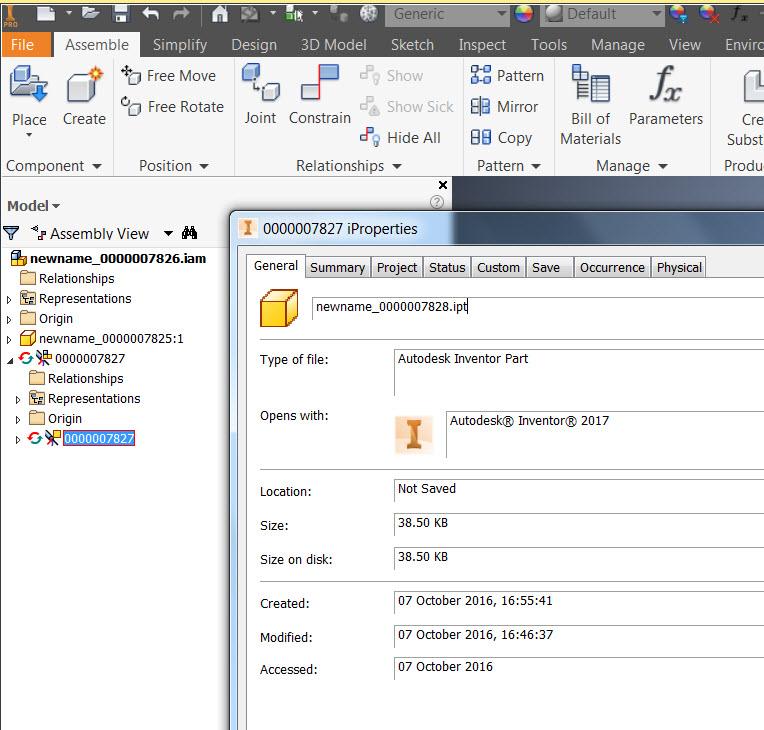
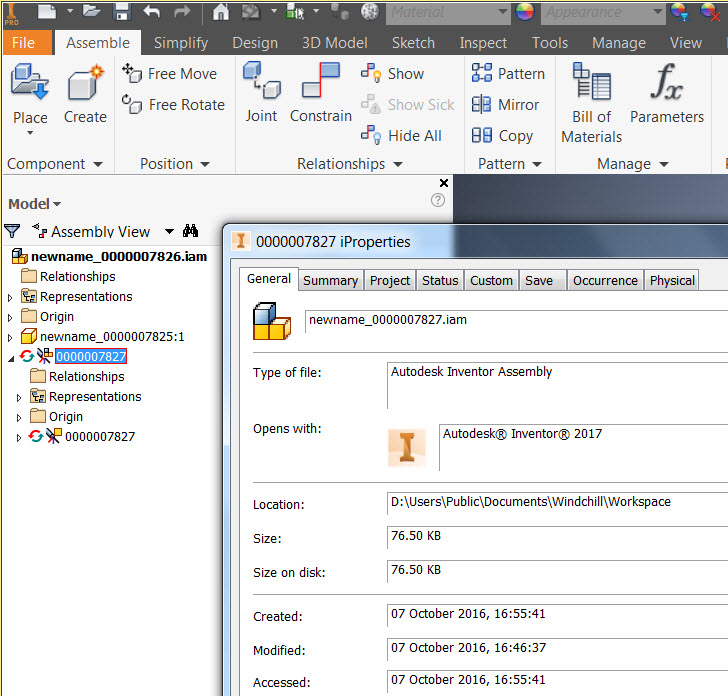
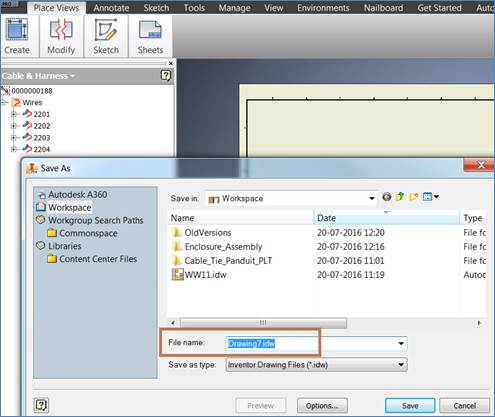
• 如果您使用 Nailboard 指令建立 Cable and Harness 組件的 2D 工程圖,工程圖不會繼承 Harness 組件檔案名稱。在下列範例中,'Drawing7.idw' 名稱會自動指派給使用 Nailboard 指令建立的工程圖。
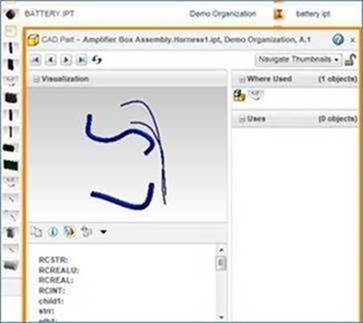
• Cable and Harness 組件的可檢視項不會顯示線和纜。它只會顯示段,如下圖所示。
圖 6. Autodesk Inventor 中的纜、線和段
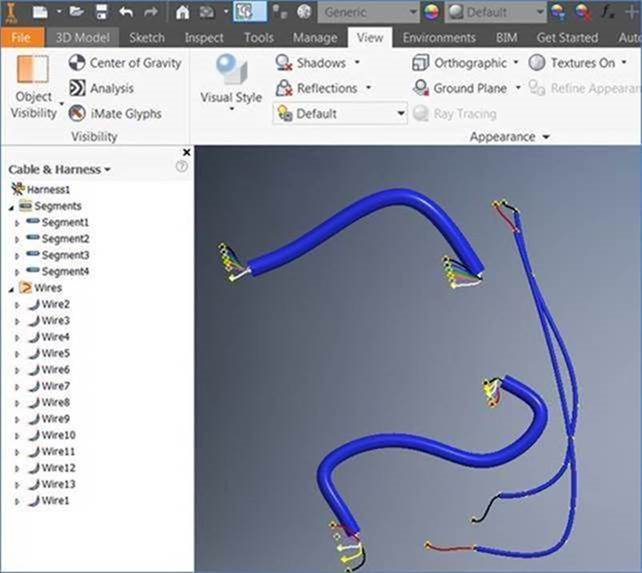
圖 7. 僅顯示段的 Harness 組件縮圖
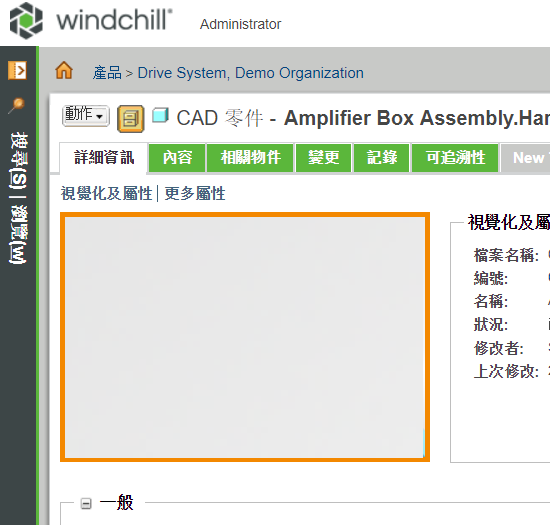
• Windchill Workgroup Manager 的「詳細資訊」標籤不會顯示 Cable and Harness 組件縮圖,如下所示。
• 如果您在將父 Cable and Harness 組件儲存至工作區之前,建立子 Harness 零件或子組件並將其儲存至工作區,子 Harness 零件與子組件不會儲存至工作區,而會為 Harness 子組件建立映象零件。
• 每當您在與 Windchill Workgroup Manager 連接的 Autodesk Inventor 中建立新的 Cable and Harness 組件 (父項) 時,請在建立任何 Harness 子組件或零件 (子項) 之前予以儲存,以防止建立子組件的映象物件。
• 重新匯入已入庫至 Windchill 的 Cable and Harness 組件時,請針對標準零件 (物件庫或內容中心零件) 選取 Reuse 選項,從 Specify Options 頁中匯入。如果在已設定「新增為已修改項目」、「出庫」及「版本修訂並出庫」選項的情況下「匯入至工作區」,會在開啟並儲存父組件之後顯示以下訊息。
「儲存的文件在工作區外具有文件參考」