CATIA V5
Configuring CATIA V5 to Read PMI
Before you configure Windchill Workgroup Manager to read PMI, ensure that you have the FTX license for CATIA V5. Without FTX license, CATIA allows you to add only text annotations.
You can configure Windchill to read PMI through:
• wgmclient.ini file
• Windchill Server-side settings
• Theorem CADverter (or CATIA CAD Worker)
• Creo View
Configuring Wgmclient.ini File
In the wgmclient.ini file, set the expose.model.annotations property to All (to expose all PMIs in Windchill) or Designated (to expose the selected PMIs to Windchill).
For a complete list of frequently used preferences, refer to Frequently Used Preferences in Wgmclient.ini File.
Windchill Server Side Setting
Set the publish.copyrepresentationsforward.restrict property to False at Windchill Server-side.
Creo View
Configure your Creo View to display floating annotations such that the annotations in the model are displayed parallel to the screen. For more information, refer to To Set Annotation Options.
Theorem CADverter
The Theorem CADverter is used to convert the native CATIA V5 data into CreoView format and enables Windchill to use PMI data from 3D models for downstream processes.
|
|
There are multiple combinations of settings available which allows you to configure Theorem CADverter to read PMI. This section only covers the default settings.
|
To configure Theorem CADverter, perform the following steps:
1. Open the CATIA V5 Setup file CATIA5_pv in Recipe Editor.
The configuration dialog box is displayed.
2. In the Basic tab, select the Required Entities, Output Options, and file format through the Advanced Options sections.
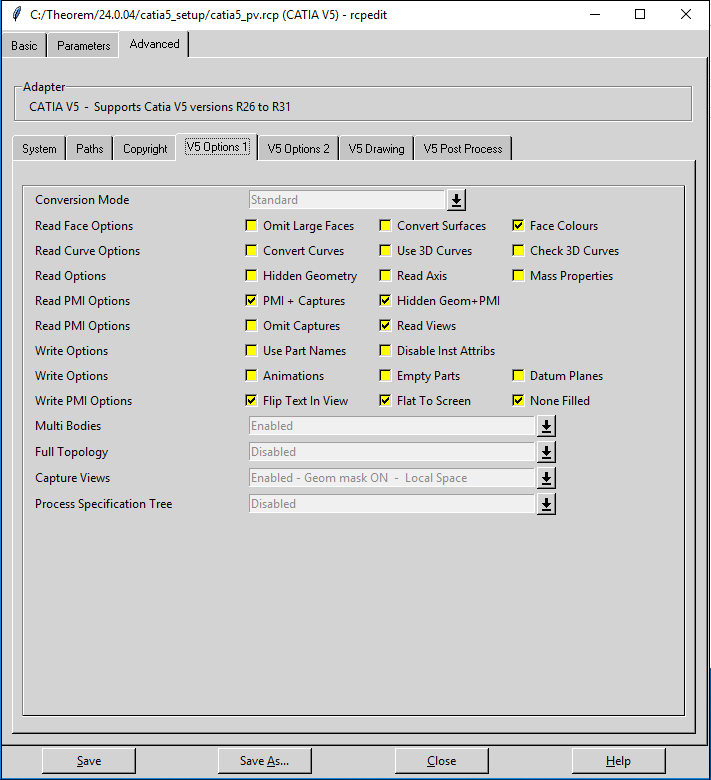
3. Click the Advanced tab and click V5 Options 1 sub-tab.
4. From Conversion Mode drop-down list, select Standard.
5. In the Read PMI Options and Write PMI Options row, select the options as shown in the image.

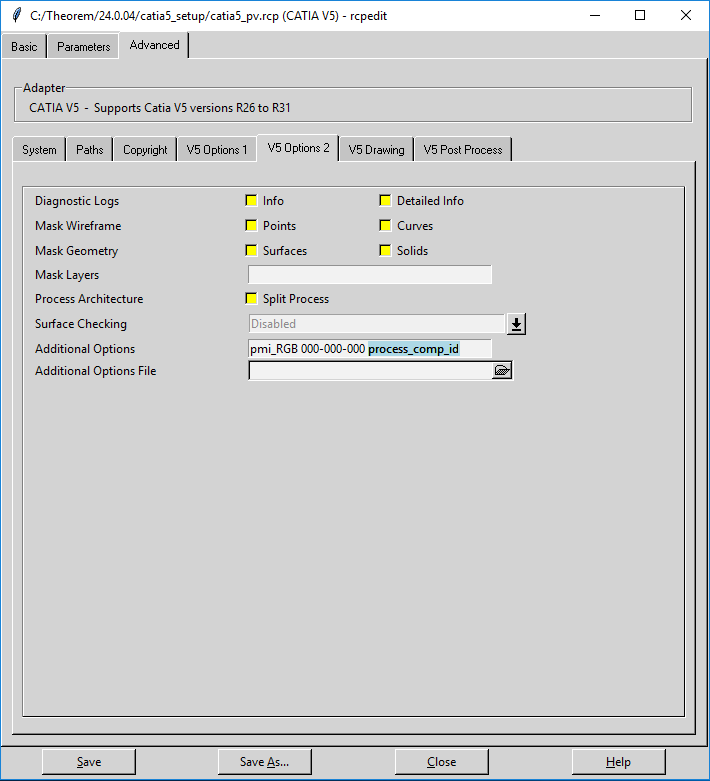
6. Click V5 Options 2 sub-tab.
7. In the Additional Options field, define component ID property process_comp_id. The component ID property allows you to avoid mismatch in identifying assembly instances.

8. Click Save.