Workflow
The steps involved in automatic build deployment using CCD are as follows:
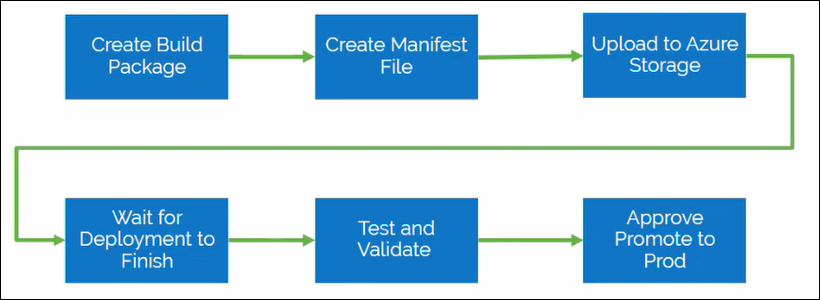
1. Create a build package file by compressing the contents into a single .zip file.
2. Upload the build package file to the following location of your Azure storage container:
data/builds
3. Create a manifest_<text>.yml file that includes the deployment details. Here <text> can be a custom text specified by you. For example, manifest_build1.yml, manifest_package1.yml, and so on.
For information on how to define the deploy_pipe targets within the manifest file, contact PTC. For more information on the deploy_pipe targets, see Trigger Automated Deploy. |
4. Submit a deployment request by uploading the manifest file to the following location of your Azure storage container: .
data/builds/deploy
5. After the manifest file is uploaded, the contacts in the notified distribution list receive a notification stating that the file was received and a new deployment request is created.
6. If the build package passes the compliance checks, the contacts in the notified distribution list receive a notification stating that the build package is scheduled for deployment.
7. When the scheduled time occurs, the contacts in the notified distribution list receive a notification stating that the deployment process has started and another notification when it is completed.
8. The approvers receive a notification to test and validate the build deployment.
9. For non production environments, you can complete the deployment request by notifying PTC that the testing is complete. You can do that by selecting Complete and Restore option in the email message sent by PTC.
For production environments, you can choose to approve or disapprove the deployment request. You can approve the deployment by clicking the Approve Deployment to Production option in the email message sent by PTC. You can disapprove the deployment by clicking the Cancel Deployment and Restore Environment option in the email message sent by PTC.