Create a New Project
1. Open Vuforia Studio.
2. If not already configured, click

at the top-right corner of the screen. Select
Settings and enter your Experience Service URL in the
Default Experience Service URL field. Click
Done.
3. Create a new project and select Mobile - Default as the template type.
4. In the New Project window, enter 3D-Guided Service Instructions 200 in the Project Name field, and confirm that the correct Experience Service URL is being used.
5. Drag and drop a Spatial Target onto the 3D canvas. Set the X Coordinate and Z Coordinate properties to 0.
6. Drag and drop a Model widget onto the canvas. Set the X Coordinate and Z Coordinate properties to 0 so that the model widget is in line with the Spatial Target. This is important, as a misaligned model can cause issues when viewed as an AR experience.
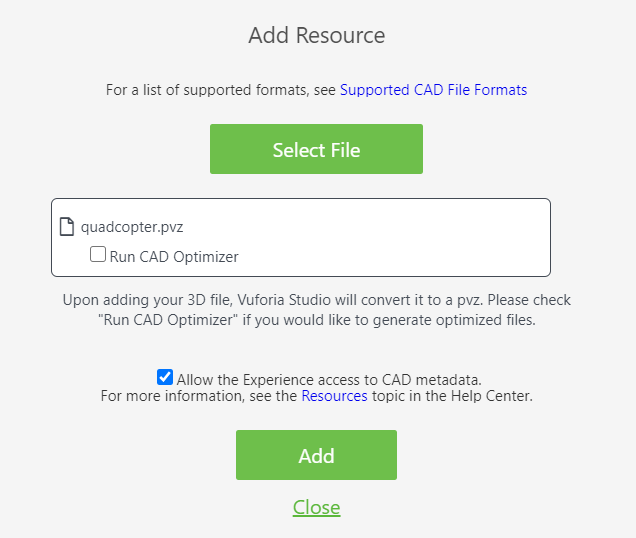
7. Under PROPERTIES for the Model widget, select Resource + to add a model to the widget. Browse to and select the completed quadcopter.pvz file that was created in 3D-Guided Service Instructions 101. Check the box for Allow the Experience access to CAD metadata. This keeps the metadata attributes that are associated with the model during the import process. Leave Run CAD Optimizer unchecked, as it will take away its underlying attributes. Click Add.
8. With the quadcopter model now visible on the canvas, change the Studio ID property to quadcopter.
9. Drag and drop a 3D Label widget onto the canvas. Make the following updates to the properties for the widget:
a. Text—enter Tap on parts to find out more
b. Font Color—set to white
c. Font Outline Color—set to black
d. X Coordinate—set to 0
e. Y Coordinate—set to 0.45
f. Z Coordinate—set to -0.165
g. X Rotation—set to 0
h. Y Rotation—set to -90
i. Billboard
—make sure the checkbox is selected
j. Studio ID
—enter Instructions