Model Item
What Does This Widget Do?
The Model Item widget allows you to select an individual model item on the already loaded CAD model and apply properties directly to that item without applying the changes to any other part of the model.
When Should I Use This Widget?
Use the Model Item widget when you want to change the properties for an item on the model without change the properties on the model itself. For example, if you want to change the color of an item on the model.
Are There Any Special Properties, Services, Events, or Actions?
To view a list of common widget properties, services, and events, see Common Widget Properties, Services, and Events.
The following table is a list of properties that are specific to this widget.
|
Property Name
|
JavaScript
|
Type
|
Description
|
|---|---|---|---|
|
Model Widget ID
|
model
|
string
|
Path to the model which the item depends on.
|
|
Component Occurrence
|
idpath
|
string
|
Index structure of the model item.
|
|
Scale
|
scale
|
string
|
Scale of the model item.
|
|
X Coordinate
|
x
|
number
|
Location of the model item on the x-axis.
|
|
Y Coordinate
|
y
|
number
|
Location of the model item on the y-axis.
|
|
Z Coordinate
|
z
|
number
|
Location of the model item on the z-axis.
|
|
X Rotation
|
rx
|
number
|
Rotation of the model item about the x-axis.
|
|
Y Rotation
|
ry
|
number
|
Rotation of the model item about the y-axis.
|
|
Z Rotation
|
rz
|
number
|
Rotation of the model item about the z-axis.
|
|
Visible
|
visible
|
boolean
|
Sets the visibility of the Model Item at runtime. This checkbox has three possible states:
• Inherit (
 )—the Model Item inherits visibility from the parent model or parent node. )—the Model Item inherits visibility from the parent model or parent node.• Visible (
 )—the Model Item is visible despite the visibility set on the parent model or node. )—the Model Item is visible despite the visibility set on the parent model or node.• Not visible (
 )—the Model Item is not visible despite the visibility set on the parent model or node. )—the Model Item is not visible despite the visibility set on the parent model or node. |
|
Occluding
|
occlude
|
boolean
|
If set to true, the geometry of a widget is invisible, but at the same time hides any other augmentations behind it in the 3D scene.
Therefore, the background or camera feed appears where the occluded widget should be. This can be used to emphasize some augmentations by hiding surrounding 3D geometry.
|
|
Always on top
|
decal
|
boolean
|
Changes the rendering of the model so that it is always on top.
If this checkbox is selected, the model is never hidden by other augmentations.
|
|
Opacity (1 Opaque - 0 Transparent)
|
opacity
|
number
|
A number between 0 and 1 that controls the level of transparency of the object. 0=completely transparent and 1=completely opaque. If set to semi-opaque (for example, opacity is set to <1), this will control whether the model item is drawn as a transparent shell (the default), or is entirely see-through.
|
|
Color
|
color
|
color
|
Current color of the model item. Supported formats include:
• rgb(255, 0, 0)
• rgba(255, 0, 0, 1)
• #FF0000
|
|
|
To override all other visibility settings and hide the model item and all items related to it, bind one of the following widget properties to the model item, and select Force Hide on the Select Binding Target window:
This also overrides any visibility as set by the selected sequence.
|
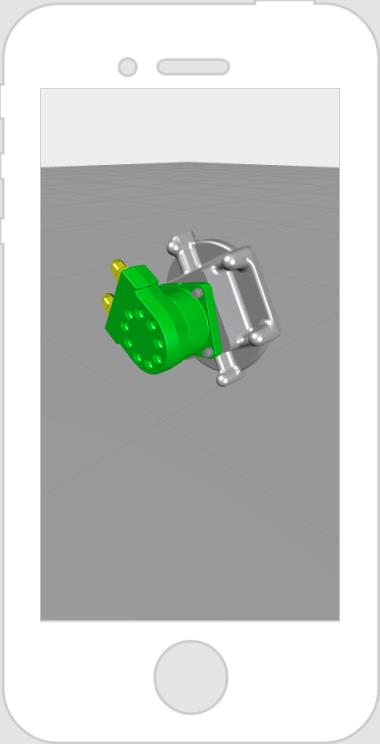
The Widget in Action
Here’s an example of what your widget might look like!
|
Minimum Steps Required for Use
|
What It Looks Like
|
|---|---|
|
1. Drag and drop a Model Item widget onto a part on the model.
2. Set the properties you wish to change on that item of the model. For this example, we’ve changed the color of the top of the pump to green.
|
 |