Add a ThingMark
experiences in Vuforia View are displayed by scanning a ThingMark from your device. In order for the 3D model to display in the correct location, you must place a digital ThingMark in the same location as your real-world ThingMark. For example, if you want the printed ThingMark to act as a tabletop for your AR experience, place the ThingMark underneath the model in Vuforia Studio. If you want the printed ThingMark to be applied to the surface of a physical object, place the ThingMark accordingly in Vuforia Studio.
1. Drag and drop a ThingMark widget onto the canvas.
2. Click the Mate icon.

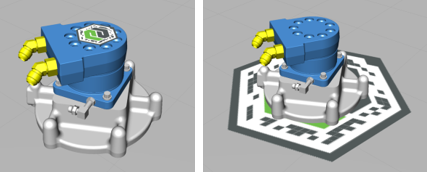
3. Drag and drop the ThingMark onto the model.
The placement of the ThingMark in Vuforia Studio directly corresponds to where the AR experience places the model in Vuforia View.
This also applies to rotation. You’ll either want to rotate the digital ThingMark in the same way as it will be placed in real-life, or you’ll want to rotate the ThingMark in real-life to the same orientation as in Vuforia Studio.
Next, we’ll add a 3D Label.