|
|
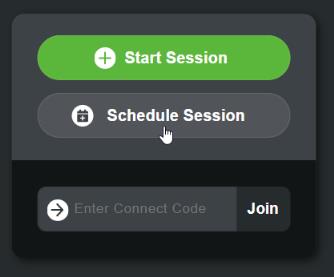
Currently, this feature is only supported in Chalk for Desktop. To enable this beta feature, please send a request to [email protected].
|
|
|
Currently, this feature is only supported in Chalk for Desktop. To enable this beta feature, please send a request to [email protected].
|
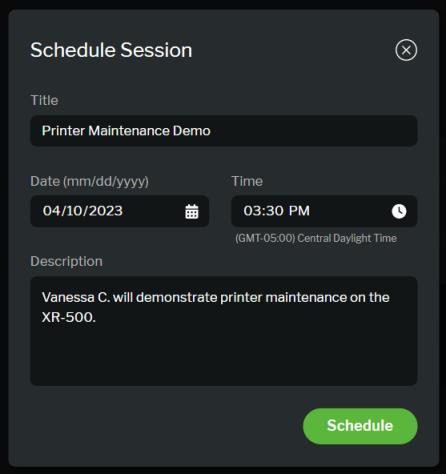
Field | Description |
Title | By default, this field is populated with <User's name> Session. Optionally, you can change this to be more descriptive. For example, XR-500 Printer Maintenance Demo. |
Date | Enter the date (mm/dd/yyyy) for the future session. |
Time | Enter the time for the future session. The time will be displayed in the scheduler’s current time zone. |
Description | Add a description for the session. This field is optional. |
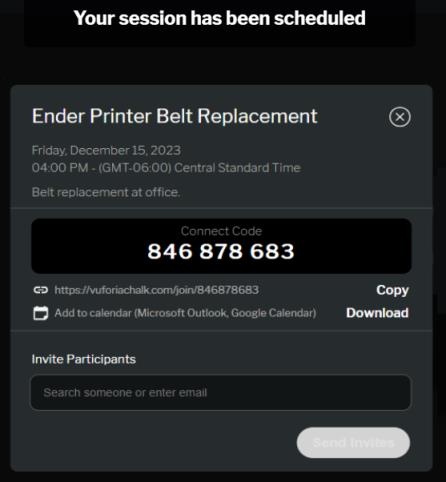
You can also add the scheduled session to your calendar by clicking Download next to Add to calendar (Microsoft Outlook, Google Calendar). |

You can click on a scheduled session in the list to view the details, join the session, or invite more participants. 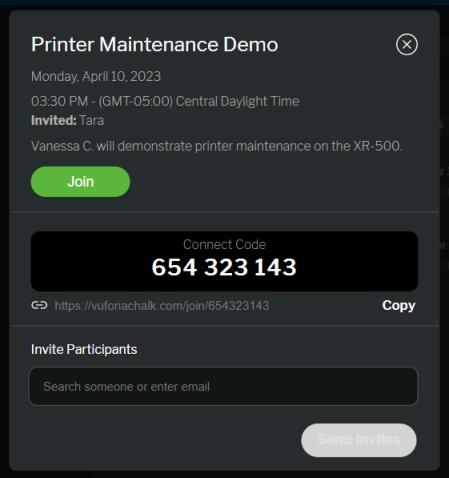 |