Upload Anomaly Models
When your ThingWorx and ThingWorx Analytics servers are both updated, use the next steps to upload the anomaly models you stored earlier. This process involves copying the contents of each stored anomaly model file into the AnalyticsUploadStorage repository and then uploading it into the new Analytics Results Thing.
1. In ThingWorx Composer, open the AnalyticsUploadStorage Thing as follows:
a. Navigate to the Things list.
b. Click Filter Options ( ) at the top of the page, select Show System Objects, and click Apply.
c. In the list of Things, open the AnalyticsUploadStorage Thing.
2. Navigate to Services and open the SaveText service.
3. Enter the following parameters:
◦ path – Enter a unique filename for the path to the model in the AnalyticsUploadStorage Thing. Example: /1.xml
◦ content – Copy the contents of the stored anomaly model PMML file and paste it into the this field.
4. Click Execute. The anomaly model is copied to the AnalyticsUploadStorage Thing. In the Output panel, the message No results appears.
5. To upload the anomaly model from AnalyticsUploadStorage to the Results Thing, open the new ResultsThing. The ResultsThing is prefixed with the name you assigned during your ThingWorx Analytics server update.
6. Navigate to Services, open the UploadModelFromRepository service, and provide the following parameters:
◦ repositoryName – AnalyticsUploadStorage
◦ filePath – The path your entered above in step 3
◦ name – The model identifier you recorded before migrating your ThingWorx server, for example: AnomalyDetectionModelFor_<identifier>
◦ description – The comma-separated key/value pairs of training statistics, if they were recorded (optional)
7. Click Execute. The anomaly model is uploaded to the ResultsThing and an upload job ID appears in the Output panel.
8. If you want to verify the model upload (an optional step), open the GetDetailsList service on the same ResultsThing and provide the following parameters:
◦ resultType – models
◦ name – The same model identifier used above during the upload, such as AnomalyDetectionModelFor_<identifier>
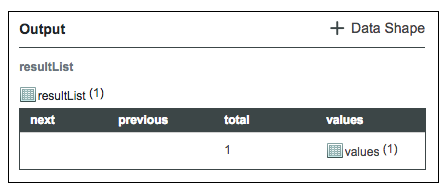
9. Click Execute. If the upload is successful, one result should be returned in the Output panel. Clicking on the nested infotable in the values column should display information about the uploaded model, such as name, description, ID, and more.
