Log Sheet Data
Overview
The Log Sheet Data screen allows users to search, view, or edit historical log sheet data based on station, product, and lot number. The Log Sheet will open in Read Only Mode for all non-supervisory users, and in Edit Mode for supervisory users.
Filtering
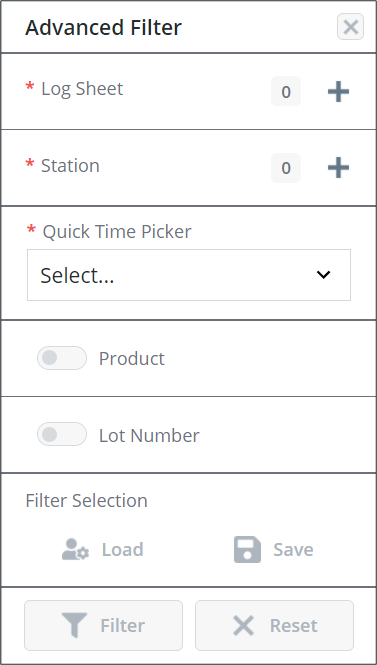
• Log Sheet – (Required) Select one (1) log sheet on which to filter data.
• Station – (Required) Select one (1) station on which to filter data.
• Quick Time Picker - (Required) Select a time frame from a list of predefined time frames or set a custom time frame.
• Product – Select one or more products.
• Lot number – Select the appropriate lot numbers for filtering.
• Load – Load saved filter settings.
• Save – Save the current filter settings to load later.
• Filter – Execute the current filter settings.
• Reset – Clear all filter settings.
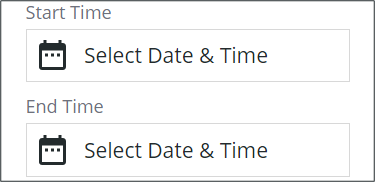
• Start Time and End Time – (Required for Custom Time Range only) If the custom option is selected in the Quick Time Picker, a start and end time must be selected for the time frame to display.
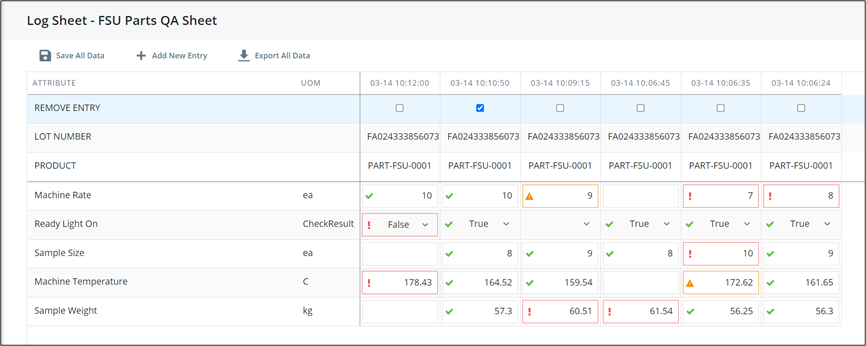
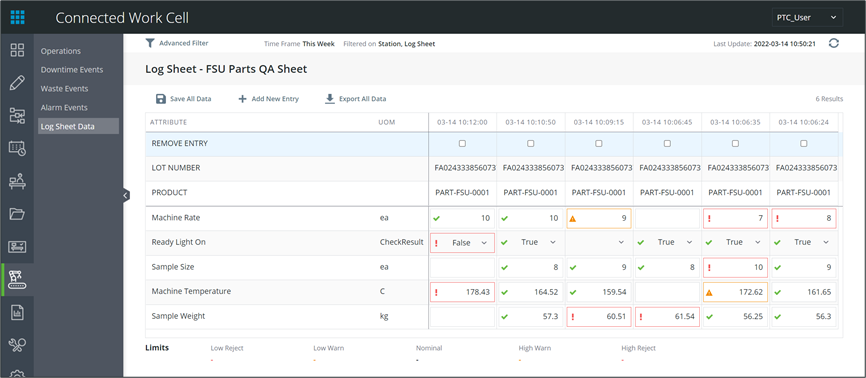
Once selections have been made the data will be displayed on the main Log Sheet data screen in alphabetical order. From here users can view historical data. Users with a supervisory role can also edit the displayed data.
If limits are set, they are displayed beneath the table for a selected attribute cell. |
Exporting Log Sheet Data
1. From the filtered Log Sheet Data main display, click Export All Data.
2. The .xlsx file will automatically begin downloading.
The export functionality supports up to 5000 attribute value entries. For example, if the log sheet contains 10 attributes (Rows), it is recommended exporting a maximum of 500 production events (columns) at one time. Attempting more can cause the export to fail. |
Adding New Log Sheet Data
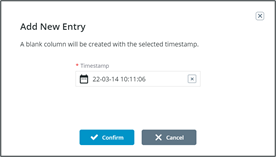
1. Click Add New Entry from the Log Sheet Data main display. The Add New Entry window will display.
2. Enter a Timestamp. The timestamp must be between the oldest and newest data in the existing log sheet page.
3. Click Confirm.
4. A new column will display in the Log Sheet Data window.
5. Fill in all applicable information.
6. Click Save All Data. The entry will be added to the log sheet.
Editing and Deleting Log Sheet Data
1. Data can be edited directly from the Log Sheet Data main display. All data can be edited except the Product and Lot number. Once data has been updated, click Save All Data.
2. Data can be deleted by checking the Remove Entry check box at the top of each column in need of deletion. Once all appropriate columns have been checked, click Save All Data.