CWC Specific Configuration
Equipment
General
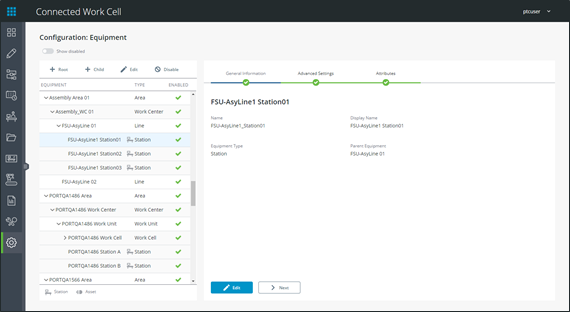
The Equipment Configuration display allows you to model the entire plant hierarchy, and set up equipment for production, IoT data capture, and more.
For more information on Equipment configuration, click here.
CWC Specific Configuration
The plant model hierarchy setup is very flexible, but we recommend adhering to the ISA-95 standard:
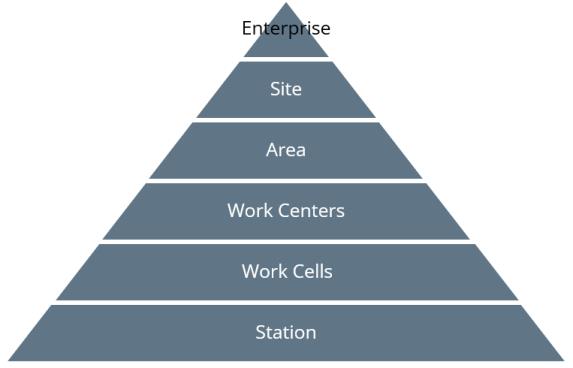
CWC specifically requires the Work Cell › Work Cell Station hierarchy for work cells.
To create equipment within the hierarchy, first create the top level by clicking + Root. Then, you can select nodes within the hierarchy tree and click + Child to create equipment as a child of the node. The equipment type available will reflect the configured hierarchy
Stations are indicated by the  icon.
icon.
Stations
The following configuration is required for a work station in CWC:
• Step One: General Information:
◦ Equipment Type – Must correspond to the configured “Station” equipment type
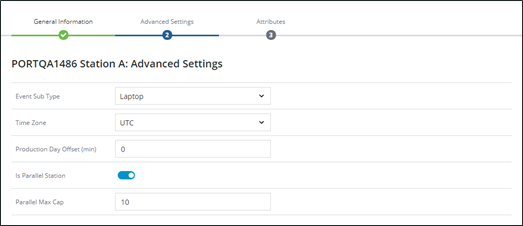
• Step Two: Advanced Settings:
◦ Event Sub Type
◦ Time Zone
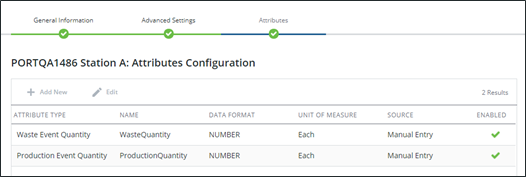
• Step Three: Attributes
◦ One attribute of type Production Event Quantity
◦ One attribute of type Waste Event Quantity
Parallel Execution Stations
Configuring a station for parallel execution is similar to a non-parallel station, with the following additional required configuration:
• Step Two: Advanced Settings
◦ Toggle Is Parallel Station on
◦ Enter a number for Parallel Max Capacity - The number of positions that can receive data at once.
Work Cells
A work cell is defined as a collection of stations performing the same tasks, on a first-in first-out basis. Work cells can help with assembly bottlenecks for tasks that take more time.
To create work cells:
• First create the work cell as an equipment corresponding to the Work Cell hierarchy.
1. Step One: General Information:
a. Equipment Type – Must correspond to the configured “Work Cell” equipment type
• Create work cell stations as children of the work cell.
1. Step One: General Information:
a. Equipment Type – Must correspond to the configured “Work Cell Station” equipment type
2. Follow the rest of the configuration for a station.
Smart Tools
General
The Smart Tool Configuration display allows you to model your IoT-ready smart tools, configure them for data collection, and organize them with smart tool types.
For CWC, smart tools and their attributes must be set up for execution.
For more information on Smart Tool configuration, click here.
CWC Specific Configuration
Parallel Execution
Smart tools can be setup for parallel execution, allowing them to collect IoT data for multiple serial numbers on assembly execution.
To configure a smart tool for parallel execution, follow the document and complete the following:
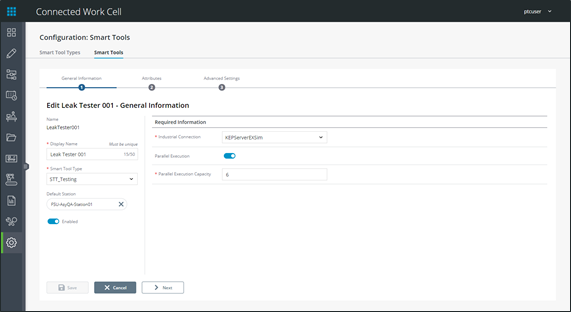
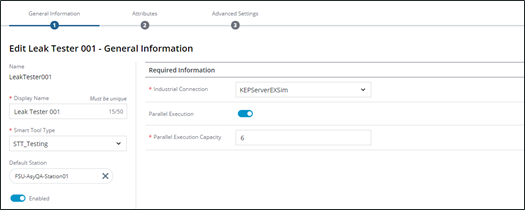
• Step One: General Information
1. Toggle Parallel Execution on
2. Enter a number for Parallel Execution Capacity - The number of positions that can receive data at once
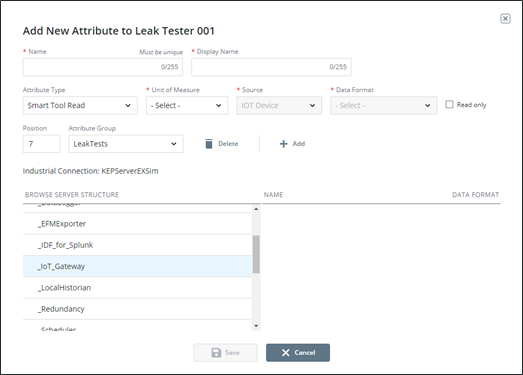
• Step Two: Attributes
1. Add attributes within an attribute group for each position and map them to IoT tags. These attributes will read/write data on execution.
It is recommended to identically name attribute groups/attributes between smart tools that are compatible for tool substitution. This will ensure the tool is available for substitution during execution. |
Users
General
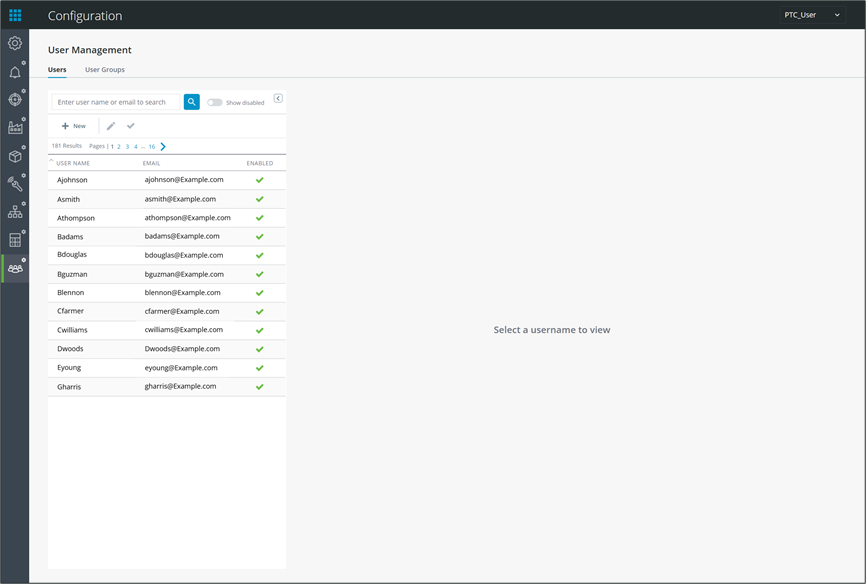
User management can be used to configure user data as well manage user groups information and members.
For more information on User configuration, See User Group Configuration.
CWC Specific Configuration
Raise Hand Functionality
A “Raise Hand” button is available to operators using the execution display and allows the user to send an email message. Follow the steps below to populate the Message Recipient field
Before beginning, ensure each desired recipient has a user created within ThingWorx and an associated email address (See the User Management Section of the CoreUI User Guide for Instructions).
1. Navigate to > >
2. Search for the group:
PTC.SCA.SCO.MnfgCommonRoleLineManagerUserGroup
3. Click  or Edit.
4. Navigate to the Members tab.
5. Search and select all appropriate users.
Users MUST have an associated Email Address. |
6. Click  and
and  to add and remove members appropriately.
and to add and remove members appropriately.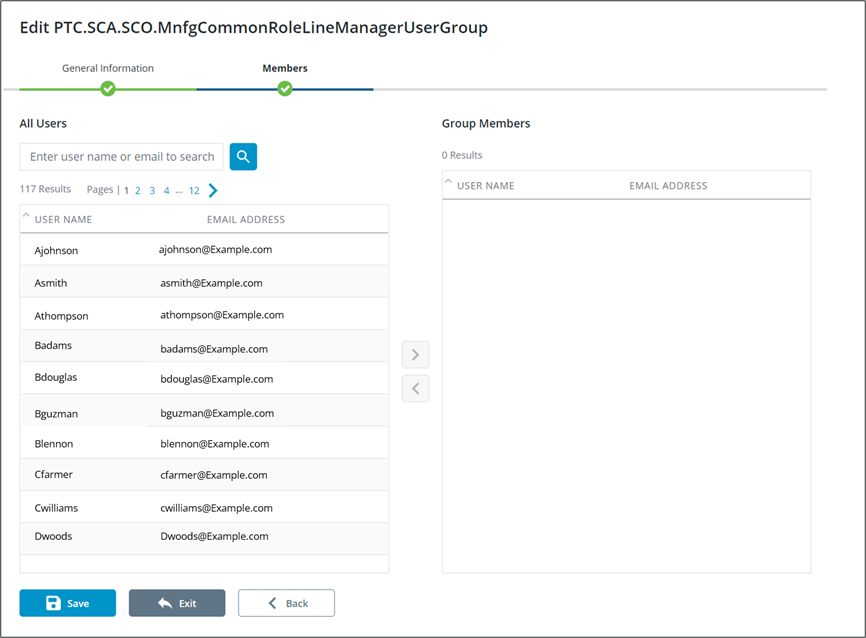
7. Once all members have been set appropriately click Save.
Secondary Signoff Functionality
1. Search for and select the user group that should be used as a secondary signoff Group.
2. Toggle CWC execution secondary signoff groupto mark the members of this group as available to act as secondary witnesses for work instruction steps.
