Configuring ServiceMax Data Sources
You can configure the ServiceMax platform data accessible to Copilot on the ServiceMax Data Sources page. Based on the data sources you configure on this page, Copilot is enabled to access data records from various ServiceMax objects and provide answers to questions by end users effectively.
You can configure the following in this page:
• Select the objects and fields as data sources
• Select expressions to filter data
• Add notes and instructions for the Copilot
• Add referencing objects of an object as data sources
Adding Objects and Fields as Data Sources
You can select objects and fields to add as data sources. The objects and fields you select are then accessible to Copilot to look through data records and present information to the end users. For example, if you select the Location object as a data source, any questions asked to the Copilot about Location records are answered based on the Location records available in the ServiceMax org.
To add objects and fields as data sources:
1. Navigate to > .
The ServiceMax Data Sources page is displayed.
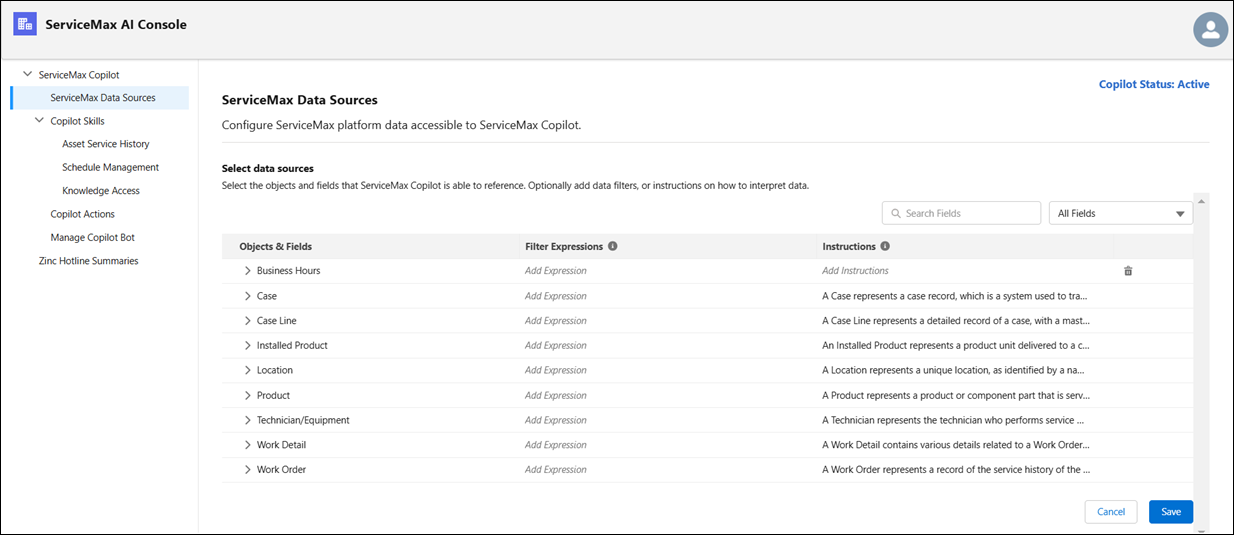
2. Expand the objects and select the fields as data sources by selecting the checkbox next to the field names.
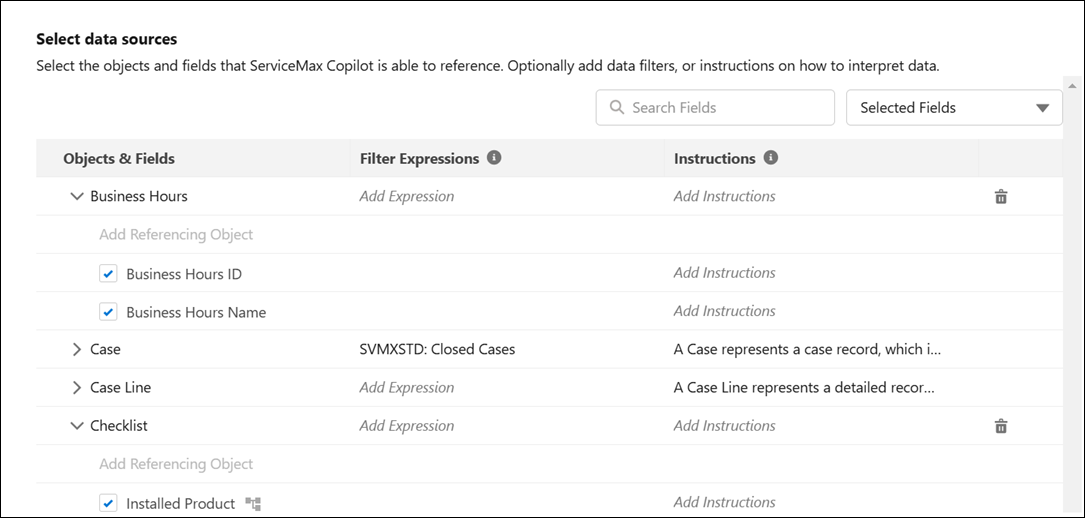
When you select a lookup field as the data source, the referencing object is also added as the data source. Lookup fields are displayed with an icon next to the field name, so that you can identify the type of field. |
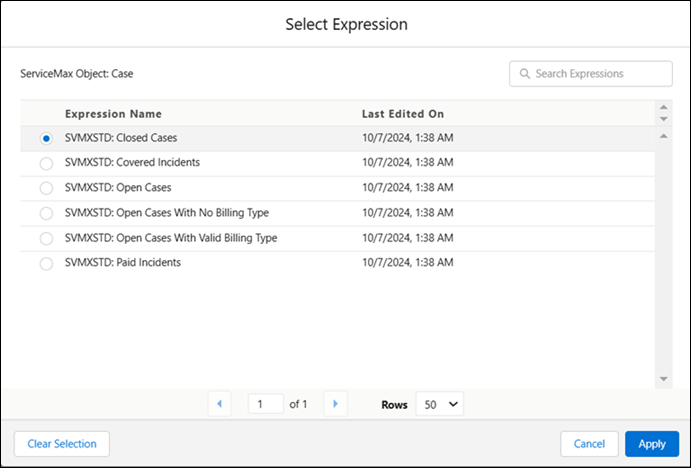
3. Select the expression to filter the criteria. For example, you can choose to select the case records only for closed cases. Then, Copilot only accesses case records with Closed status.
To add an expression for an object, click the Edit icon in the Filter Expressions column on the object row. The Select Expression modal window is displayed with the available filter expressions for the object. Select the required expression and click Apply.
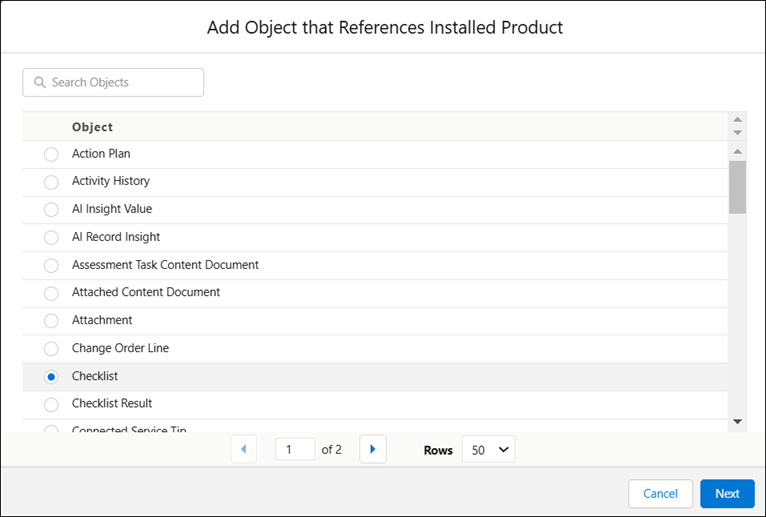
4. Add a referenced object to an object as the data source. For example, you can add the Checklist object, which is referenced from the Install Product object.
To add a referenced object of an object as data source, click the Add Referencing Object link under the object. The Add Object that References <Object Name> modal window is displayed.
Select the referencing object to add a data source and click Next.
The Select Relationship window is displayed.
Select the Relationship Field, which the lookup field from the referencing object that establishes the connection between the two objects.
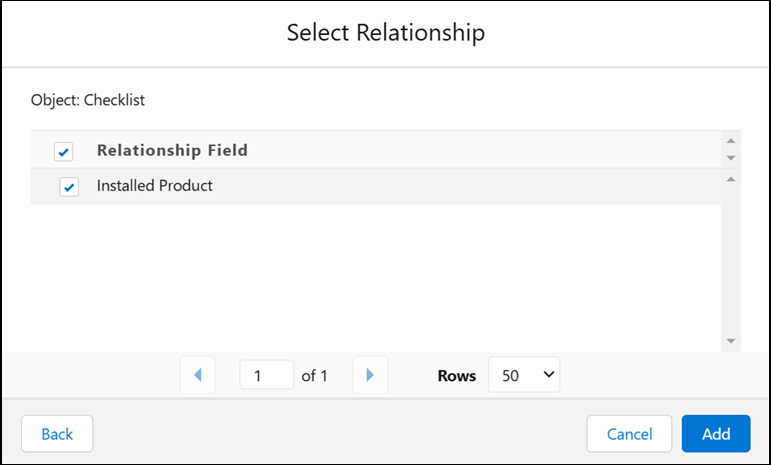
Click Add.
5. Add instructions for the Copilot. When you select an object or a field as data source, you can add notes or instructions to provide context to the Copilot about the field or the object.
To add instructions for a field or an object, click the Edit icon in the Instructions column in the object/field row. The Edit Notes for Copilot modal window is displayed.
Add the relevant instructions. You can provide the required information about the field or the object. You can use up to 1000 characters to add the instructions.
The instructions provide Copilot with information and context about the objects, fields, and the data records. • Provide instructions about how to interpret the data. For example, when a user asks ‘when a work order happened?’ Copilot must provide the date and time based on start date and end date fields of the work order. • Provide instructions to give context for customer-specific scenarios. For example, technicians might informally refer to critical work orders as code red work orders. • Provide context for terms and words user might use, such as short-forms and abbreviation of terms. For example, users might refer to the location named Good Samaritan Hospital as GSH. • Ensure that instructions are easy to interpret and are not very lengthy. |
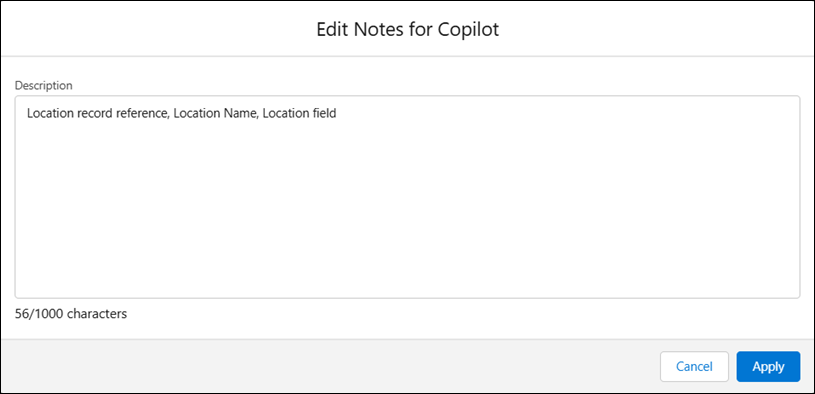
Click Apply to save the instructions.
6. Click Save to save the data sources selection.
Managing Data Sources
You can perform the following actions while managing the data sources for Copilot. These options help you to manage the data sources easily.
• You can search for the fields using the Search bar. For example, if you want to add Date fields in many objects as a data source, enter Date in the Search bar. All the fields that have Date as part of the field name are displayed. Now, make the appropriate selections.
• You can choose to view all the fields or only the selected fields by selecting the relevant option in the dropdown menu.
• You can remove any object from the data sources list. To remove an object, click the Delete icon on the object row.
A confirmation message is displayed. If the object you have selected to remove has referenced objects, those objects are also removed.
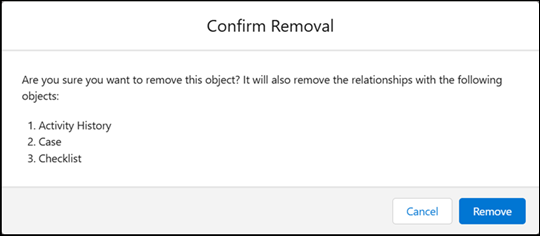
Click Remove to remove the object as a data source.