Creating Asset Timeline Quick Action
As a business administrator, you can enable the Asset Timeline feature for Salesforce app users. The users can view the asset timelines from Asset and Work Order records with a single tap on the Asset Timeline quick action.
Perform the following steps to create the Asset Timeline quick action for Salesforce app records.
1. Log into Asset 360 Admin.
2. Navigate to Setup > Object Manager, and open the object where you want to add the action.
3. Click Button, Links, and Actions, and then click New Action. The New Action screen is displayed.
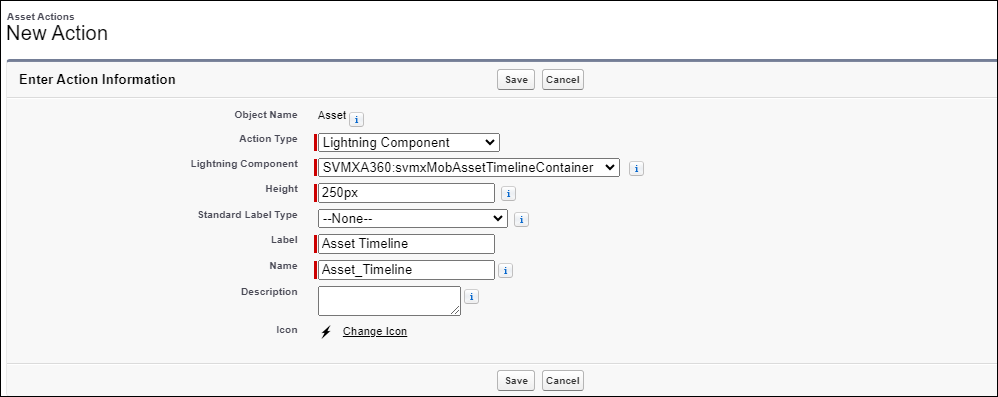
4. Provide the details as per the following table.
|
Field Name
|
Field Description
|
|---|---|
|
Fields highlighted in red are mandatory.
|
|
|
Action Type
|
Select Lightning Component from the list.
|
|
Lightning Component
|
Select SVMXA360:svmxMobAssetTimelineContainer from the available list.
|
|
Label
|
Add a label for the action. For example, Asset Timeline.
|
|
Name
|
This field is auto-populated from the Label field. You can change it. This value should be unique for the object.
|
|
Description
|
Add a description for the action.
|
5. Click Save.
6. To add the quick action to the object page layout, click the object for which you have created the action.
7. Click the user-assigned Page Layouts. The page layout screen is displayed.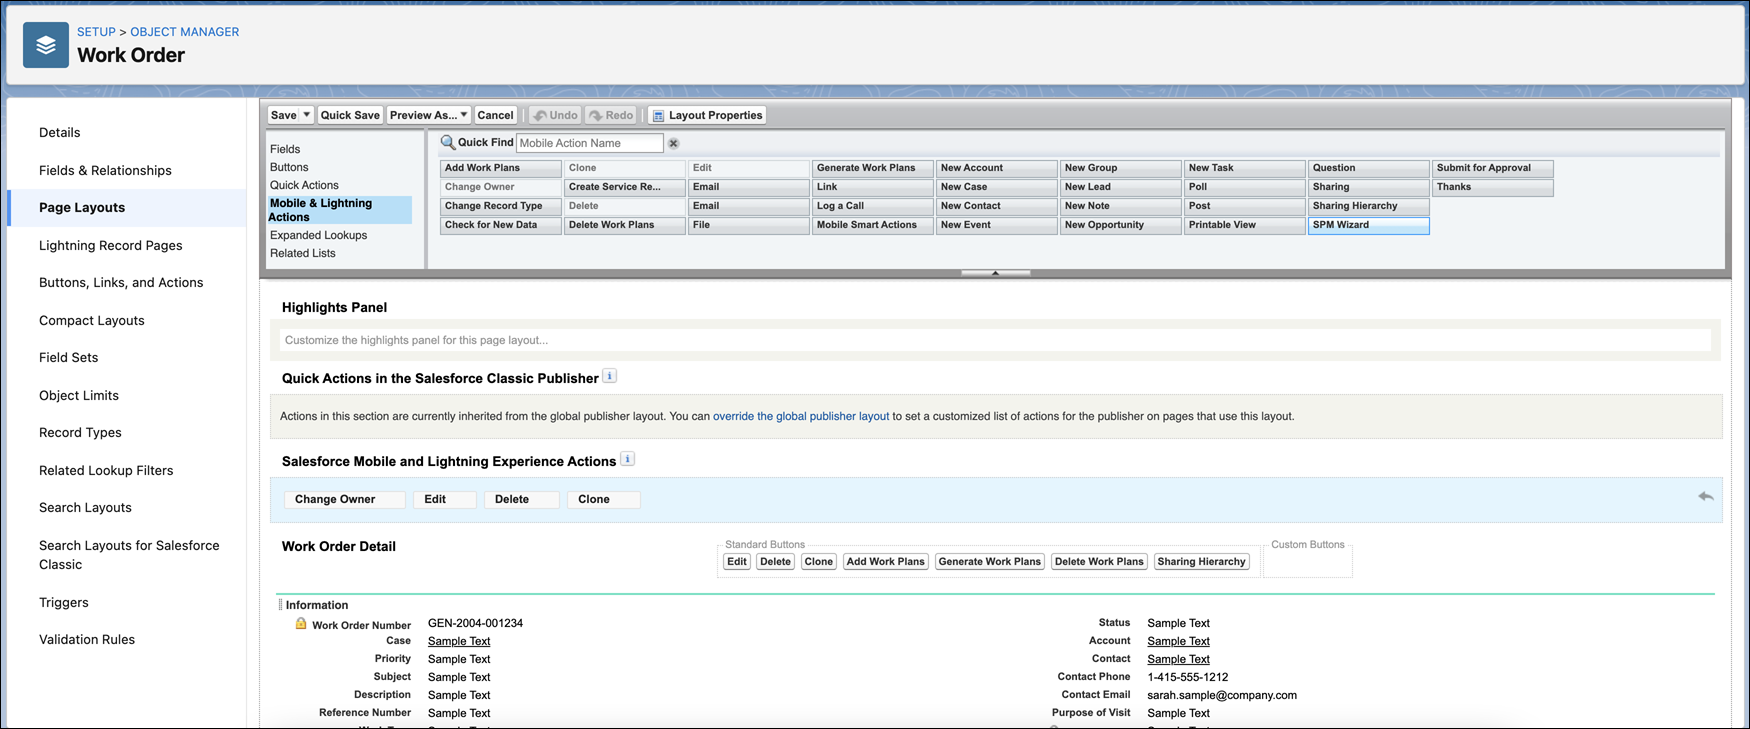
8. From the Mobile & Lightning Actions section on top, drag and drop the object action to the Salesforce Mobile and Lightning Experience Actions section.
|
|
If the Salesforce Mobile and Lightning Experience Actions section is not available for adding the object action, click the override the predefined actions option.
|
9. Click Save. The page layout is saved after successful validation.