Creating Warranty Term Templates
To create a warranty term:
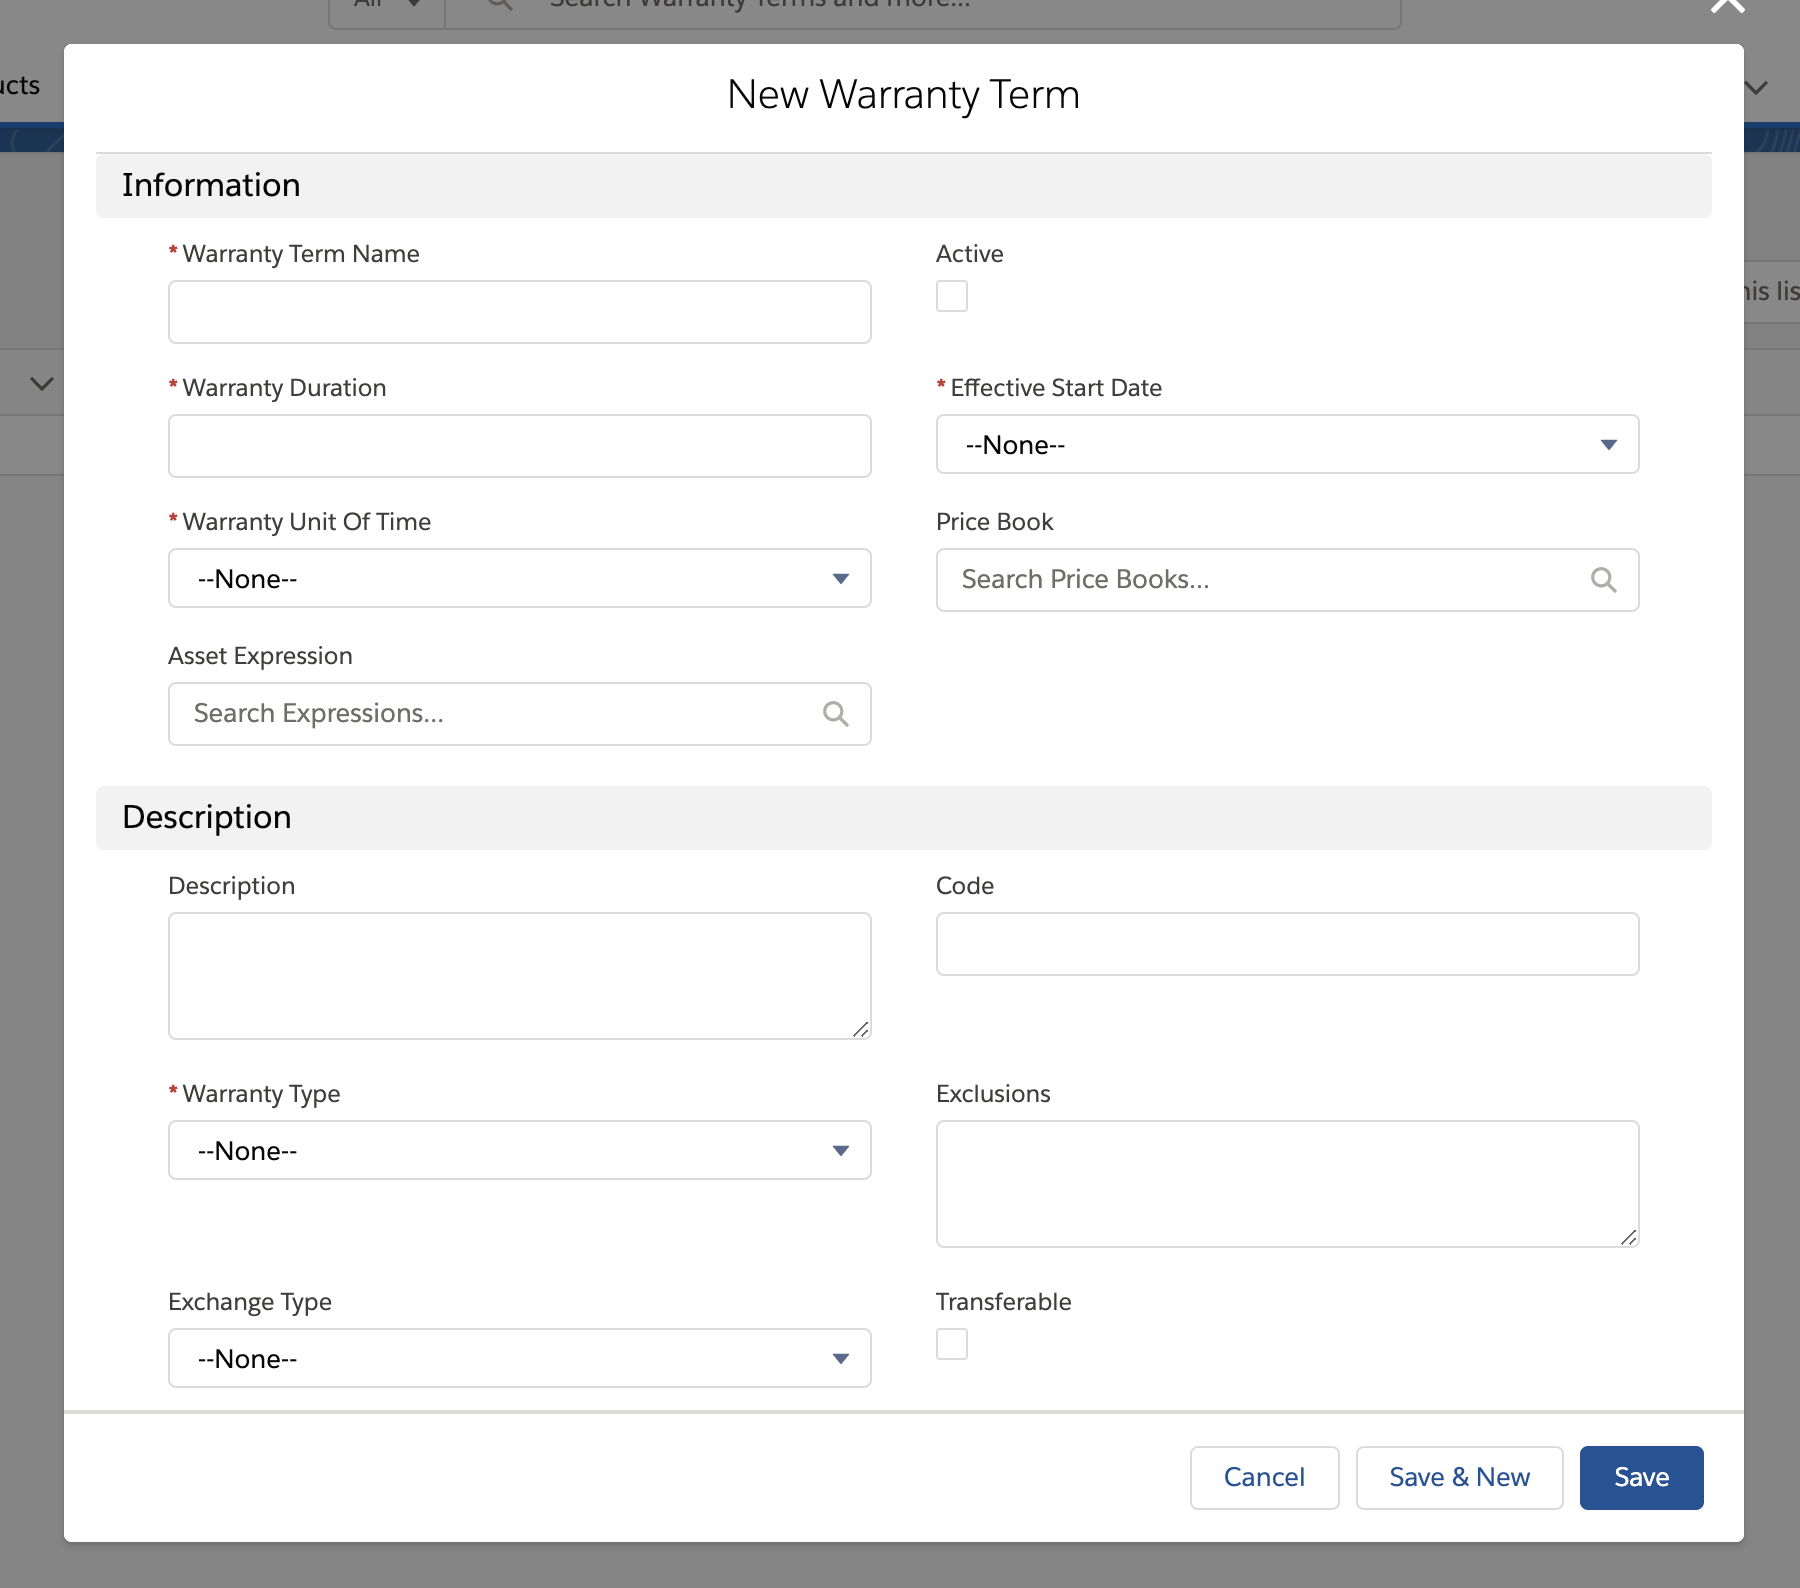
1. From the Warranty Term object tab drop-down, click + New Warranty Term. Alternatively, launch the warranty term list page and then click the New. button. The New WarrantyTerm pop-up is displayed.
2. Provide the details for the fields as explained in the following table.
|
Field Name
|
Field Description
|
||
|---|---|---|---|
|
Fields marked with * are mandatory
|
|||
|
Information
|
|||
|
Warranty Term Name*
|
Enter a name for the warranty term.
|
||
|
Warranty Duration*
|
Enter a duration for which the warranty is applicable for the asset.
|
||
|
Warranty Unit of Time*
|
Select a unit of time from the drop-down list for which the warranty duration is applicable. The available options are:
• Days
• Weeks
• Months
• Years
|
||
|
Effective Start Date*
|
Select an effective start date from the drop-down list from which the warranty is in force. The available options are:
• Install Date: to enforce the warranty from the install date of the asset
• Manufacture Date: to enforce the warranty from the asset manufacture date
• Purchase Date: to enforce the warranty from the asset purchase date
|
||
|
Asset Expression
|
Select an expression for the asset to qualify the warranty term.
|
||
|
Price Book
|
Select a price book from the available list.
|
||
|
Active checkbox
|
Select this checkbox to make the warranty term active once it is created.
|
||
|
Description
|
|||
|
Description
|
Enter the details about the warranty term.
|
||
|
Warranty Type*
|
Select a warranty type from the drop-down list. The available options are:
• Repair: to create a warranty term for the repaired asset
• Standard: to create a standard warranty term
• Supplier: to create a supplier warranty term
|
||
|
Exchange Type
|
Select an exchange type from the drop-down list. The available options are:
• Advance Exchange: to create a warranty term for the advanced exchange asset
• Loaner: to create a warranty term for the loaner asset
• Return Exchange: to create a warranty term for the return exchange asset
|
||
|
Exclusions
|
This is a Long Text field where Warranty Admin can capture any parts and services excluded from Warranty Coverage terms.
|
||
|
Transferable checkbox
|
Select this checkbox to indicate that Asset Warranty can be transferred to a different asset.
|
||
|
Coverage
|
|||
|
Labor Covered
|
Provide labor coverage details.
|
||
|
Parts Covered
|
Provide parts coverage details.
|
||
|
Expenses Covered
|
Provide expenses coverage details.
|
||
|
Travel Covered
|
Provide travel coverage details.
|
||
3. Click Save. The new warranty term is created, and a confirmation message is displayed.