Performing a Client Only Installation
To perform a Client Only installation:
1. Log on to Windows as a user that has Local Administrator rights.
2. If you plan to use XMI Import/Export, you must download and install the 32–bit version of Oracle Java 8 JRE.
3. To start a standard installation of Modeler, Run the Modeler installation application WindchillModeler9_3Setup.exe.
4. Follow the installation program instructions.
|
|
Installation of the Windows .NET Framework can take up to 10 minutes; during installation, the Cancel button on the dialog is not available.
|
◦ On the Setup Type page, select the Client Only option.
◦ On the Custom Setup page, the following options are selected by default:
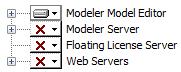
On the Custom Setup page, expand the Modeler Model Editor entry and review the add-ins, documentation and profiles that are selected for installation. If you do not want to install a feature, click the entry, and then click This feature will not be available.
◦ On the Default Servers page, enter a SQL Server instance and a Modeler License Server:
▪ To connect to a SQL Server instance, click Browse..., then select a SQL Server instance from the list of available servers.
▪ To connect to a Modeler License Server, type the name of the license server computer.
The Integration for IBM Rational DOORS is available only if DOORS is installed and has been run on the computer. The Publisher add-in requires Microsoft Word. The IDL Profile requires Microsoft Excel for some reports. For information about which versions of Microsoft Word and Excel are supported, see the Modeler Release Notes. |
5. After the installation is complete, perform the necessary post-installation tasks. For more information, see
Post-Client Only installation tasks.