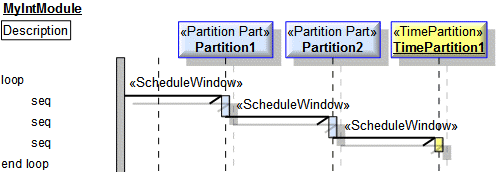
A diagram based on the UML Sequence Diagram, which allows the user to specify scheduling information for partitions within the module. ModuleSchedules scope to modules. For more information see the ARINC SPECIFICATION 653P1-2, December 1, 2005
A Module Schedule models a <ScheduleScheme> element, which is a child element of the <ScheduleTable> element.
In the following example, the Module Schedule diagrams schedules Partition1 first, then schedules Partition2, and finally schedules TimePartition1. The order is determined by the Schedule Windows target item in each seq Step.
An empty Module Schedule is created when you create an Integration Project through the New > Integration Project command.
Tell me more...
Create additional Module Schedules from a
Module: right-click the Module, point to ARINC 653, point to New, and then click Module Schedule.
You can view all the Module Schedules in the model through the ModuleSchedule folder in the ARINC 653 Profile pane.
A Module Schedule is based on a UML Object Sequence Diagram.
A Module Schedule can show the following items.
Iteration Step (UML item)
The diagram includes an iteration (the loop and end loop entries) that includes one seq Step. Use the
Create an iteration only if you accidentally delete the loop or end loop step on the diagram.
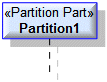
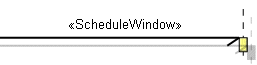
Create a Schedule Window through the diagram's toolbar: click the Start Event toolbar button, in line with the required seq Step click the System Boundary or the lifeline of the source Partition Part or Time Partition, and then click the lifeline of the end Partition Part or Time Partition.
When generating a Configuration, the System Boundary, Partition Part or Time Partition at the start of the Schedule Window is irrelevant; the Schedule Window schedules the end Partition Part or Time Partition.
Specify the Period, Flush TLB, Flush I-Cache, Flush D-Cache and DurationSeconds properties of the Schedule Window through the instance properties: right-click the Schedule Window, click Instance Properties, and then on the ScheduleWindow tab of the Property Pages set the properties as required.
Step (UML item)
The diagram includes one step (the seq entry). Each Schedule Window requires a seq Step on the diagram. Ensure that you create the steps within the loop and end loop steps.
Create a Step through the diagram's toolbar: click the
Step toolbar button, and then click the appropriate place within the loop and end loop steps.
Create a Time Partition through the diagram's toolbar: click the
Time Partition toolbar button, and then click in the area along the top of the diagram. You can drag existing Time Partitions onto the diagram.
Specify the TimePartitionID property on the Time Partition's Property Pages. Note that if you do not specify a TimePartitionID value, ACS will generate a value of 0.
To specify the Partition Parts that use the Time Partition, reference the Time Partition from each Partition Part using the Partition Part's TimePartitionReference property.
The following sections provide information about how a Module Schedule is used in the model.

 Start Event toolbar button, in line with the required seq Step click the System Boundary or the lifeline of the source Partition Part or Time Partition, and then click the lifeline of the end Partition Part or Time Partition.


