Installing Model Manager
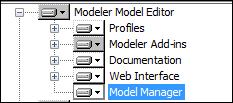
Model Manager is an optional component that can be installed as part of the Server only and Standalone Windchill Modeler installation options. It is not selected by default.
|
|
You cannot add Model Manager to an existing installation of Windchill Modeler. To add Model Manager, reinstall Windchill Modeler and make sure that Model Manager is selected.
|

Pre-requisites
Internet Information Services (IIS) must be enabled to use Model Manager.
Firewall rules must be added to allow access to the Model Manager website. For more information, see Managing Modeler and Web Interface Security.
Setting the Access Policy
To allow user access to Model Manager, you must set User Rights Assignment policies to allow local log on to the Modeler server. You can manage user group policies through the Local Group Policy Editor in Windows. To configure user and group access on the Modeler server, you need to do the following:
1. From the computer that is hosting the Modeler server, start the Local Group Policy Editor: in the Windows Run text box, type gpedit.msc, and then press the Enter key.
2. In the left pane tree, under Local Computer Policy, select > > > > .
3. In the Policy window, locate and set the following policies:
◦ Allow log on locally
Double-click the policy to open the properties window, and make sure that the Model Manager user or group is allowed.
◦ Deny log on locally
Double-click the policy to open the properties window, and make sure that the Model Manager user or group is not listed.
4. Click OK to apply any changes, and then close the Local Group Policy Editor.
Licensing Model Manager
You must set up licensing for all of the users on the computer hosting the Windchill Modeler Server.
Running the License Manager as an administrator will allow you to set up default license details for users who have not tried to use Windchill Modeler yet.
Supported Web Browsers
The following web browsers can be used to access Model Manager:
• Chrome
• Firefox
• Opera
• Safari (Mac)
• Edge
If you recently upgraded Windchill Modeler, you may need to clear your browser cache to see the new changes to Model Manager. |
Enabling HTTP for the Model Manager Website
For high security environments, we recommend keeping HTTPS enabled. Use the instructions provided for enabling HTTP for the Web Interface as guidance. For more information, see Configuring the Web Interface website to use HTTP.
Manual Configuration of applicationHost.config File
If you saw the following error during the Windchill Modeler installation:
Error setting applicationHost.config file.
Failed to create applicationHost.config backup file.
Failed to create applicationHost.config backup file.
Or if a 500 error occurs when you access the Model Manager, you should complete the steps below to manually configure the applicationHost.config file.
1. Open Internet Information Services (IIS) Manager
2. Select the root server node in the 'Connections' tree
3. In the 'Features View' select the 'Configuration Editor' under the 'Management' section
4. In the 'Configuration Editor' in the 'Section' drop down select system.webServer/serverRuntime
5. In 'Actions' pane under the 'Section' heading there should be 'Unlock Section' text
6. If set to 'Lock Section' then section should already be unlocked
7. If the text "Unlock Section" is displayed, click on the text and this will change to 'Lock Section'
8. Stop/start the 'Windchill Modeler Model Manager' website and application pool