Configuring an Agent
An agent configuration is required to begin publishing data to a third party endpoint. At least one agent needs to be configured with one active tag for the gateway service to start. Follow the steps below to configure a new agent.
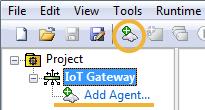
1. Click on the Add Agent... text or right-click any blank area in the agent pane and select New Agent from the pop up menu. Alternatively, click on the New Agent icon in the toolbar.
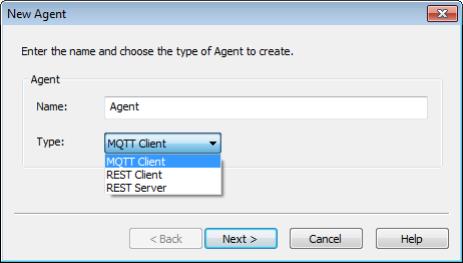
2. In the New Agent dialog, enter a name for the agent and select the type: MQTT Client, REST Client, or REST Server agent. Click Next >.
3. Select the type of agent to configure:
Changing an Agent Configuration
Agent settings can be updated after configuration. To access the settings, double-click the agent name or right-click on the agent and select Properties. Changes take effect immediately once submitted. This causes the gateway to reload the agent configuration.
Notes: 1. If there are any events in the agent's buffer when a property change is made, those events are not lost; they are pushed to the updated configuration. 2. Disabling an agent causes its buffer to be dropped. 3. If the endpoint URL is changed after the connection is created, no new initial update is sent. Only buffered values or new values are delivered to the new endpoint. 4. Click the Default button to reset contents back to the initial settings. |