Generating an Application Report
To create a report with the Application Reporting Tool:
1. Launch the Application Report tool.As the Administrator through the desktop icon OR through the server Tools menu OR through the Administration menu. OR
OR OR
OR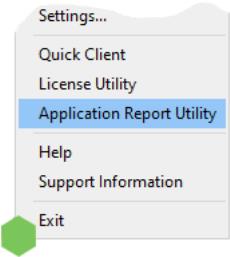
OROR2. Select Basic, Basic + Crash, or Basic + Hang. Basic gathers all the normal troubleshooting information. If the application is experiencing crashes, use Basic + Crash. If the application is in a deadlocked state, use Basic + Hang (to use Advanced, see steps below).
3. Click Next >.
4. Review the information to be gathered. Click Next >.
5. Choose the location for the file to be saved and click OK.
6. The Application Reporting Tool collects the files, generates the archive, and displays a notification message on completion.

7. Click Close.
8. Browse to the archive in the output folder. Output archives are compressed using the ZIP format and follow the naming convention (UTC Time): ARU_YEAR-MONTH-DAY_HOUR-MIN-SEC.zip
9. Send the file to Technical Support or extract the archive and browse the directory for the files of interest.
Advanced
1. Select Advanced to control how much detail to include and click Next.

2. Choose the event logs and diagnostics to collect, as described in Collecting Event Logs and click Next.

3. Select content to include as described in Server Data and Crash Dumps.

4. Click Next.
5. Select the processes for which to generate on-demand process memory dumps and click Next. For more information on process memory dumping, including when a memory dump is necessary, refer to Server Data and Crash Dumps.
For more information on process memory dumping, including when a memory dump is necessary, refer to Server Data and Crash Dumps.
6. The Application Reporting Tool generates a preview of the collected data for review. Verify the settings and click Next (or click Back to make changes before generating).For details regarding the information collected, see Information Included in an Application Report.
For details regarding the information collected, see Information Included in an Application Report.
7. Browse to and select the folder in which to save the report archive.

8. Click OK.
9. The Application Reporting Tool collects the files, generates the archive, and displays a notification message on completion.

10. Click Close.
11. Browse to the archive in the output folder. Output archives are compressed using the ZIP format and follow the naming convention (UTC Time): ARU_YEAR-MONTH-DAY_HOUR-MIN-SEC.zip
12. Send the file to Technical Support or extract the archive and browse the directory for the files of interest.