Create a Start and Stop Link to the Animation
1. The animation’s start and stop links now have to be created. First of all, the start link.
The START button object (green circle) is to be used to start the animation.
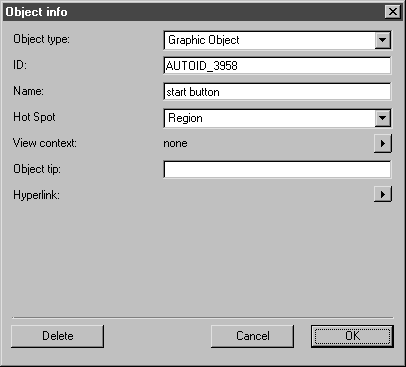
Click on the circle area and select the > menu.
The following dialog box appears.
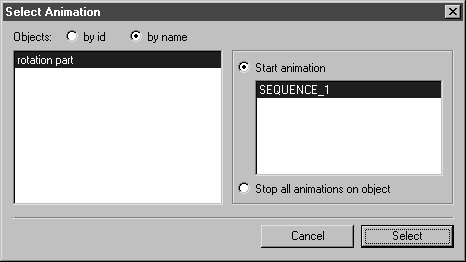
2. Click on the arrow to the right of Hyperlink and select the Animation command from the pop-up menu.
The Select Animation dialog box appears as indicated below.
The object and sequence have already been selected and the Start animation option has been preselected.
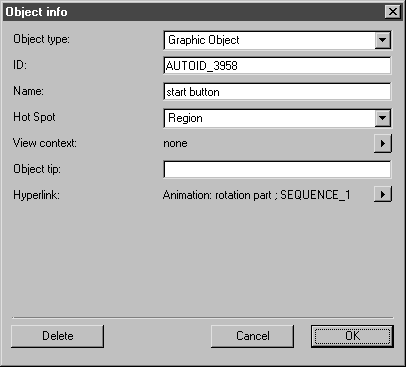
3. Confirm the settings for the link by clicking Select.
The link to the animation is now depicted in the Object info dialog box.
4. Click OK.
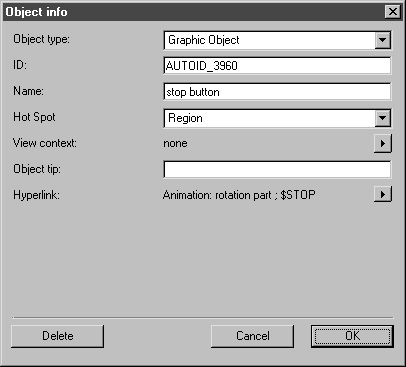
5. Use the same process to create the link to the animation with the STOP button object (red circle).
Click on the circle area and select the > menu.
The Object info dialog box will appear.
6. Click on the arrow to the right of Hyperlink and select the Animation command from the pop-up menu.
The Select Animation dialog box appears as indicated below.
The object and sequence have already been selected and the Start animation option has been preselected.
7. Select the Stop all animations on object option.
The selected SEQUENCE_1 is depicted in gray.
8. Confirm the settings for the link by clicking Select.
The link to the animation is now depicted in the Object info dialog box.
9. Click OK.
All the necessary settings have now been made to enable playback of the animation to be controlled using the two buttons.
10. Save the file.