Create a Macro within the Macro File example.ism
1. Both macros example1 and example2 have been recorded in the file example.ism. The program has saved this file in the Arbortext-IsoDraw-install-path\Program\Macros folder.
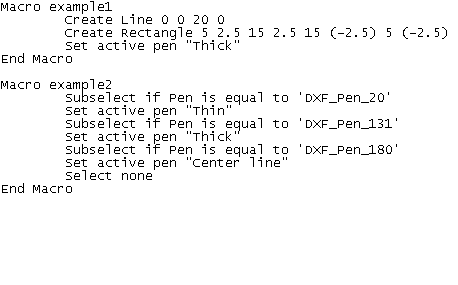
Up to this point, you have recorded the macro for changing a pen type. Two other pens have been used in the drawing – DXF_PEN_131 and DXF_PEN_180. The process for changing these pens will also be recorded in the macro example2. The function flow is the same, except that the pen to be selected and the pen for the changeover have different names.
2. Use a text editor to open the macro file.
3. Select the text between Macro example2 and Select none.
4. Copy the text and then paste it in twice above Select none.
5. Change the pen names as indicated in the figure above.
6. Save the macro file.
7. If you now select the more macros command in Arbortext IsoDraw you will be asked whether the macros should be reloaded. Confirm by clicking Yes.
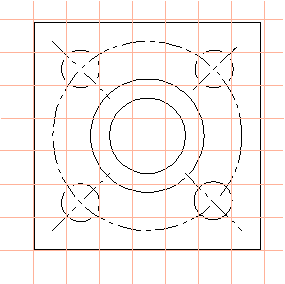
8. You can now apply the extended macro to the drawing, thereby changing all elements to the Arbortext IsoDraw standard pens.
You can now use the process described above for the first macro example to add the new macro to the example macros toolbar.