Options
You can use command Options from the pop-up menu to determine the appearance of line ends and line corners. The two Overprint options also allow you to display hidden elements or element groups in the printout.
Line Ends and Line Corners
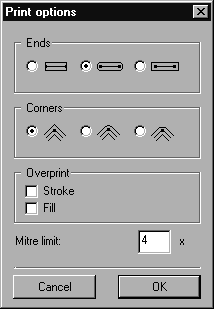
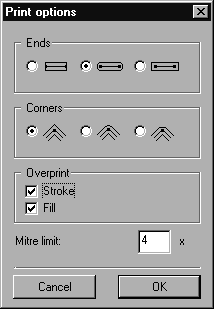
First select the elements you want to change. Then choose menu command Options. The following dialog box will appear:
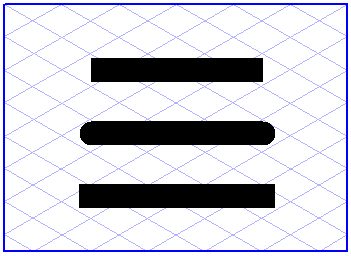
Click the buttons next to the required options for the ends and corners. Then confirm with OK. The illustration shows 3 lines of the same length with different line ends.
The line corners are only significant for Bézier paths with corner points. The top option is the miter corner. If you select this option the contour lines will be combined to produce a sharp end.
In order to limit the miter corner for sharp angles, you can enter a value in the Mitre limit field which is equal to or greater than 1. The greater the value the longer the tip can be. A standard value of 4 is set.
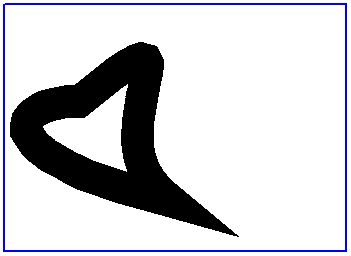
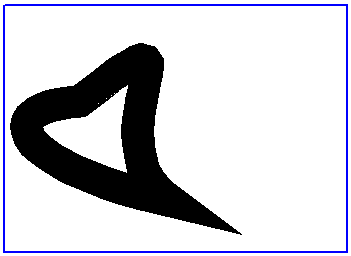
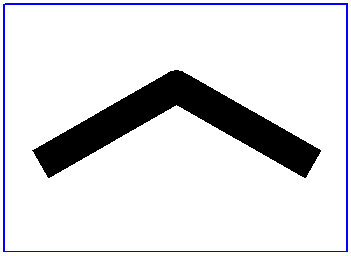
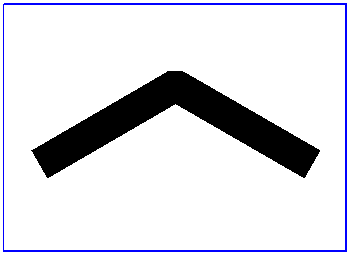
The left-hand illustration shows a path with a miter limit of 1, while the illustration on the right shows the same path with a miter limit of 10.
The center option for the line corners generates a rounded corner, the lower option a flattened corner.
Neither of these options is affected by the miter limit.
| The various line ends are displayed on the screen when you work in preview mode. The line corners can only be seen in the printout. |
You can also change the form of the line ends and line corners of an individual element at another location. Select the element in question and call up the Element info command from the Element menu.
A dialog box appears which, among other things, includes an
Options button. If you click this button, the same dialog window will appear as after direct selection of menu command
Options (see
Element Info).
Overprint
Elements or element groups which are hidden by areas of the drawing lying above them are generally not printed. This is also desirable in most instances. Often you may want the colors of contours or fills to mix in the printout, however. This method of printing can give rise to special effects, e.g. transparency effects.
Select the elements to Overprint and choose the Options command. In the dialog box which then appears check the Stroke and/or Fill boxes. You can use this option for all element types including for text converted to paths.