Save Layers
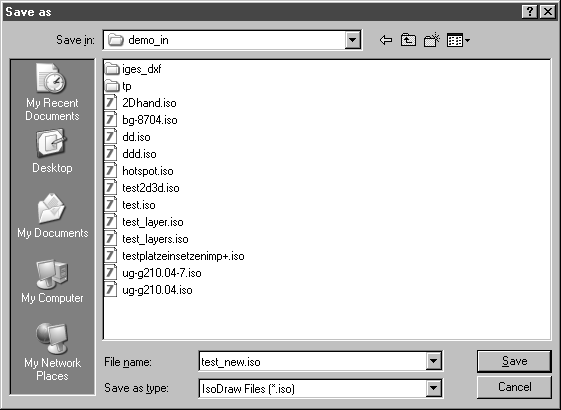
The Save Layers command allows you to save one or more layers from an illustration that has been opened. Selecting this command causes the following dialog box to appear which we have already met in conjunction with the Save command:
The name of the open file is automatically displayed. If you would like to rename it, enter the new name for the file here. Click Save. The following window appears:
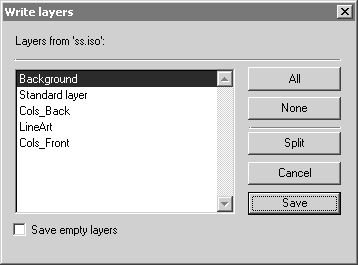
The list shows you all the layers of the active illustration. Select the layers you want to save. By holding down the SHIFT key at the same time, you can select a series of layers. By pressing the CTRL key, you can select individual layers from those you have selected.
The All and None fields are designed to aid you in your selection.
If you select the Save empty layers check box, you will also save layers containing no elements. If you do not select this check box, these layers will be skipped.
There are two ways of saving the layers. Click Save if you want all selected layers to be saved in a single file. You can also save each individual layer in its own file, however. In this case, click Split.
You can end the procedure without saving by selecting Cancel.
If all layers are to be written to a single file, a single file will be created bearing the name you have entered.
If you wish to distribute the layers to individual files, this is done in the following way: For each layer, a file is created whose name is a combination of the name you have entered and the name of the layer saved in this file.
To illustrate this point, let us assume you have entered and confirmed the name Axis. After that you have selected layers 3 and 4 and clicked Split. Two files will be created with the names Axis.Layer 3 and Axis.Layer 4.
| If you use CGM as the standard format, you will create a CGM file during saving which is based on the settings defined in the preferences (see information on the CGM format in the Arbortext IsoDraw Data Exchange Reference. |