Redlining an Illustration
The Redlining mode in
Arbortext IsoView enables you to add information to an existing illustration using the redlining tools on the toolbar. To use these redlining tools, first start the redlining mode by selecting the
Redlining
toolbar button. All redlining tools on the toolbar become selectable.
| You can select the auto hide redlining tools check box in the Preferences dialog box to hide the redlining toolbar buttons until the Redlining mode is activated. |
Drawing graphical redlines
Adding redlining annotations
If you want to add a text annotation to your graphic in redlining mode, do the following:
1. Select the
Add redlining annotation
button in Redlining mode; the pointer changes to a text pointing finger

.
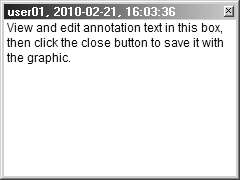
2. Click on the graphic to place the annotation. A small text editing window opens at that location. The editing window title bar shows the user name and date the annotation will be saved with.
3. Add or edit your annotation text in this window, then close it. The annotation changes to an icon

at that location in the
Arbortext IsoView window.
4. To view or edit the annotation text later, click the annotation icon
to open the annotation editing window.
Deleting redlining information
There are two ways to delete redlining information (graphics or annotations):
• With Redlining mode on or off:
1. Place the pointer over the redlining graphic or annotation icon you want to delete.
2. When the pointer changes to a pointing finger

, click to select the redlining graphic or annotation icon.
3. Press the DELETE key.
• With Redlining mode on:
1. Select the
Delete redlining annotation
button; the pointer changes to a pointing finger
.
2. Place the pointer over the redlining graphic or annotation icon you want to delete.
3. When the pointer changes to an eraser pointing finger

, click to delete the redlining graphic or annotation icon.
Saving, exporting, and importing redlining information
When you close the Arbortext IsoView window, any redlining information displayed in it is automatically saved with the graphic file, whether you are in Redlining mode or not. The next time you open that same graphic file in Arbortext IsoView, your redlining information will reappear.
If you want to export redlining information from a graphic file, then import it into a different graphic file, use the
Export redlining
and
Import redlining
toolbar buttons as follows:
1. If you are not in Redlining mode, select the
Toggle redlining mode button.
2. Select the
Export redlining button. The
Save As dialog box opens, prompting you to save the current graphic’s redlining information to an ISO file with the same filename as the graphic.
3. Click Save. The redlining information is saved to a separate *_rl.iso file.
For example: If you saved the file as filename.iso, the redlining information is saved in a separate filename_rl.iso file.
4. To import the redlining information you just exported to
filename_rl.iso, select the
Import redlining toolbar button. The
Open dialog box appears.
5. Select the Redlining file, filename_rl.iso, then click Open.
The redlining information in filename_rl.iso appears in the Arbortext IsoView window.