Add the Macro Created in Exercise 1 to a Toolbar
By adding macros to a toolbar, the required macro can be used without having to select it from the menu. Simply clicking the relevant toolbar button runs the macro.
The macro example1 will be added to a new example macros toolbar
1. Select the > menu.
The Customize Toolbars dialog box is displayed.
2. Click the New button.
|
|
If an existing toolbar is to be changed, select the name of the appropriate toolbar and click Edit.
|
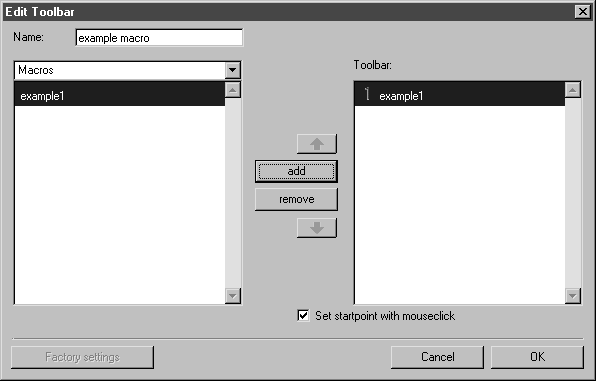
The Edit Toolbar dialog box is displayed.
3. Enter example macro next to Name for the new toolbar.
| When using several toolbars, select a name for each one that reflects the function of the toolbar. |
4. Click on the arrow next to Menu items and select Macros from the pop-up menu.
5. Select the macro example 1 and click add.
6. Specify the icon that is to be used to depict the macro in the toolbar from the Select tool icon dialog box that then appears.
Select the 1 icon and click OK to confirm.
7. Check the box next to Set startpoint with mouseclick.
8. Click OK in the dialog box to confirm that the macro should be added to the toolbar list.
The Customize Toolbars dialog box is displayed. The name example macro is selected.
9. Confirm by clicking OK.
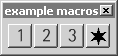
The toolbar with the macro appears on the drawing area.
10. The macro example1 is run by clicking the 1 button. The figure below shows the toolbar after further macros have been added from the second macro exercise.