Upgrading from PTC Arbortext Content Delivery 7.1.3.0 to 7.x Release—Monolithic
This section describes the steps that you must follow to upgrade PTC Arbortext Content Delivery from 7.1.3.0 to 7.x release. These steps are applicable only for the monolithic installation upgrade.
Upgrade Steps
1. Install the latest PTC Arbortext Content Delivery release and load data. Verify whether the data visible in the UI.
2. Copy the latest PTC Arbortext Content Delivery release to any folder.
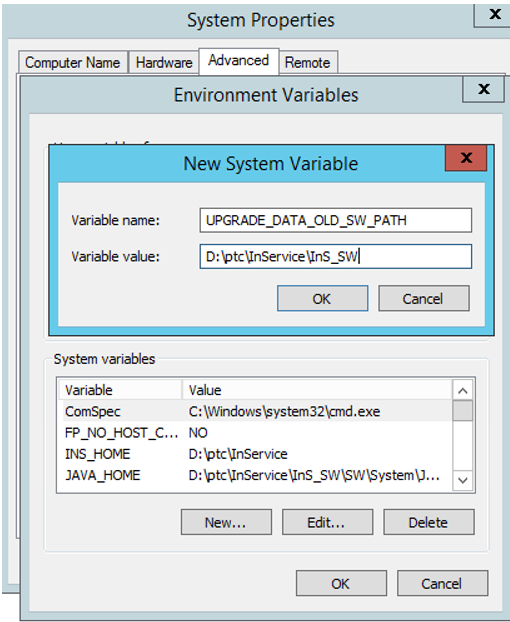
3. For Windows, from Advanced System Settings > Environment Variables, create the environment variable UPGRADE_DATA_OLD_SW_PATH, and set it to the folder location of the old PTC Arbortext Content Delivery installation. For example, UPGRADE_DATA_OLD_SW_PATH=/qa/<INS_HOME>/InS_SW.
For Linux, set the environment variable UPGRADE_DATA_OLD_SW_PATH in the terminal, from where the installer for the new build is launched.
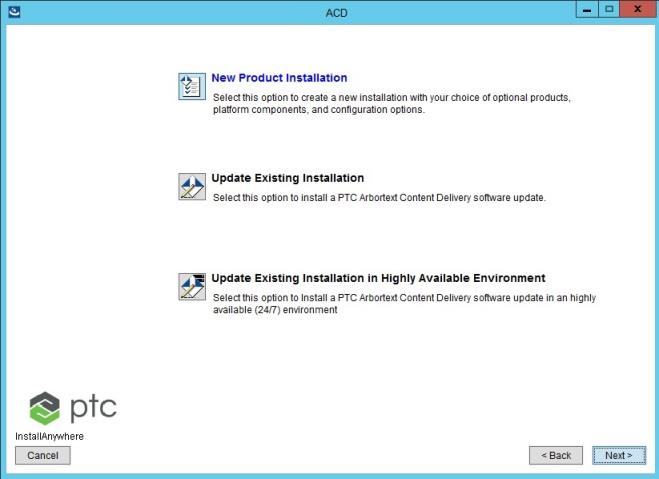
4. Launch the PTC Arbortext Content Delivery installer and select the New Product Installation option.
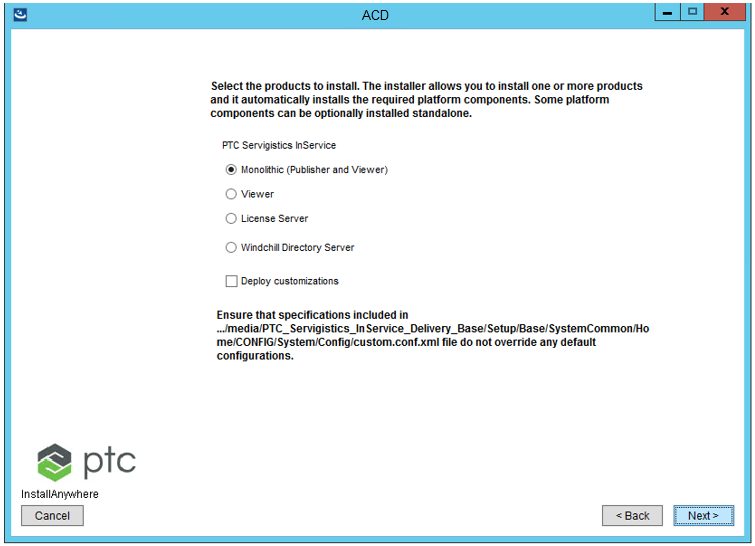
5. Select the product to install.
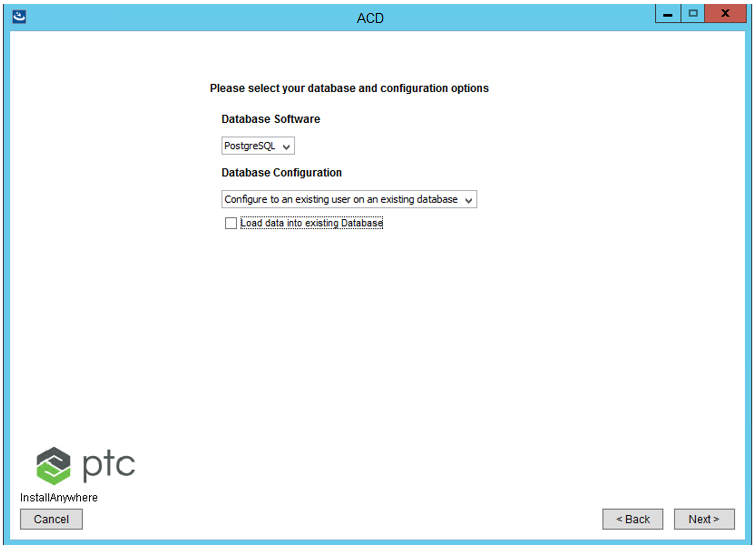
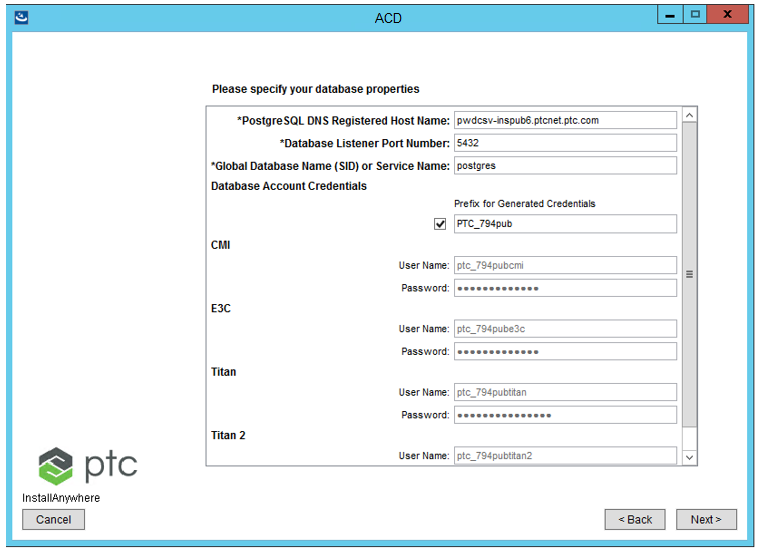
6. For database, select the Configure to an existing user on an existing database option. Clear the Load data into existing Database check box.
7. Specify the same database user that you used for the previous installation.
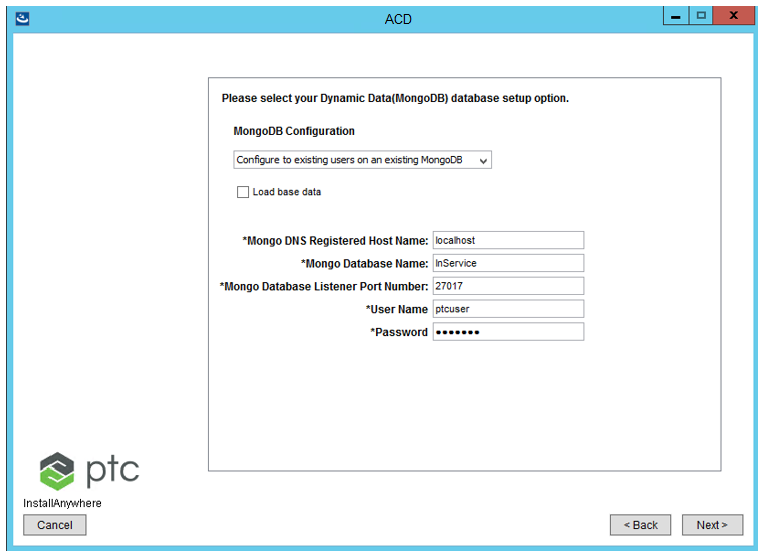
8. For dynamic data database (MongoDB), select the Configure to existing users on an existing MongoDB option. The Load base data check box must be cleared.
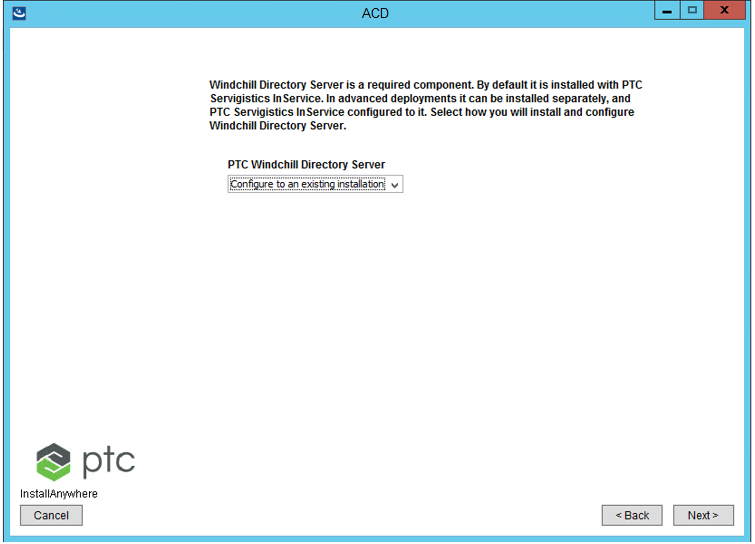
9. For LDAP, select the Configure to an existing installation option.
| Core, CoreCMI, JBOSS, and LDAP servers for the previous environment must be up and running when installing the new environment. |
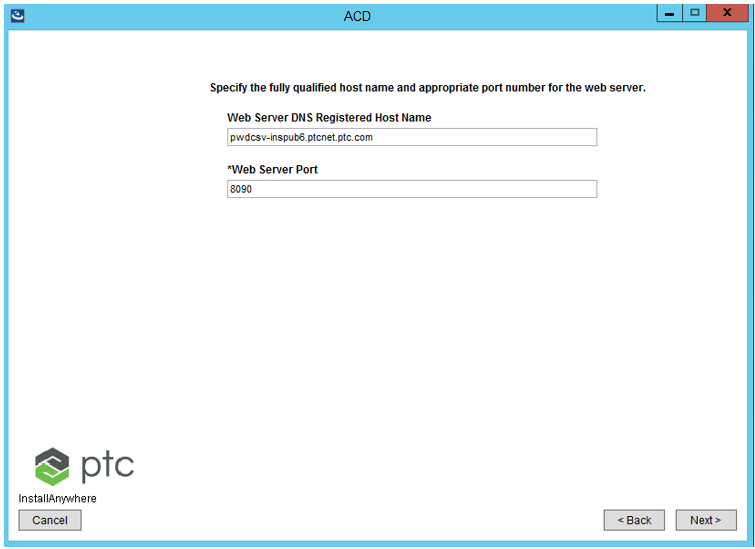
10. Provide a web server port that is equal to 1000 plus the value of the old web server port. For example, if the old web server port is 8080, use port 9080 for the new installation.
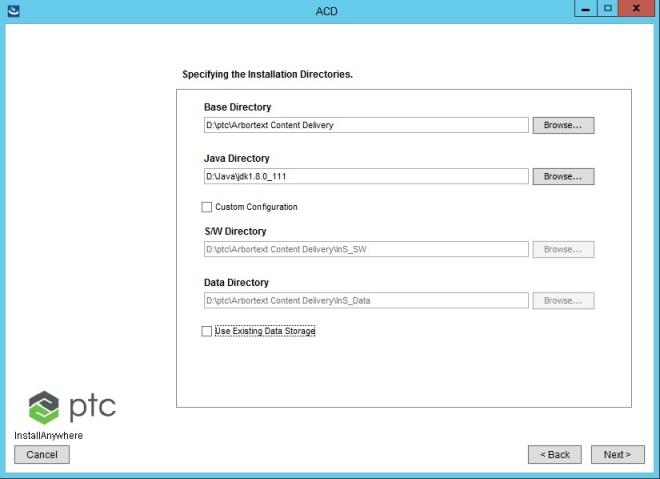
11. Specify an installation directory that is different than the previous installation directory. For example, if the previous directory is /qa/ptc321/<INS_HOME>, specify the new directory as /qa/ptc540/<INS_HOME>.
12. After the installation is successful, run the startInService.sh script on both old and new environments. The location of this file is ..\InService\InS_SW\SW where PTC Arbortext Content Delivery is installed. For Publisher, this process launches the JBOSS server. For Viewer, it launches the entity that is configured in the configurator.xml file. Before launching these entities, the startInService.sh script stops all the running services.
For manually starting the services, see
Launching .
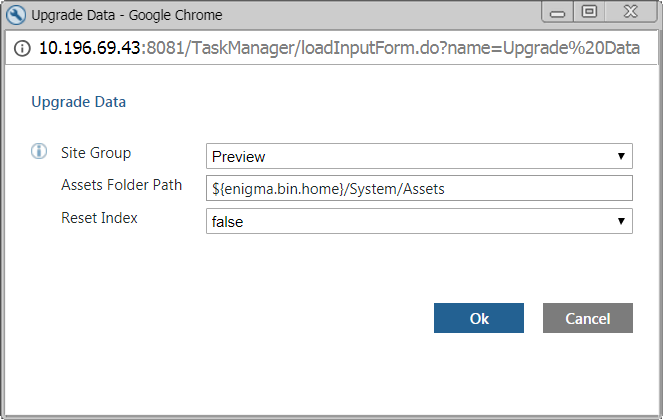
13. Run the Upgrade Data task from the Task Manager of the new environment.
The input parameters for this task are:
◦ Site Group: Specifies the site name on the Viewer server. The value is Runtime or Preview depending on your configuration. This task deals with only one site group at a time. If there are multiple site groups in your environment, then you must run this task multiple times, once for each site. For example, if you have two site groups, Preview and Runtime, then run this task twice, once for Preview and once for Runtime.
◦ Assets Folder Path: Specifies the path to the folder containing the collection assets.
◦ Reset Index: Specifies whether to re-index all the asset types when deploying the collection. The default value is false. Change the value to true if you want to update the assets and have already loaded the bundles. This will update the index without need to TAL again.
After running this task, the task flow transforms the data (Segments, Files storage, assets) from old to new environment. You can auto re-index the data during the flow. However, this is optional.
The Task Manager or the UI of the new environment is accessible at the port that is increased by 1000 than the previous installation. For example, if the old installation is using port 8080, the new environment will be accessible at 9080. For the old environment, the Task Manager is still accessible.
14. Before committing the changes, the task will pause after sometime to allow you to switch the Load Balancer from old to new environment.
| The Load Balancer is the IT level load balancer that you need to configure to look into the new PTC Arbortext Content Delivery environment instead of old. |
The following message is displayed on the Task Monitor tab:
Switch the load balancer from the old to the new environment before resuming the task.
At this point, both the old and the new environments contain the complete data set. Click Resume to allow the task to complete.
After you resume the task, the task actions will be committed to the database, the data is removed from the old environment, is now available only on the new environment.
15. After the Upgrade Data task is completed, restart the servers on the new environment before any further publishing.
This completes the upgrade from PTC Arbortext Content Delivery from 7.1.3.0 to 7.x release for monolithic environment.