Adding Custom Attribute
This topic explains how to add the custom attribute to WindchillDS and PTC Arbortext Content Delivery.
Adding the Custom Attribute to WindchillDS
Update the 00-core.ldif file at the location <INS_HOME>\InS_SW\SW\System\WindchillDS\server\config\schema\00-core.ldif as follows:
1. Create an entry similar to the following example: attributeTypes: (2.5.4.55 NAME ‘dealerCode’ SUP name X-ORIGIN 'RFC 4519')
| In the above example, the sequence number of attribute highlighted in green is unique. If there is an existing entry with 2.5.4.55 and a new attribute is to be added, then the sequence number to be used should be 2.5.4.56. The sequence number value goes on incrementing for each newly added custom attribute. |
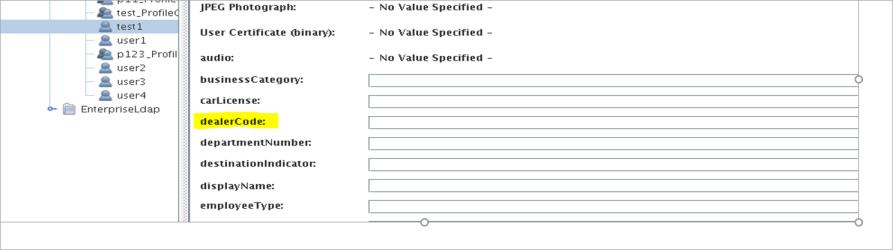
2. Add the custom attribute as ‘$ dealerCode’ to class 'organizationalPerson’ as shown in the following image:
3. Add the custom attribute as ‘$ dealerCode’ to class 'inetOrgPerson' as shown in the following image:
4. Restart the WindchillDS.You can see the newly added custom attribute in WindchillDS.
Adding the Custom Attribute to PTC Arbortext Content Delivery—User
1. Add the custom attribute in SCEnterpriseAttributesRB.java file at the location <INS_HOME>\InS_SW\SW\Applications\Windchill.ear\src\com\ptc\sc\resource\SCEnterpriseAttributesRB.java
For example,
@RBEntry("dealerCode")
public static final String dealerCode="dealerCode";
2. To compile the added custom attribute resource, run the following command.
◦ Linux-based command:javac -d <INS_HOME>/InS_SW/SW/Applications/Windchill.ear/codebase.war/WEB-INF/classes <INS_HOME>/InS_SW/SW/Applications/Windchill.ear/src/com/ptc/sc/resource/SCEnterpriseAttributesRB.java
◦ Windows-based command:javac -d <INS_HOME>\InS_SW\SW\Applications\Windchill.ear\codebase.war\WEB-INF\classes ../src/com/ptc/sc/resource/SCEnterpriseAttributesRB.java
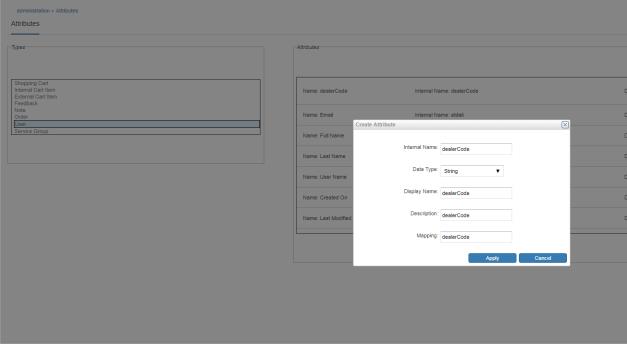
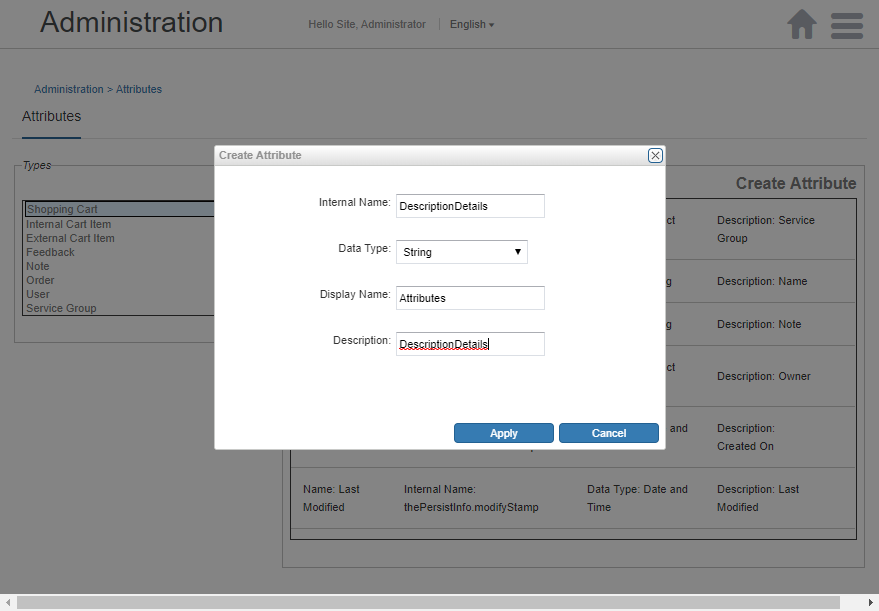
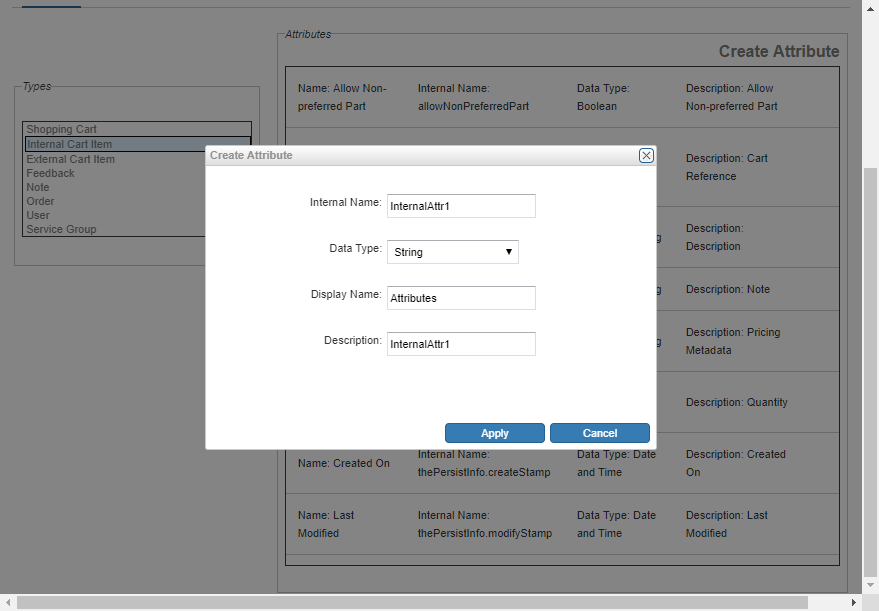
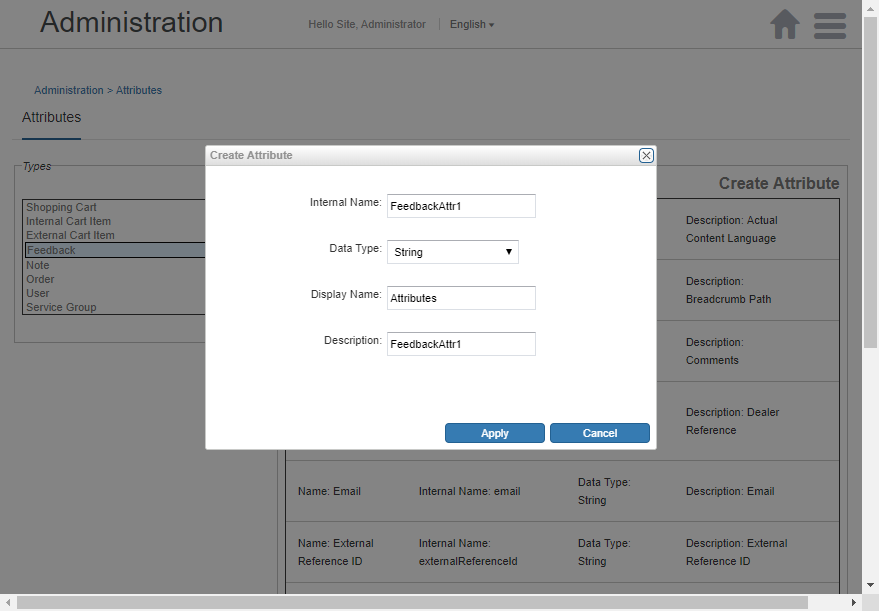
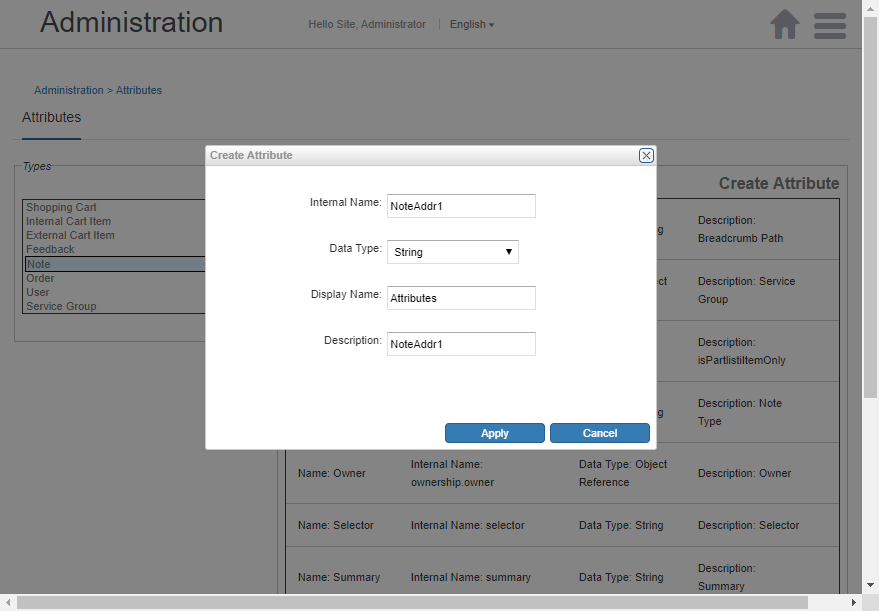
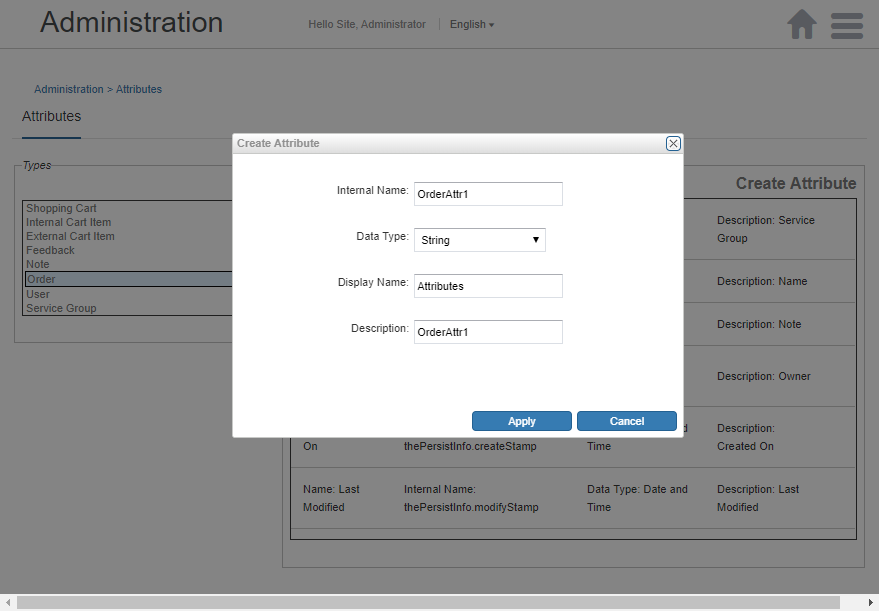
3. Navigate to the PTC Arbortext Content Delivery Administration home page. Click Attributes and from the Types pane, select USER. Add the custom attribute as shown in the following image:
4. Restart the PTC Arbortext Content Delivery servers.
Adding Custom Attribute—Service Group
1. Go to the file addCustomSGAttributesController.js at ~\InS_SW\SW\Applications\Windchill.ear\codebase.war\delivery\custom\controllers\scadmin\addCustomSGAttributesController.js
2. Add the attributes you create in the Atrribute app for ServiceGroup here: $scope.customSGAttributes = ["newDate"];
3. Run minimize.xml. The attribute will be visible on screen.
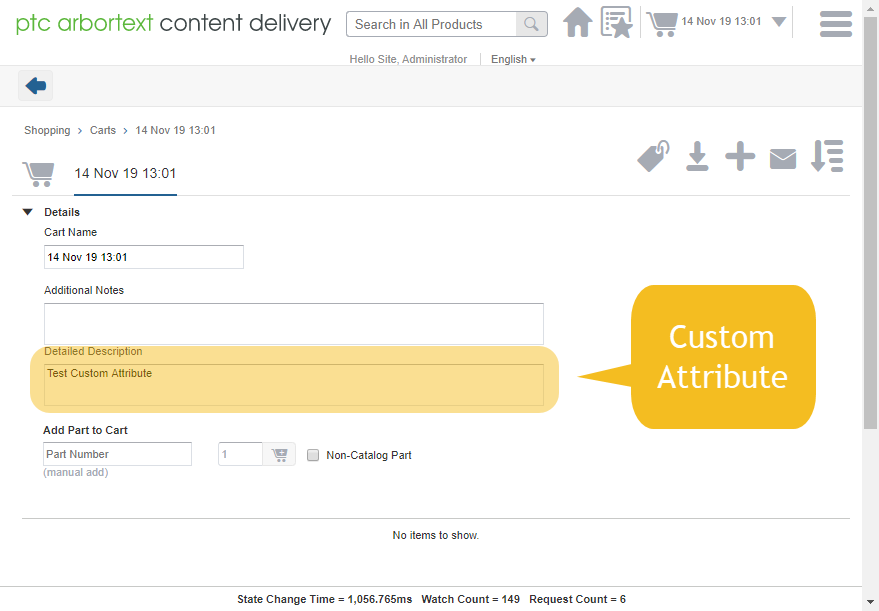
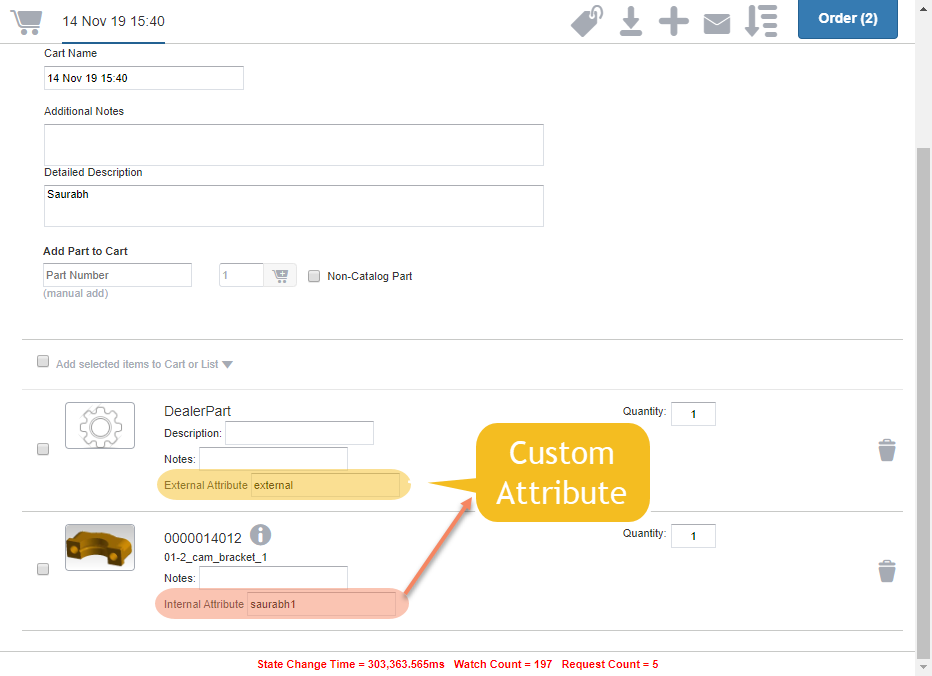
Adding Custom Attribute—Shopping Cart
1. Add custom attribute using scadmin administration page for Shopping Cart.
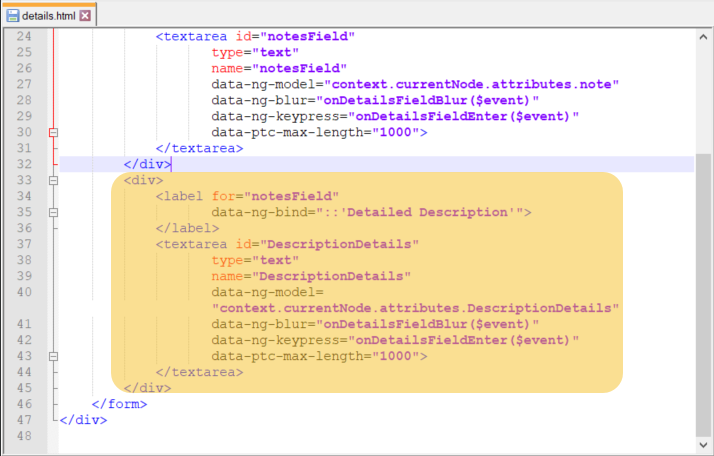
2. Add UI customization to consume the custom attribute (line number 33 to 45) to the location: $WT_HOME/codebase.war/delivery/app/views/cartDetails/details/ details.html
3. Resulted UI Behaviour:
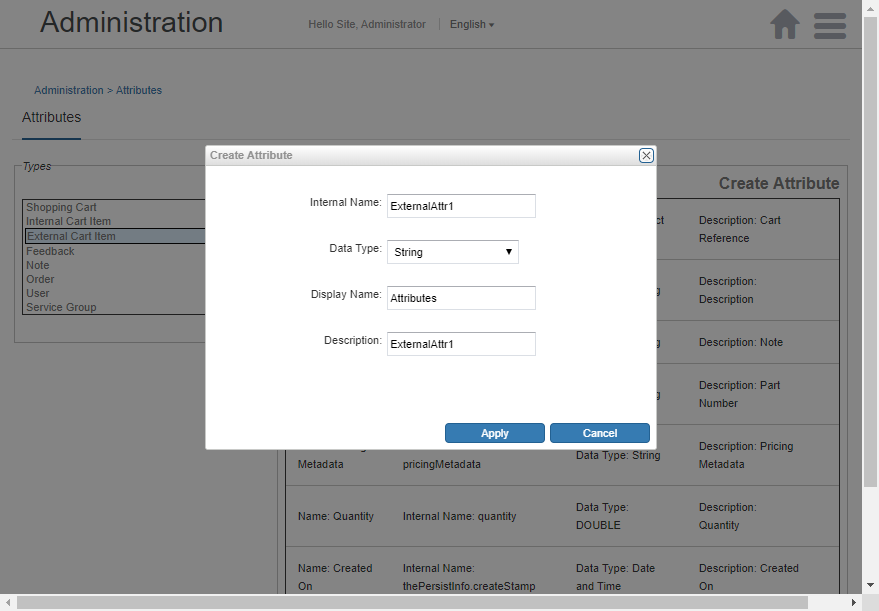
Adding Custom Attribute—Internal and External Cart Item
1. Add custom attribute using scadmin administration page for Internal Cart Item.
2. Add custom attribute using scadmin administration page for External Cart Item.
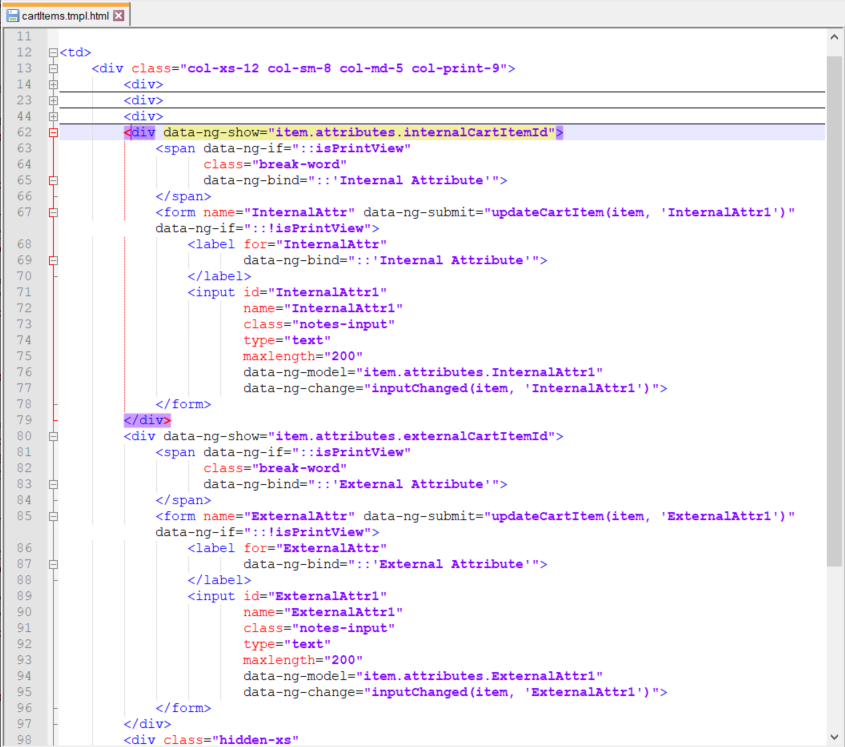
3. Add UI customization to consume the custom attribute from line number 62 to 79 for internal attribute and line number 80 to 97 for external attribute to the location: $WT_HOME/codebase.war/delivery/templates/cartItems.tmpl.html
4. Resulted UI Behaviour:
Adding Custom Attribute—Feedback
1. Add custom attribute using scadmin administration page for feedback.
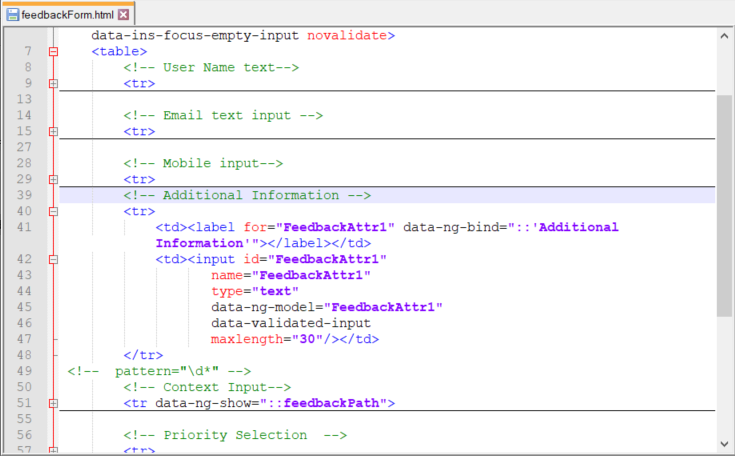
2. Add UI customization to consume the custom attribute in html file (line number 40 to 48) at location: $WT_HOME/codebase.war/delivery/app/views/feedback/feedbackForm.html
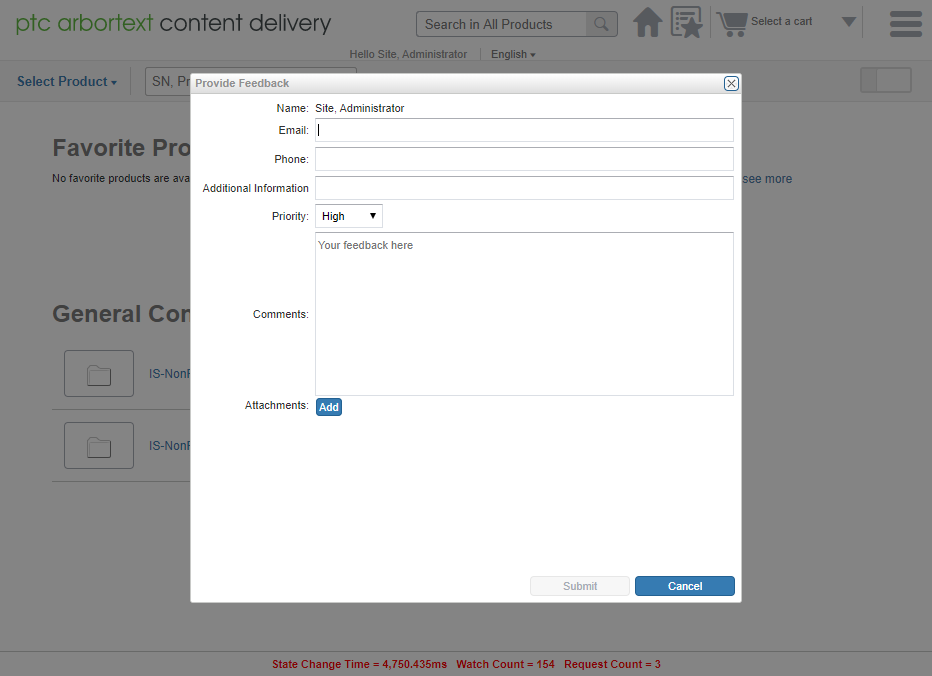
3. Resulted UI Behaviour: Send feedback form with custom attribute on UI.
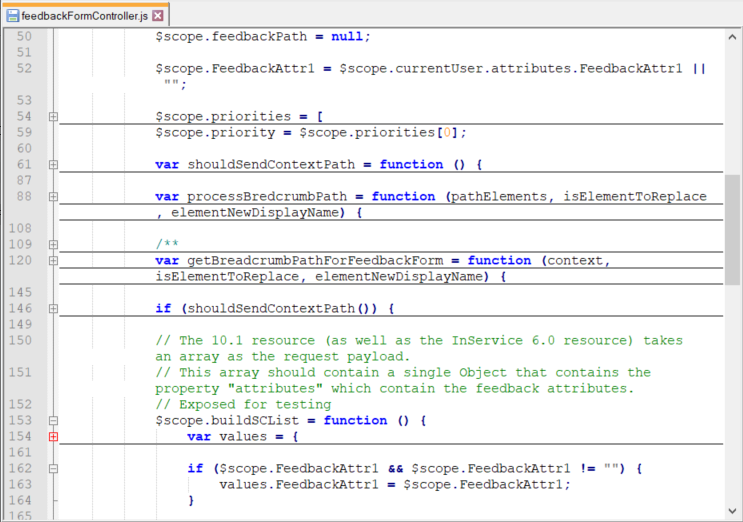
4. Add UI customization to consume the custom attribute in controller file to view the attribute on view feedback page (line number 50 and 162 to 164). $WT_HOME/codebase.war/delivery/app/views/feedback/ feedbackFormController.js
5. Consume the custom attribute to view the details on view feedback form at location: $WT_HOME/codebase.war/delivery/app/views/feedbackDetails/feedbackDetails.tmpl.html
6. Resulted UI Behaviour:
Adding Custom Attribute—Notes
1. Add custom attribute using scadmin administration page for Notes.
2. Add UI customization to consume the custom attribute in html file (line number 16 to 19) at location:
$WT_HOME/codebase.war\delivery\app\views\notes\notesList.html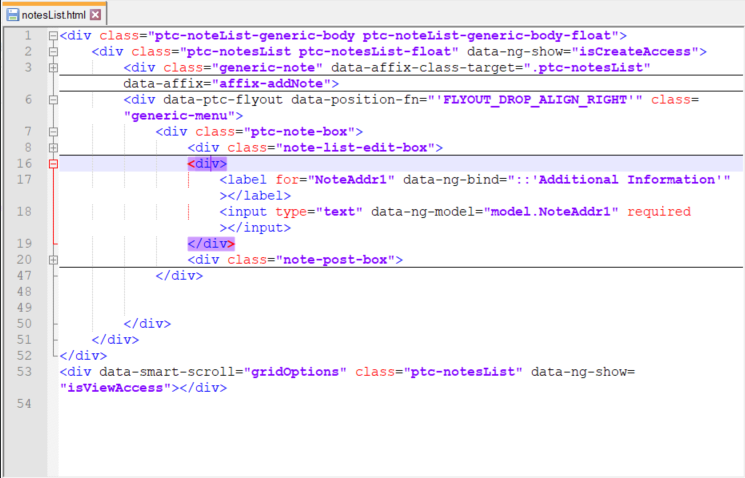
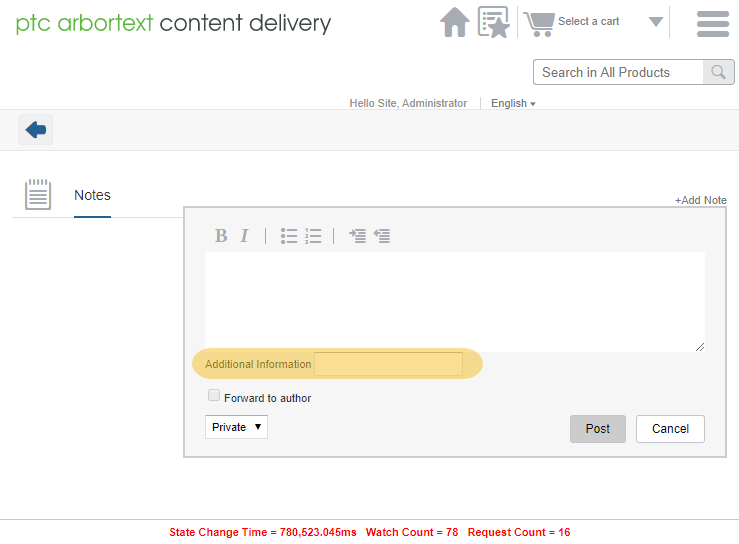
It shows the custom information to be pushed from UI as shown in the following image:
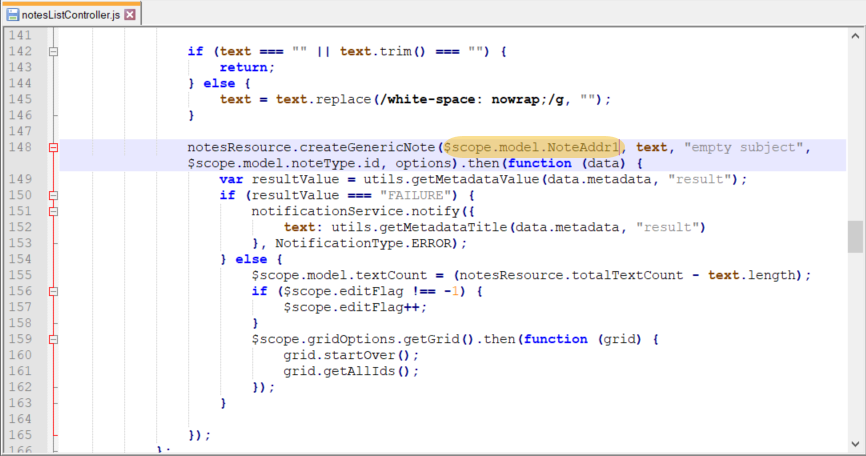
3. Consume the custom attribute for controller at location: $WT_HOME\codebase.war\delivery\app\views\notes\notesListController.js
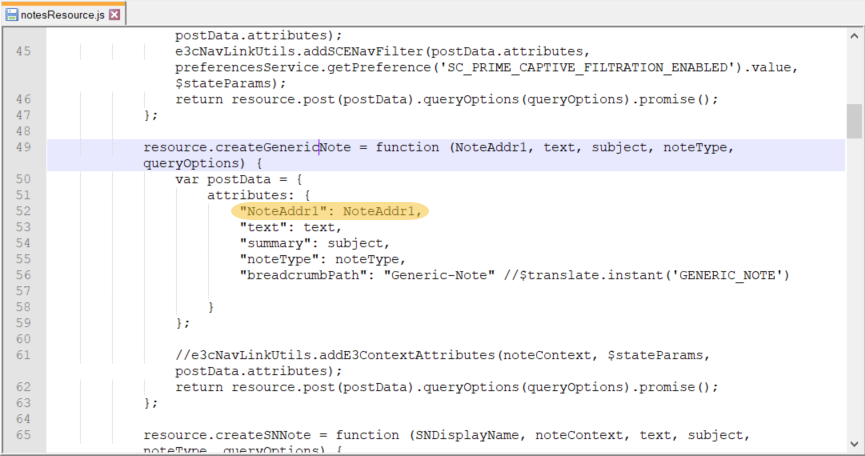
4. Consume the custom attribute for resource at location: $WT_HOME\codebase.war\delivery\app\resources\notesResource.js
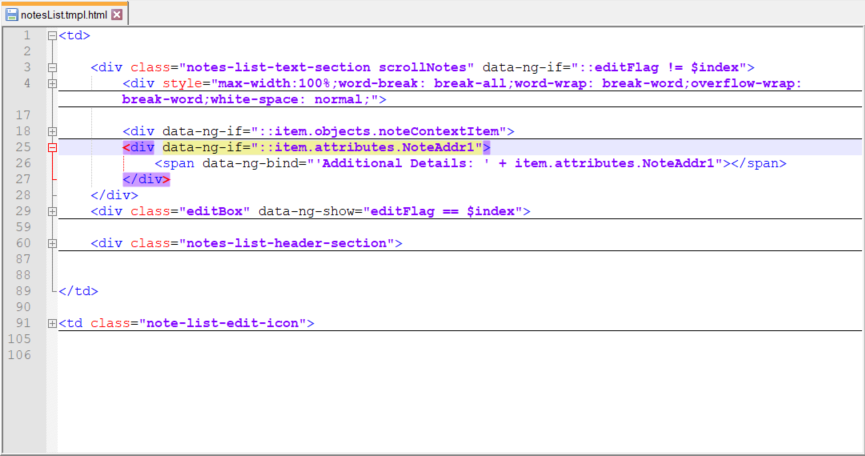
5. Consume the custom attribute to show on All Notes Page (line number 25 to 27) at location: $WT_HOME\codebase.war\delivery\templates\notesList.tmpl.html
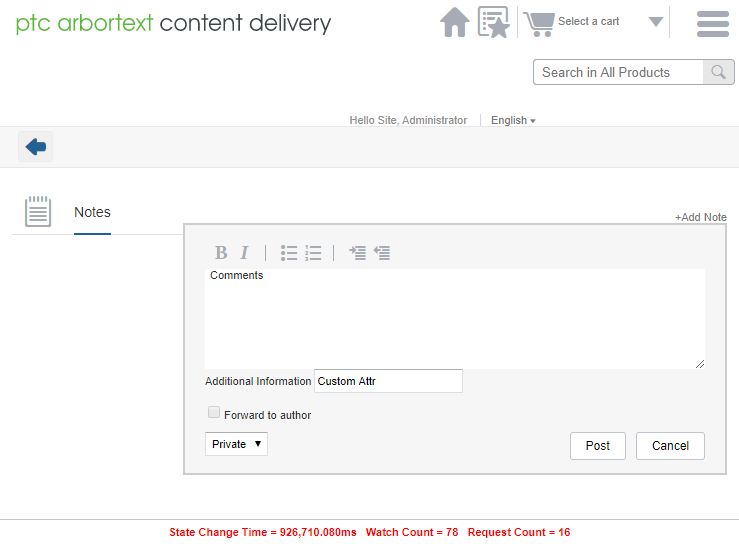
6. Resulted UI Behaviour: To Save the custom attribute.
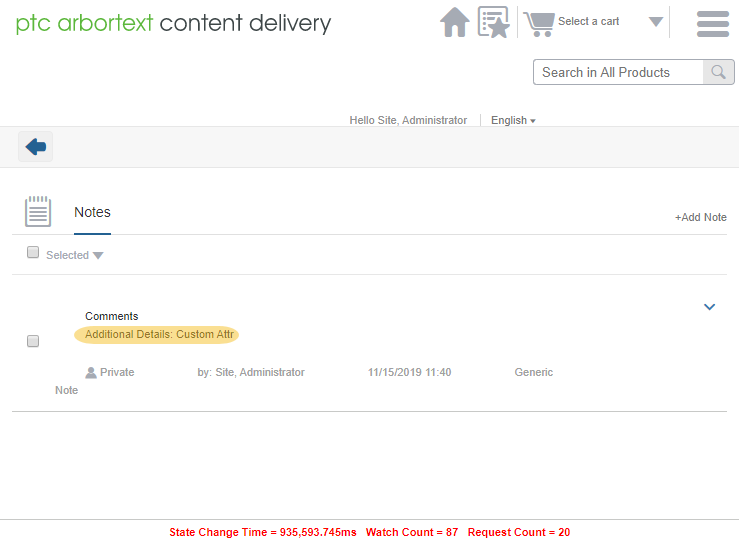
7. To display the custom attribute:
Adding Custom Attribute—Order
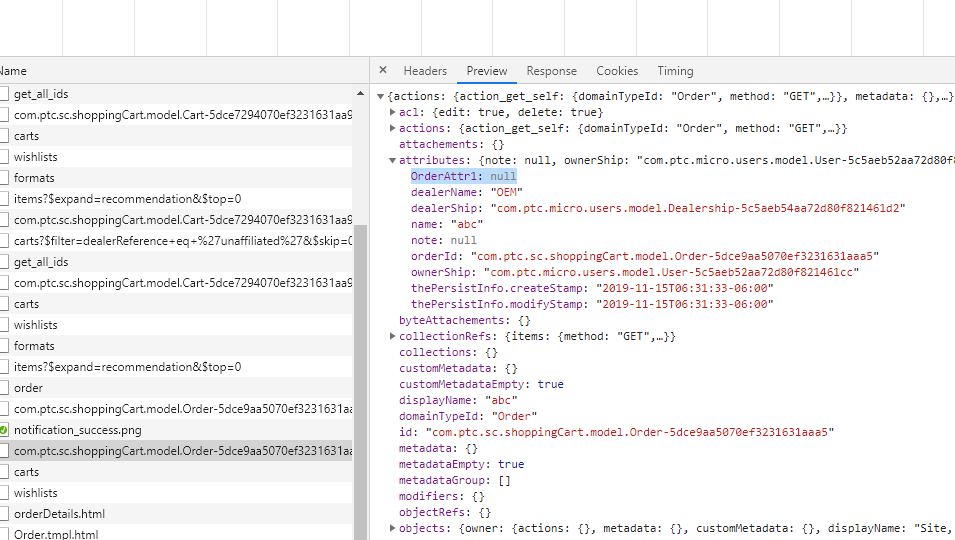
1. Add custom attribute using scadmin administration page for Order.
2. We do not have UI processing currently to add or remove the custom attributes value. However, the response has the attribute created with json response.