配置客户端应用程序,并且使 ThingWorx 作为 AD FS 应用程序组中的资源服务器
步骤 1:为资源服务器 (ThingWorx) 创建新的应用程序组
1. 在 AD FS 中,单击菜单内的 Application Groups。
2. 在 Actions 菜单中,单击 Add Application Group。
3. 在 Add Application Group Wizard 的 Welcome 页面中,输入新应用程序组的 Name,然后从 Standalone applications 列表中选择 Web API 模板。然后单击 Next。

4. 随即将自动填充 Configure Web API 页面上的 Name 字段。如下图所示,请执行以下操作。
◦ 在 Identifier 字段中,为 Web API 资源设置唯一受信任的标识符。
将该标识符复制到文本编辑器中,以便在后续步骤中使用。
◦ 单击“添加”。
◦ 单击“下一步”。

5. 在 Apply Access Control Policy 页面上,选取一个访问控制策略,然后单击 Next。
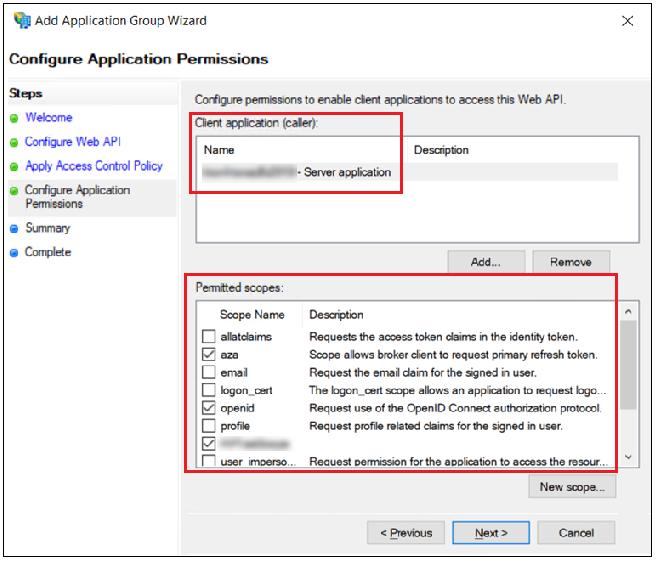
6. 在 Configure Application Permissions 页面中,完成以下步骤:
◦ 在 Client application 面板中,添加客户端应用程序的服务器名称。
◦ 在 Permitted scopes 面板中,对于允许的作用域,选中其复选框。有关作用域的示例,请参阅下图。
7. 单击 Next。
8. 在 Summary 页面上,单击 Next。
9. 完成向导步骤后,单击 Close。
步骤 2:更新所创建应用程序组的属性
1. 在 AD FS 的 Application Groups 列表中,双击为 ThingWorx 资源服务器创建的应用程序组。
2. 选择 ThingWorx Web API 应用程序,然后单击 Edit。
3. 选取 Issuance Transform Rules 选项卡,然后单击 Add Rule。
4. 对于 Choose Rule Type,选择 Send LDAP Attributes as Claims,然后单击 Next。
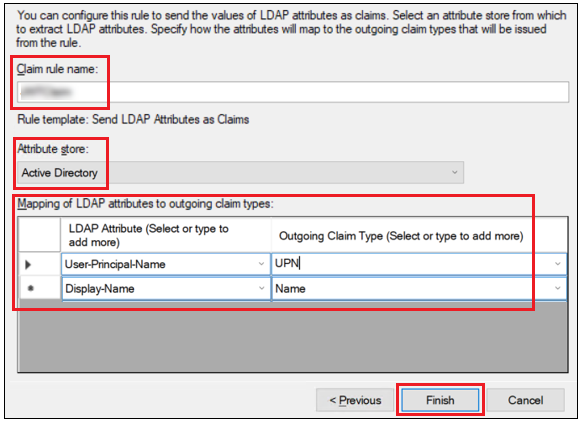
5. 在 Configure Claim Rule 页面上,输入以下信息:
◦ Claim rule name - 输入声明规则的名称。
◦ Attribute store - Active Directory。
◦ Mapping of LDAP attributes to outoing claim types - 如下图所示填写以下属性:
▪ User-Principal-Name - 将其映射至传出声明 UPN。
▪ Display-Name - 将其映射至传出声明 Name。
6. 单击 Finish。
步骤 3:配置 resourceServerSetting.json 文件
根据您所使用的 ThingWorx 版本,选择以下两个主题之一来了解详细配置步骤。
• ThingWorx 9.5 及更高版本:将 ThingWorx 配置为资源服务器
• ThingWorx 9.0 到 ThingWorx 9.4:将 ThingWorx 配置为资源服务器