Create an Enterprise Application in Microsoft Entra ID
You may configure the application using either an OIDC authentication or an SAML authentication. Proceed with the section relevant to your authentication.
Using OIDC Authentication
1. In the Microsoft Azure portal, under the Microsoft Entra ID menu, select the Enterprise applications option.
2. In the page that opens on the right, click New application.
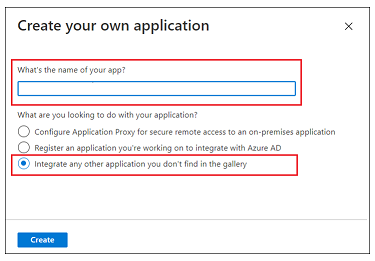
3. In the Browse Microsoft Entra Gallery (Preview) page, click Create your own application.
4. Enter a name for your application, select the Integrate any other application you don’t find in the gallery option, and click Create.
5. On the Properties page, click application registration. In the sections below, complete the detailed steps
Step 1 – Basic OIDC Authentication
1. Select the Authentication page.
2. In Platform configurations, click Add a platform.
3. Select Web. The Configure Web page opens.
4. In the Redirect URIs field, add a redirect URI in the following format: https://<ThingWorx FQDN>:<port>/Thingworx/oidc/SSO and click Configure.
Step 2 – Token Configuration
1. Select Token configuration and click Add optional claim. The Add optional claim page opens.
2. In Token type, select ID.
3. Select all claims you wish to incorporate into the token and click Add.
4. Select the Turn on the Microsoft Graph email, profile permission (required for claims to appear in token). box and click Add.
Using SAML Authentication
1. In the Microsoft Azure portal, under the Microsoft Entra ID menu, select the Enterprise applications option.
2. In the page that opens on the right, click New application.
3. In the Browse Microsoft Entra Gallery (Preview) page, click Create your own application.
4. Enter a name for your application, select the Integrate any other application you don’t find in the gallery option, and click Create.
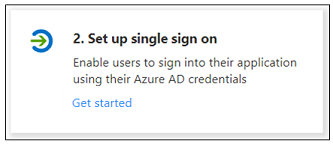
5. On the Overview page, click Set up a single sign on.
6. On the Select a single sign-on method screen, select the SAML option. A Set up Single Sign-On with SAML page with numbered steps opens. In the sections below, complete the detailed steps.
Step 1 – Basic SAML Configuration
1. In step 1 for Basic SAML Configuration, click Edit.

2. In Basic SAML Configuration, enter the following information:
▪ Indentifier (Entity ID) – Will be used as the value of the metadataEntityId in the BasicSettings component of the sso-settings.json file.
▪ Reply URL (Assertion Consumer Service URL) – Depending on your ThingWorx version, use either of the following formats:
▪ For ThingWorx 10.0.x and later versions: https://<ThingWorx_FQDN>:<Port>/Thingworx/login/saml2/sso
▪ For ThingWorx 9.7.x and earlier versions: https://<ThingWorx_FQDN>:<Port>/Thingworx/saml/SSO
3. Click Save and then close the Basic SAML Configuration. When prompted to test the single sign-on, select No, I’ll test later.
The Set up Single Sign-On with SAML step is redisplayed with the Identifier and Reply URL values entered.
Step 2 – User Attributes & Claims
1. Click Edit in step 2 for User Attributes & Claims.
2. In User Attributes & Claims, click Add new claim.
3. In the Manage claim page, enter the following information:
▪ Name – Enter a UID.
▪ Source – Select the Tranformation option. A Manage transformation pop up window opens.
4. In the Manage transformation window, enter the following information, as shown in the image below:
▪ Transformation – StartWith()
▪ Paramter 1 (Input) – user.userprincipalname
▪ Value – Administrator@
▪ Parameter 2 (Output) – “Administrator”
▪ Specify output if no match – Select the check box.
▪ Parameter 3 (Output if no match) – user.userprincipalname
5. Click Add.
6. Click Save and close the Manage Claim window. When prompted to test the single sign-on, select No, I’ll test later.
The User Attributes & Claims step is redisplayed with the values you just entered.
Step 3 – SAML Signing Certificate
1. In step 3 for SAML Signing Certificate, download the Certificate (Raw), which is the Microsoft Entra ID Public certificate.
2. Download the Federation Metadata XML. When the file is downloaded, rename it to sso-idp-metadata.xml.