Configure ThingWorx with a Resource Server in AD FS Application Groups when the Resource Server is an Application other than ThingWorx
|
|
If you are configuring your ThingWorx application as a Resource Server (and not as the client application), the steps in this section are not required.
|
Configure ThingWorx to be a Server Application (client) in Application Groups
1. In AD FS, click Application Groups in the menu.
2. From the Actions menu, click Add Application Group.
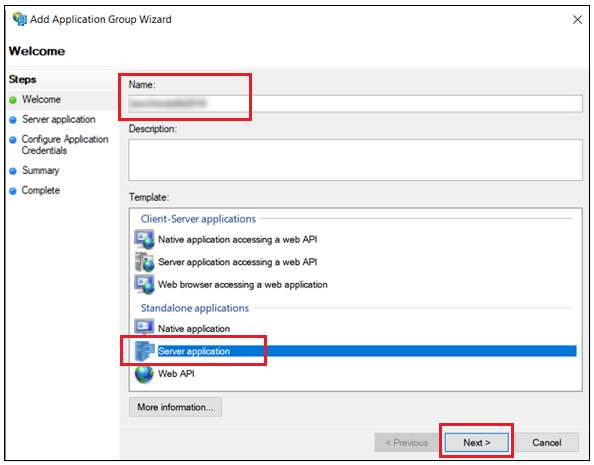
3. On the Welcome page of the Add Application Group Wizard, enter a Name for the new application group and select the Server application template option. Then click Next.
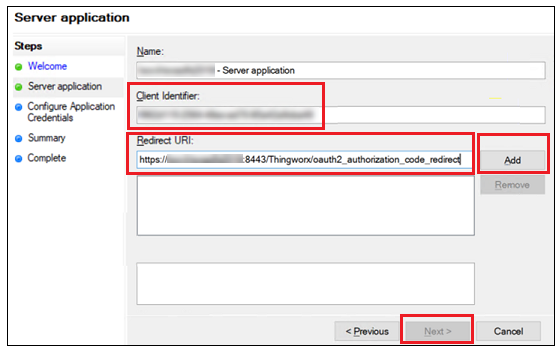
4. On the Server application page, the Name and Client Identifier fields are auto-populated. Do the following, as shown in the image below:
◦ Copy the value of the Client Identifier to a text editor for use in a later procedure.
◦ In the Redirect URI field, enter a ThingWorx authorization redirect URI using the following format:
https://<ThingWorx_FQDN>:<port>/Thingworx/oauth2_authorization_code_redirect
Then click Next.
◦ Click Add.
◦ Click Next.
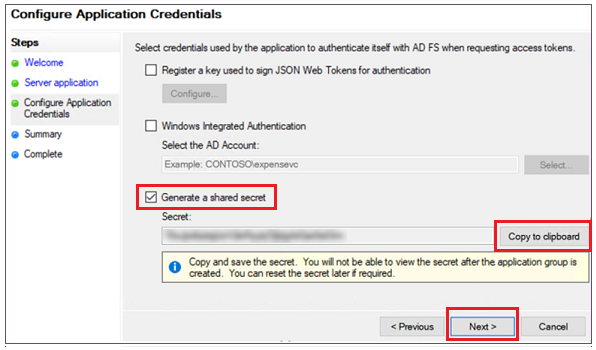
5. On the Configure Application Credentials page, do the following:
◦ Select Generate a shared secret.
◦ To copy the value in the Secret field, click Copy to clipboard. Save the copied value for use in a later procedure.
◦ Click Next.
6. Click through to complete the rest of the Add Application Group Wizard.
Create an Application Group for Your Resource Server
1. Create custom scopes for your resource server, as needed.
2. Add the permitted scopes as part of the application permissions configuration.
Add ThingWorx Application to Act as a Client for the Resource Server
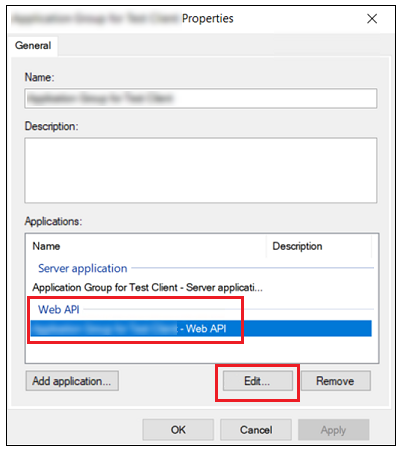
1. In the Application Groups list of AD FS, double click on the application group that you created for your resource server.
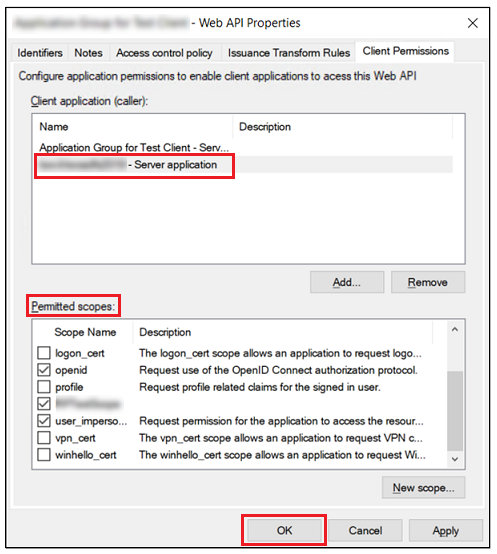
2. In the window that opens, select the Web API application group, as shown in the image below, and click Edit.
3. In the Web API Properties window, navigate to the Client Permissions tab and click Add.
4. In the Add Client popup window, select the ThingWorx server application and click Add.
5. The ThingWorx server is now listed in the Client application list on the Web API Properties window, as shown in the image below. Select the Permitted scopes and click OK.