Configure a Client Application with ThingWorx as a Resource Server in AD FS Application Groups
Step 1: Create a New Application Group for the Resource Server (ThingWorx):
1. In AD FS, click Application Groups in the menu.
2. From the Actions menu, click Add Application Group.
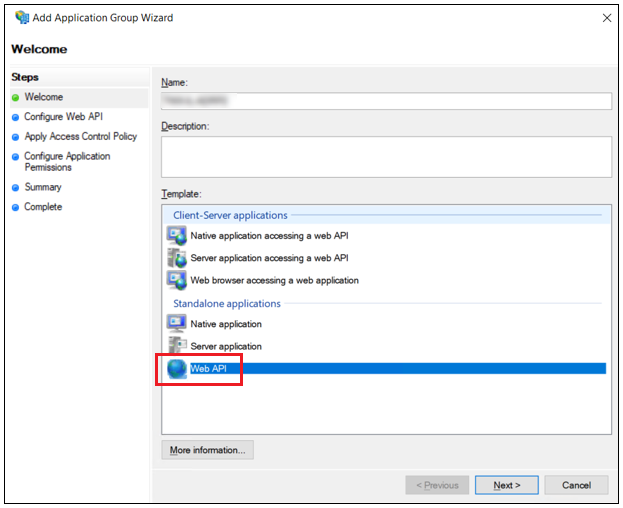
3. On the Welcome page of the Add Application Group Wizard, enter a Name for the new application group and select the Web API template from the Standalone applications list. Then click Next.
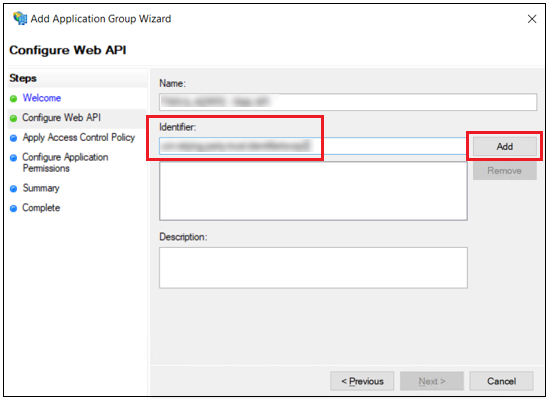
4. On the Configure Web API page, the Name field is auto-populated. Complete the following steps, as shown in the image below.
◦ In the Identifier field, set a unique trusted identifier for the Web API resource.
Copy the identifier to a text editor for use in a later procedure.
◦ Click Add.
◦ Click Next.
5. On the Apply Access Control Policy page, choose an Access Control Policy and click Next.
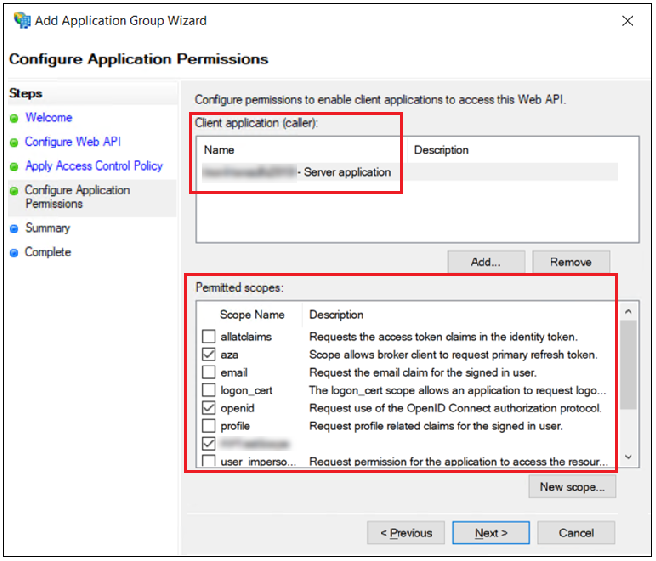
6. In the Configure Application Permissions page, complete the following steps:
◦ In the Client application panel, add the server name of your client application.
◦ In the Permitted scopes panel, select the check boxes of the permitted scopes. For example, see the image below for the scopes.
7. Click Next.
8. On the Summary page, click Next.
9. When the wizard steps are complete, click Close.
Step 2: Update the Properties of the Application Group Created
1. In the Application Groups list of AD FS, double click on the application group that you created for your ThingWorx resource server.
2. Select the ThingWorx Web API application and click Edit.
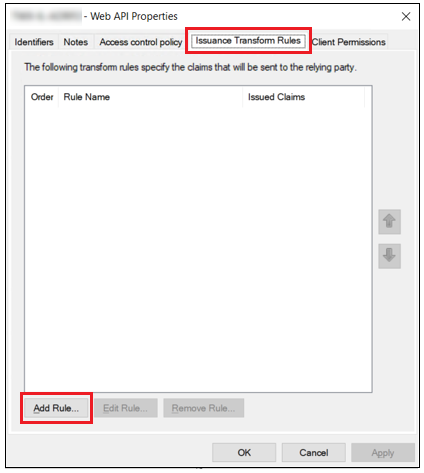
3. Choose the Issuance Transform Rules tab and click Add Rule.
4. For Choose Rule Type, select Send LDAP Attributes as Claims and click Next.
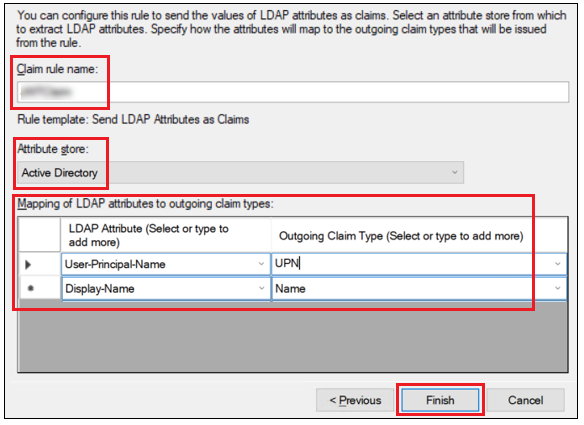
5. On the Configure Claim Rule page, enter the following information:
◦ Claim rule name – Enter a name for the claim rule.
◦ Attribute store – Active Directory.
◦ Mapping of LDAP attributes to outoing claim types – Fill in the following attributes as shown in the image below:
▪ User-Principal-Name – Map it to the outgoing claim UPN.
▪ Display-Name – Map it to the outgoing claim Name.
6. Click Finish.
Step 3: Configure the resourceServerSetting.json File
Based on your ThingWorx version, refer to either of the topics below for detailed configuration steps.
• ThingWorx 9.5 and later versions: Configure ThingWorx as a Resource Server
• ThingWorx 9.0 to ThingWorx 9.4: Configure ThingWorx as a Resource Server