Creating a Calendar
To create a calendar, complete the following steps:
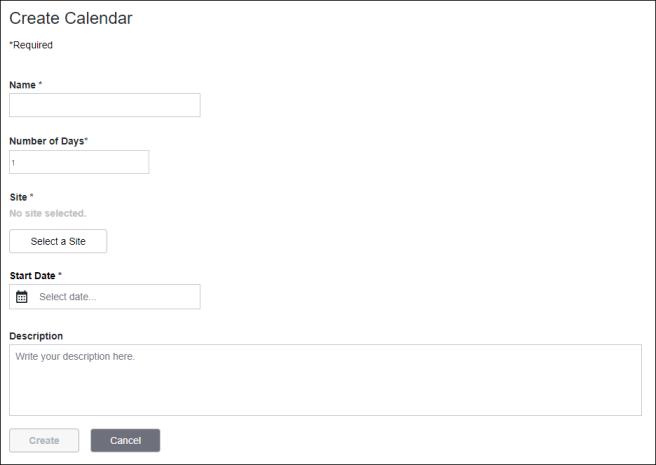
1. From the Calendars tab, click Create to open the Create Calendar window.
Create is disabled if any row is selected. Click the selected row to clear the row selection.

2. Enter the information for the new calendar:
◦ Name—The name of the calendar. Required.
◦ Number of Days—The total number of days in the calendar. Required. A calendar must have at least 1 day.
◦ Site—The site to which the calendar belongs. Required.
To select a site, complete the following steps:
a. Click Select a Site to open the Select a Site window.
b. Select a site from the equipment list.
c. Click Select. The new site is displayed in the Create Calendar page.
You can click Cancel to discontinue adding a site.
◦ Start Date—The start date of the calendar. Required.
◦ Description—Additional information about the calendar. Optional.
You can click Cancel to cancel the creation of this calendar.