Exercise 4 - Assembling Fasteners Using Mouse Clicks
1. Click
Tools >
Screw >
 Assemble by mouse click
.
The Select References dialog box opens.
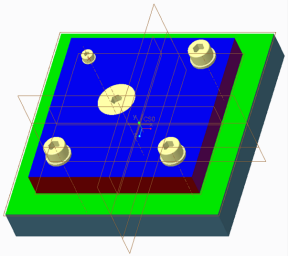
2. Click in the first Position Reference box and select the right purple side surface.
3. Select the front red side surface.
4. Select the top blue surface for the screw head placement.
5. Select the bottom yellow surface for the nut or thread placement.
6. Click OK to complete selecting the references and close the dialog box. The Screw Fastener Definition dialog opens.
7. Select a Counter Sunk Screw of type ISO 10642-8.8 from the list.
8. 8. Change the Thread size from M5 to M10.
9. Click
 Set length automatically
.
10. Click OK. The fastener is now on the pointer.
11. Click to place the fastener in the middle of the assembly.
12. Middle-click to exit the placement tool.