Exercise 1—Changing the Appearance of the Model’s Surface
Appearance is set of attributes that determines the appearance of a surface. These attributes include color, reflecting ability, transparency, texture, and so on.
1. Click File > Open and browse to the directory where you downloaded the model for this tutorial.
2. Select
chair.asm. The model opens in the graphics window. To see the model without displaying datums, in the graphics toolbar click

and then clear the
(Select All) check box.
3. To begin rendering, click Applications > Render Studio. The Render Studio tab opens in the ribbon and rendering begins.
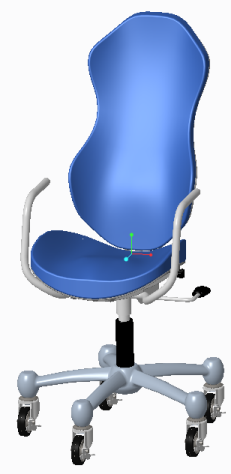
4. Rotate the part. Notice that as you rotate the chair the rendering continues, as you can see in the image below:
5. To set the chair back to the original orientation click
 Saved Orientations
 and then select
00–Start. The chair returns to its original orientation.
6. Click
 Perspective View
 to change the display from orthographic to perspective. This puts the part in the correct perspective before editing the scene.
7. To change the color of the base of the chair, click the arrow below
 Appearances
. The
Appearance gallery opens.
8. In the
Search box at the top of the
Appearance gallery, type chrome and click

. In the
Appearance gallery, under
Library, you can see the search results. When you place the pointer on a circle, you can see the name of the appearance and a description of the material that the appearance represents.
9. Follow the sequence in the table below to change the appearance of the base of the chair to chrome:
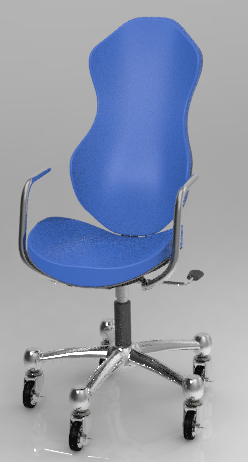
In the Appearance gallery under Library click chrome. The Select dialog box opens and the Appearance gallery closes. | Click the base to select it. | Click OK. The base of the chair changes to chrome and the paintbrush changes back to a pointer. |
| | |
10. To change the color of the seat and back of the chair, click the arrow below
Appearances. The
Appearance gallery opens.
11. In the
Search box at the top of the
Appearance gallery, type leather and click
. In the
Appearance gallery. Under
Library, you can see the search results.
12. Follow the sequence in the table below to change the appearance of the seat and back of the chair to leather-black:
In the Appearance gallery under Library click leather-black. The Select dialog box opens | Click the seat to select it. | Press CTRL and click the back so both the seat and the back are selected | Click OK. The seat and back of the chair change to leather black and the paintbrush changes to a pointer. |
| | | |
13. Click the arrow below Appearances. The Appearance gallery opens. Place the pointer on leather-black, right-click, and select Edit. The Model Appearance Editor dialog box opens.
14. Set the sliders as shown in the list below and notice the impact of these changes on the chair.
◦ Diffuse—.80
◦ Reflectivity—.60
◦ Glossiness—.40
15. Click Close to close the Model Appearance Editor dialog box.
16. Continue by following one of the actions described below:
◦ Go to Exercise 2.
◦ Click File > Save to save the model. You can continue with Exercise 2 at a later time.