Example: Creating a Bottle Using the Freestyle Commands
The next steps show how to create a bottle in the Freestyle Modeling environment. Steps involve manipulating a primitive and using the Freestyle commands: extrude, split, delete, crease, scale, and align.
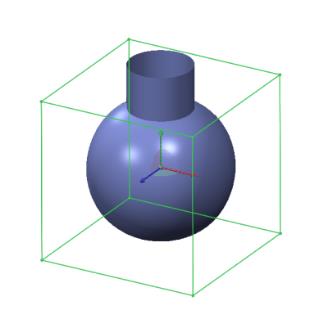
1. Open a new part and create an extruded cylinder of diameter 40 mm and height 60 mm centered along the default coordinate system.
2. Click
Model >
 Freestyle
. The
Freestyle tab opens.
3. Click the arrow next to Shapes to open a gallery of open and closed primitives.
4. Select a sphere from the gallery to display it in the graphics window with its control mesh.
5. Drag a box around the sphere to select all the mesh elements.
6. Right-click the graphics window and click

to scale the mesh elements. The dragger changes to a 3D scaling handle and a bounding box appears around the selection.
7. Hold down the CTRL key and pull a scaling handle to perform 3D scaling of the sphere. Continue this process until the sphere is almost twice the size of the cylinder.
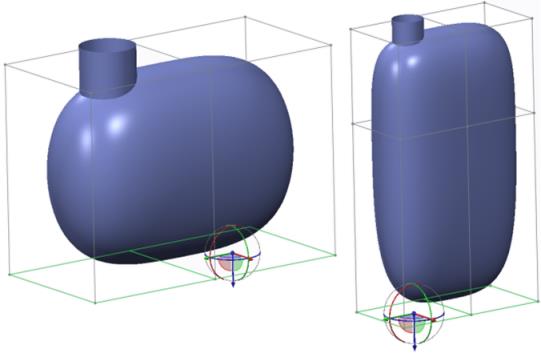
8. Select the rear face of the control mesh as shown in the figure below and right-click and select

menu to extrude the face.
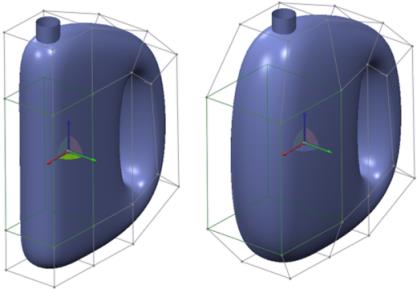
9. Select 2 faces while holding down the CTRL key. Pull the handle of the dragger to stretch the shape.
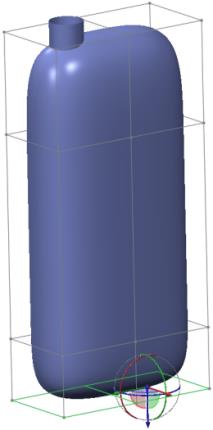
10. Middle-click to repeat the extrude operation. Pull the handle of the dragger down to stretch the main body of the bottle. Middle-click to repeat the extrude operation for the second time.
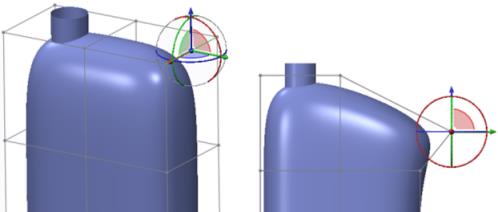
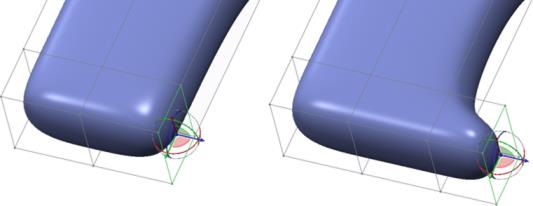
11. Select the top-right edge, change the orientation to the Right view, and pull the planar handle of the dragger to position the edge as shown below:
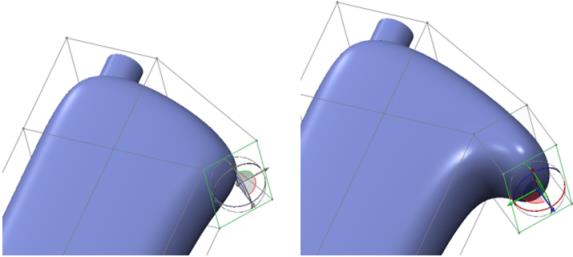
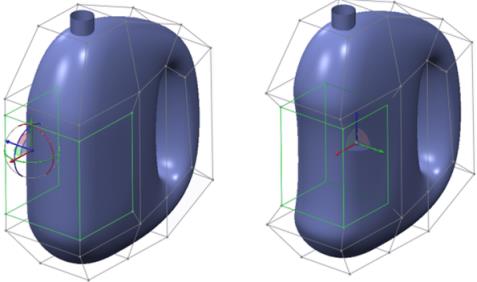
12. Select the face shown below and right-click and select
to extrude the face and start creating the top portion of the handle.
13. Select the lower-right face as shown below and right-click and select
to extrude the face and start creating the lower portion of the handle.
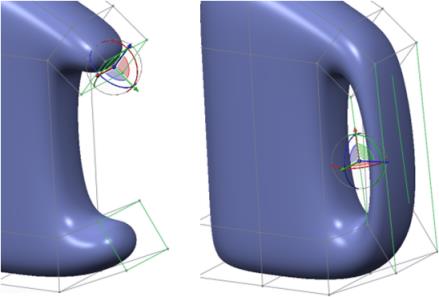
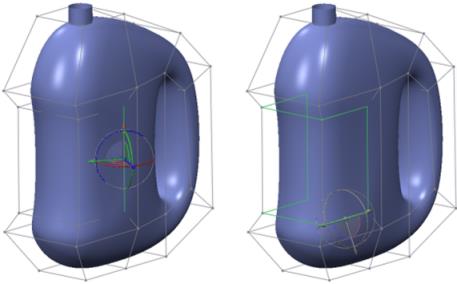
14. With the face still selected, change the orientation to the Right view. Use the rotation handle to rotate the face as shown below. Then use the center ball of the dragger to perform a free drag on the screen to position the face as shown below:
15. With the face still selected, reorient the model. Using the CTRL key, select another face using the top handle of the dragger. Right-click and select

. The 2 faces are connected and the handle is created.
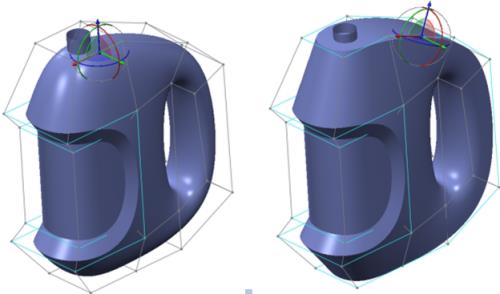
16. Reorient to the Right View and using the region selection mechanism, select the vertices and move them with the handle of the dragger to get the desired shape.
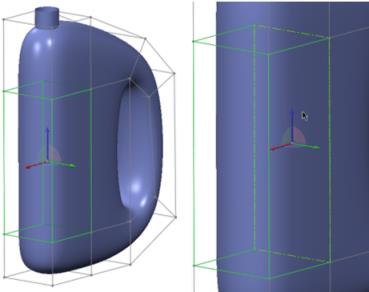
17. To bulge the bottle in the middle to make space for the label panel, select 3 faces as shown below. Click
. The scaling handle appears to the center of the bounding box of the selected faces. Reposition it to the rear face of the bounding box so that you can scale from that location. Move the pointer over one of the scaling handles, right-click, and click
Relocate. Select the rear face on the bounding box. The scaling handle is now relocated to that face.
18. Point to the planar dragger and pull it to perform a 2D scaling on the control mesh.
19. The bottle now has a shape to it. Follow this step to define the label panel. Split the 3 faces that are still selected using the face split options. Right-click the dragger and click
Relocate. Click the rear face of the bounding box to relocate the dragger. Use the planar handle to scale the faces inwards. You can also choose to display the incremental scaling values by clicking
Freestyle >
 Increment
.
20. To add more definition to the label pane, follow this step. Introduce hard edges. Select the edge as shown in the figure below, hold down the SHIFT key and select the same edge again for completing a loop selection. Select Hard from the Crease group to apply a hard crease to the selected edges.
21. Repeat the previous step for the outer edges of the label panel as shown in the following figure:
22. To apply a crease to the handle area, use this step. Select the bottom edge, hold the SHIFT key and click the same edge again to select a loop correctly. Select Hard from the Crease group to apply a hard crease.
23. The shape of the bottle is now complete. Click
 OK
OK. Follow the next few steps to add detail to the bottle.
24. To round the creased edges, select the edges, right-click and click
Round Edges. Click
OK to complete the creation of the bottle as shown below:
25. To merge the cylinder that you created in step 1 with the Freestyle feature, follow this step. Select the cylinder, hold down the CTRL key, and select the feature that you have created above. Click
Model >
 Merge
Merge. Flip the arrows to get the desired result and complete the feature. Add a round to the intersection edge to refine the shape further as shown below:
26. You can further refine the Freestyle surface by redefining the Freestyle feature.