Inserting Elbows
To Insert Elbows at all Corners
1. Click
 Insert Fitting
. The
Insert Fitting dialog box opens.
2. Select a pipeline by selecting one of its segments. The label of the selected pipeline appears as read-only in the box.
3. Click

to select the Elbow category, if you have used the sample project files.
4. Click At all corners.
|  Trim Trim is not selected in this case and so trimmed elbows are not inserted. |
5. (Optional) Select a name from the Selection name list.
6. Click OK to insert the elbow and close the dialog box.
or
Click Apply or middle-click to insert the elbow and keep the Insert Fitting dialog box open.
To Insert Elbows at Pipe Ends
You can insert an elbow at a pipe end with one of the ports aligned with the pipe segment and its vertex at the pipe end.
1. Click
Insert Fitting. The
Insert Fitting dialog box opens.
2. Select a pipe segment end. The selected location is displayed in the box under Reference.
3. The Specification, Size, and Schedule \ Pressure boxes display values of the selected pipe segment. To override the current specification, click the Specification check box and select a different specification from the list. Spec-Driven Piping selects the fitting again based on the specification that you have selected.
| The Specification check box is not selected by default. |
4. Click
.
5. Select an elbow from the Selection name list.
6. Click the Placement / orientation tab.
| The Placement options are unavailable for selection. |
7. If required, click

Flip under
Alignment to flip the fitting.
8. If required, rotate the elbow using the options under Rotation angle.
9. Click OK to insert the trimmed elbow and close the dialog box.
Click Apply or middle-click to insert the trimmed elbow and keep the Insert Fitting dialog box open.
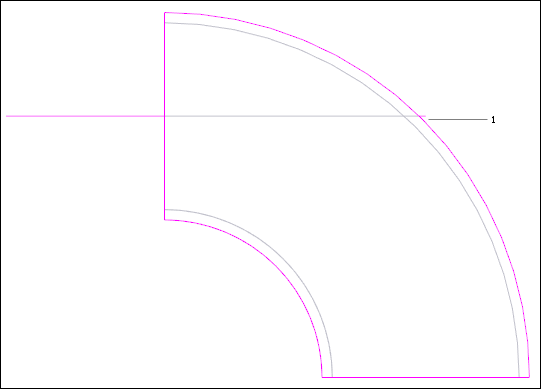
Example: Inserting Elbows at Pipe Ends
1. Pipe end and vertex