To Create a Volume Helical Sweep
1. On the
Model tab, click the arrow next to
 Sweep
Sweep, and click
 Volume Helical Sweep
. The
Volume Helical Sweep tab opens.
2. To sketch or select the helix profile, which sets the distance from the 3D object origin to the helix axis, click the References tab, and do one of the following actions:
1. Helix profile
◦ To select the helix profile, click the Helix sweep profile collector, and select an open sketch.
◦ To sketch the helix profile:
1. Click Define. The Sketch dialog box opens.
2. Set the sketch plane and orientation, and then click Sketch. The Sketch tab opens.
3. Sketch an open sketch for the helix profile.
4. Optionally, to include the central axis of the helix in the sketch, click
Sketch >
 Centerline
 in the Datum group, and sketch a geometry centerline to use as the central axis.
5. Click
 OK
OK to exit Sketcher.
3. To toggle the start point of the volume helical sweep between the two ends of the helix profile, click Flip next to Profile start point.
4. To select the helix axis, do one of the following actions, depending on whether the helix profile sketch contains a geometry centerline:
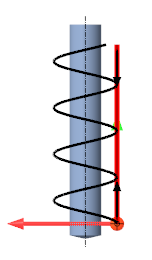
1. Helix axis
◦ Sketch does not contain a geometry centerline—Click the Helix axis collector, and select a straight curve, edge, axis, or axis of a coordinate system. The selected reference must lie on the sketch plane.
◦ Sketch contains a geometry centerline—The geometry centerline is automatically selected as the helix axis, and InternalCL appears in the Helix axis collector.
If InternalCL does not appear in the Helix axis collector, click Internal CL to use the centerline in the sketch.
5. To show the helix and the 3D object dragger, click

.
6. To sketch or select a section that the system revolves to create the 3D object, click the Section tab, and do one of the following actions:
◦ To sketch a section:
1. Select Sketched section.
2. Click Create/Edit section. The Sketch tab opens, showing the red x-axis and green y-axis intersecting at the origin.
3. Sketch the section at the helix origin.
|  In some cases, the sketch automatically snaps to entities in the model, which could change the resulting geometry. To prevent the sketch from automatically snapping to the model, perform one of these actions: • To disable snapping as the default, click File >  Options Options > Sketcher. Under Sketcher references, clear the Allow snapping to model geometry check box. • To disable snapping for the current action, while the Sketch tab is open, hold down the SHIFT key while you sketch. |
4. Click
OK.
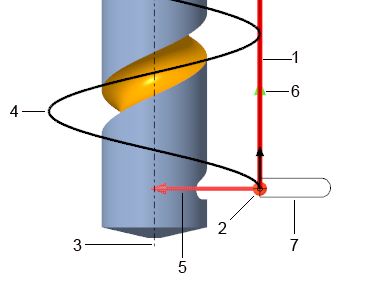
1. Helix profile
2. Start point
3. Helix axis
4. Helix
5. X-axis
6. Y-axis
7. Section of the 3D object
◦ To select a sketch:
1. Select Selected section.
2. Click the Sketch collector, and then select a sketch from anywhere in the model.
3. Click the Axis of revolution collector, and then click a linear entity that is collinear with one of the lines of the sketch, around which the system revolves the sketch.
4. To select the location along the axis of revolution that defines the point of contact between the 3D object and the helix, click the Origin collector, and then select a point, vertex, or coordinate system that lies on the axis of revolution.
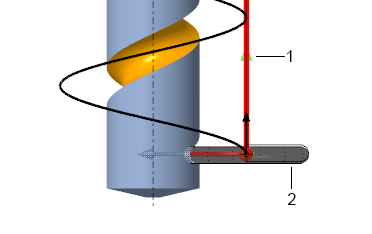
7. To show the revolved 3D object, click

.
1. Y-axis of the 3D object
2. 3D object
8. To set the pitch, the distance between the coils of the helix, do one of the following:
◦ Constant pitch—Next to

, enter a pitch value.
◦ Variable pitch—Click the Pitch tab to add, define, and place pitch points as needed.
9. If needed, to tilt the 3D object at a constant angle around the x- or z-axis:
a. Click the Adjustments tab.
b. To select the axis to tilt the 3D object around, select either X-axis or Z-axis.
c. To set the tilt angle, enter a value from -90° through 90°.
10. Click

to use the left-hand rule, or click

to use the right-hand rule.
Left-hand Rule | Right-hand Rule |
| |
11. Click

.