Sketching Profile Rib Features
When creating rib features, you sketch a section of the rib to the silhouette of the parent feature. You then thicken the sketch to either one side or both sides of the sketching plane.
As you define your rib feature, you can either sketch the rib after entering the rib tool or pre-sketch the rib before entering the rib tool. In either case, the reference collector will only accept one valid rib sketch at a time.
Valid rib feature sketches must meet the following criteria:
• Single open loop
• Contiguous and non intersecting sketch entities
• Sketch ends must align to attachment surfaces forming a closed area
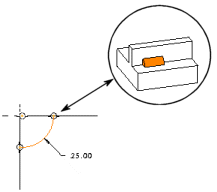
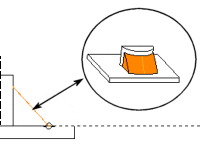
While the workflow for straight and rotational rib features is the same, each rib type has specific sketch requirements. Keep the following in mind as you sketch your rib features:
|
Rib Type
|
Sketch Requirement
|
Valid Sketch Example
|
|
Straight
|
Sketch can be created on any point as long as its line ends attach to surfaces, providing an area to fill.
|
|
|
Rotational
|
Sketch must be created on a plane that passes through the axis of revolution for the revolved surface. Its line ends must attach to surfaces, providing an area to fill.
|
|
Whether you create an internal sketch or you seed your rib feature with an external sketch, you can easily modify your rib feature sketch because it lives inside the rib feature. Any modifications you make to an original seed sketch, including deletion, do not affect the rib feature because an individual copy of the sketch is stored in the feature. In order to modify the rib sketch geometry you must modify the internal sketch feature, which is a sub-node of the rib feature in the Model Tree.
If you want to redefine the independent section, click Edit on the References tab and use Sketcher. You can also use Edit Internal Sketch from the shortcut menu.

