Example: Offset Geometry with Attachment Options
The following figures are examples of offset geometry after selecting different attachment options.
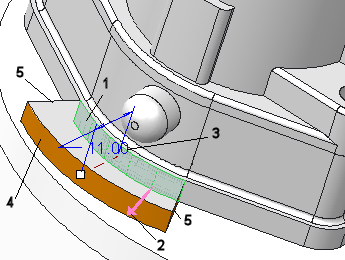
Offsetting a surface with the Attach offset geometry attachment option (default) selected. In this case, when the original geometry is offset, the adjacent surfaces remain in place. Side surfaces are created to connect the offset geometry to the original geometry.
1. Selected surface
2. Offset direction arrow
3. Offset value
4. Offset surface
5. Side surfaces
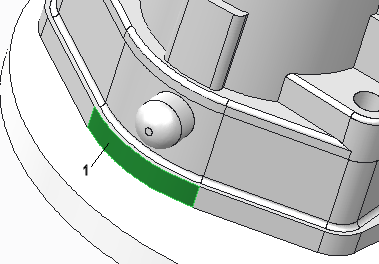
Offsetting geometry without selecting attachment options or tangent surfaces. In this case, only the selected surface is offset.
1. Selected surface
2. Offset surface
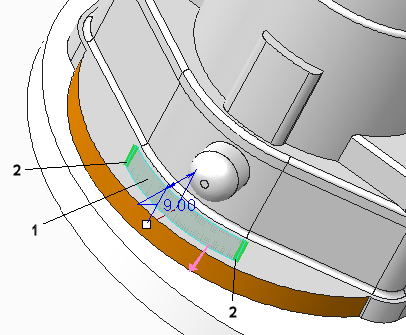
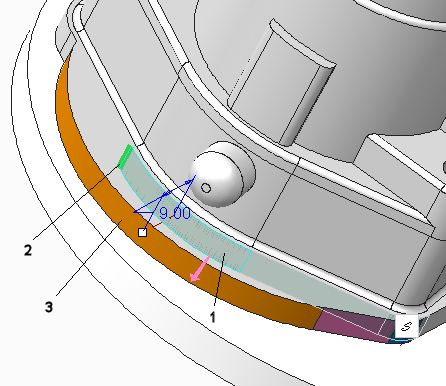
Offsetting a surface with the Extend and intersect attachment option. In this case, when the selected surface is offset, it extends and intersects the original surface. You can only extend the surface until the edges converge.
1. Selected surface
2. Selected references for a side surface (green)
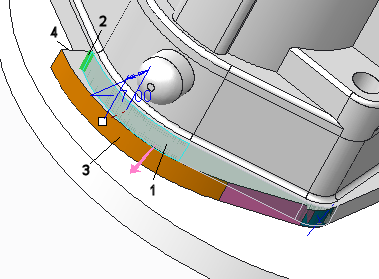
Offsetting a surface with the attachment option
Create side surfaces and

selected. On the left, a reference is selected, so when the selected surface is offset, a side surface is created. On the right, tangency is propagated.
1. Selected surface
2. Selected reference for create side surfaces attachment option
3. Offset surface
4. Side surface
Offsetting a surface with the attachment option
Extend and intersect and
selected. On the left, a reference is selected, so when the selected surface is offset, it extends and intersects the original surface. On the right, tangency is propagated.
1. Selected surface
2. Selected reference for extend and intersect attachment option
3. Offset surface