Example: Creating a Sloped Mill Surface
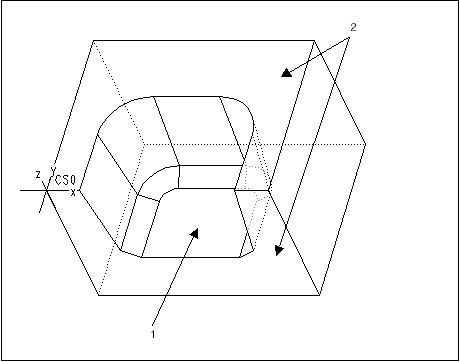
1. Create a parent Mill Surface by gathering all surfaces in the pocket, as shown below. Select surface (1) as the seed surface, and the top and front surfaces (2) as bounding surfaces.
The resulting Mill Surface is shown in blue in the next illustration.
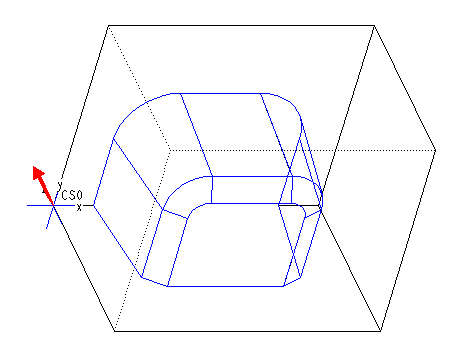
2. Create a new Mill surface by clicking
Mill Surface >
 Sloped
. To define the
Surfaces element, use the
Quilt Surfs option
SURF SELECT menu and select the parent Mill surface. Use the Z-axis of the coordinate system to define
Direction (the direction vector is shown in red) and type
45 as the value for
Angle.
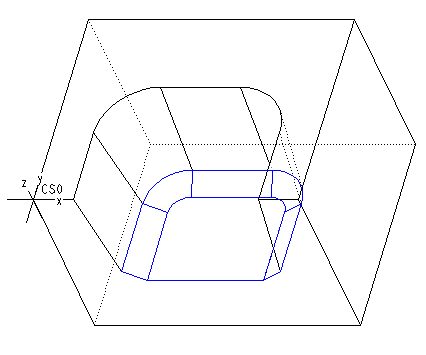
3. Click Keep Shallow Side. The resulting Mill surface is shown in blue in the following illustration.
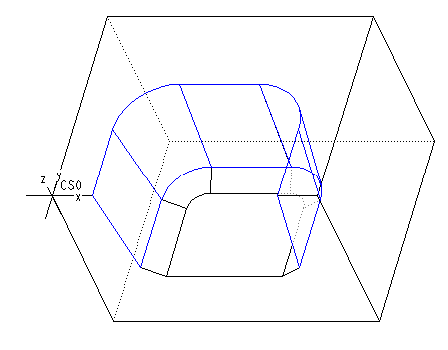
4. To define a complementary Mill surface for Profiling, repeat Step 2 and click Keep Steep Side. The resulting Mill surface is shown in blue in the following illustration.
5. Create the NC sequences using the appropriate sloped mill surface.