Using a Mapping Shape
Using a mapping shape
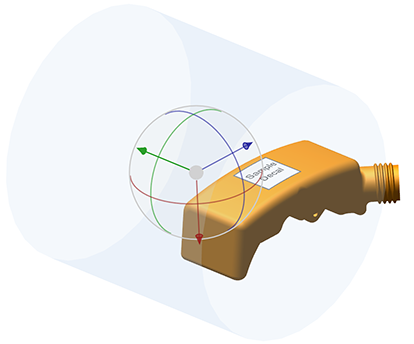
Depending on the underlying geometry of the selected face it may be preferable to use a mapping shape. When using a mapping shape, the decal is projected onto the part from the selected mapping shape. Use a mapping shape that best matches the shape of the face the decal is being applied to.
|
Plane
Flat surfaces that don’t have the geometric detail required to apply the decal directly.
|
 |
|
Cylinder
Cylindrical surfaces or surfaces that are curved in one plane.
|
 |
|
Sphere
Spherical surfaces that are curved in multiple planes.
|
 |
To use a Mapping Shape
1. Select a part.
2. Click > > . The Decal Library dialog box opens.
3. Select a decal and click Insert. The Add Decal dialog box opens.
4. Click a point on the face of the part to apply the decal. The decal is shown on the part centered on the selected point.
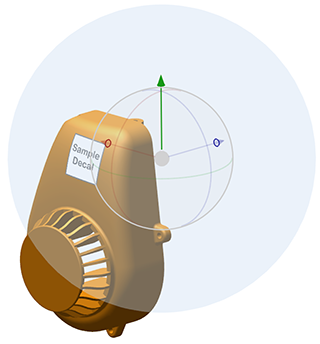
5. Check the Use Mapping Shape checkbox. The mapping shape button is enabled and the default mapping shape is used to project the decal onto the part.
6. Click Mapping Shape. The Mapping Shape dialog box opens and a representation of the mapping shape is shown in-view with a dragger.
7. Select a Mapping Shape from the shape menu that is most appropriate for the selected face.
◦ Plane
◦ Sphere
◦ Cylinder
8. Use the in-view dragger(ordialog controls)torotate and move the shapeto align with the face so that the decal is projectedcorrectlyonto the part.
9. Click OK. The Mapping Shape dialog box closes and themapping shapedragger is replaced with the decal dragger.
10. Adjust the scale and position of the decal.
11. Click OK . The decal is applied to the part.
|
|
In some cases where the selected part does not haveenoughanalytic data a mapping shape may be enforced.Decals cannot be applied to parts with very basic geometry.
|