Managing Accounts and Membership
As an administrator, you manage your enterprise account, create teams in your enterprise, and add members to them. You perform these tasks using the Onshape platform.
When your company purchases the GDX license, you receive an email from GDX with a link to the Onshape platform. Click the link and provide information to activate your Admin account.
After you complete these activities, you are redirected to the GDX application.
For more information, see the following:
To Activate the Credit Purchase
After you purchase credits for the GDX application, you need to activate them as follows:
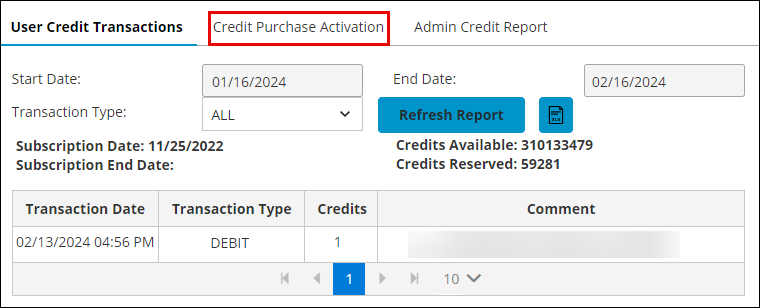
1. In the title bar panel, click  and click Credit Reports. The page displays the report related to User Credit Transactions.
and click Credit Reports. The page displays the report related to User Credit Transactions.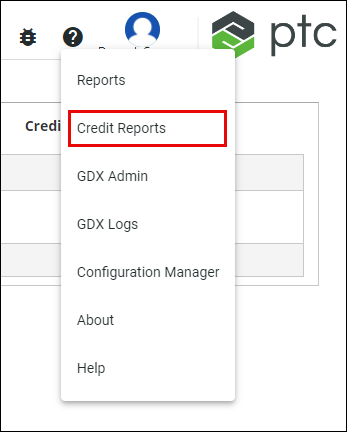
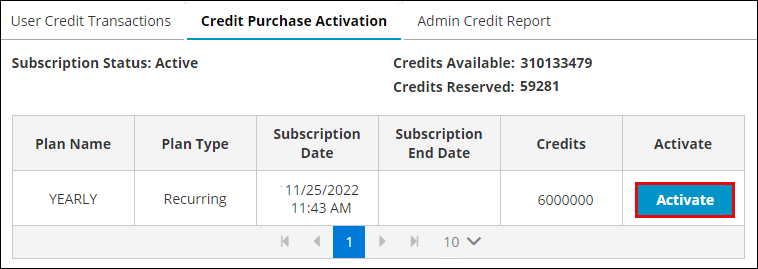
2. Click Credit Purchase Activation. The table displays your subscription details.
3. Click Activate to activate your credit purchase.
To Grant Users Access to the GDX Application
You can grant users access to the GDX application as follows:
1. In GDX, click your account name and then click Admin Tools. The Onshape Users page opens in a separate tab.
2. Add users to the enterprise account as follows:
a. Click Invite users. The Invite users dialog box opens.
b. In the Email addresses box, specify the email addresses of the individuals to add as users.
c. Under User type, select Full user.
d. Click Send invitation. The recipients get an email with a link to create their GDX accounts.
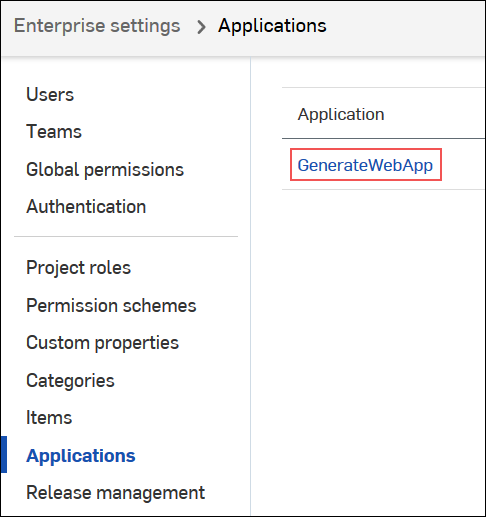
3. Add users to the GDX application as follows:
a. In the left pane, click Applications. The Applications page opens.
b. In the application list, click GenerateWebApp. The list of GDX users appears.
c. In the Add users box, specify the email addresses of the individuals to add as GDX users. The individuals must be previously added to the enterprise account.
d. Click Add. The users are allowed to authenticate into the GDX application.