Installing Creo Schematics: Simple Installation Process
Using PTC Installation Assistant, you can install the Creo Schematics using a simple installation process. You can also customize the installation using this installer. A simple installation process is described below:
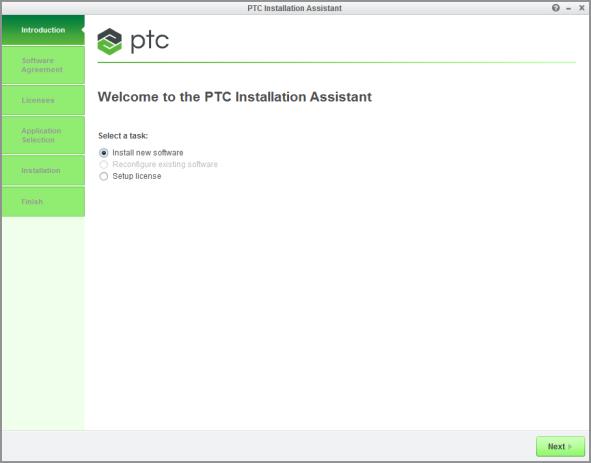
1. Start the Assistant. The Welcome screen appears.
2. Click Install or add new software.
3. Click Next. The Sign Software License Agreement screen appears.
4. Accept the agreement and click the check box at the bottom of the screen to confirm that you are installing the software in compliance with the Export Agreement.
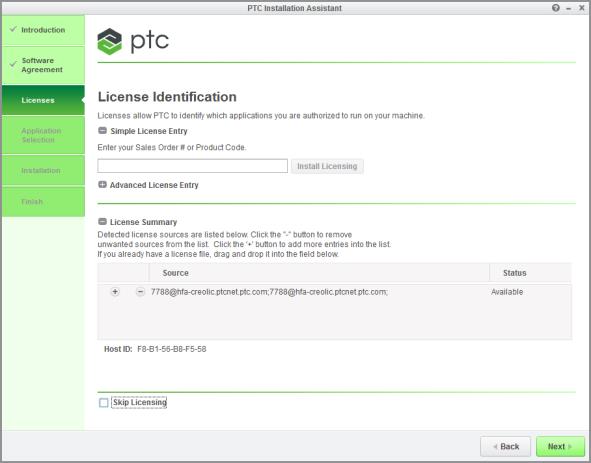
5. Click Next. The License Identification screen appears.
If you have configured your licenses, confirm that your desired license source appears in the License Summary area, or add it using one of the following methods:
◦ Drag and drop a valid license file into the Source column for a node-locked license.
◦ Specify the port@hostname value of the license server in the Source column for a single floating license server.
◦ Specify the name of a member of the Triad license server in the Source column. The License Summary area is automatically populated with the entire Triad license server information.
After you provide the correct license information, the availability of the license appears in the Status column.
7. Click Next. The Application Selection screen appears.
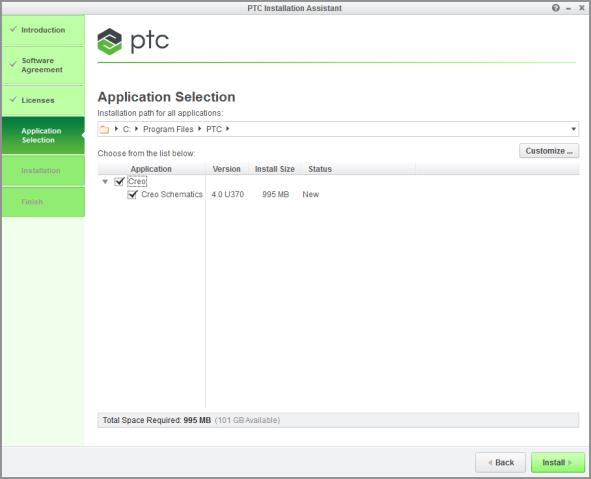
8. Specify an installation folder or retain the default folder.
9. Creo Schematics is selected. Check if you are installing the correct version of the software and whether the disk space requirements are met.
10. Perform one of the following steps:
◦ Click Install to install the applications without any customization.
◦ Select the applications and click
Customize to customize their installation. The
Application Custom Setting screen appears with the applications selected for customization on the left pane. Refer to the chapter
Customizing the Installation of Creo Schematics for more information.