Adding Ports, Placing Labels, and Defining Cells
Adding Ports
1. In the ribbon, click Catalog.
2. Click
 Instance Port
.
3. In the Catalog Selector dialog, select your newly created Port shape with the text to the left followed by OK.
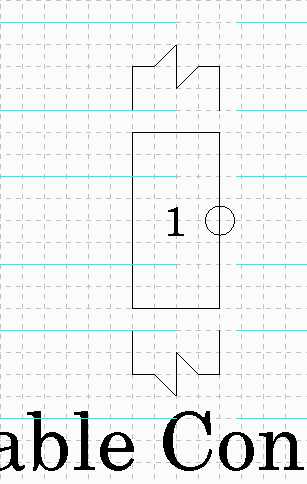
4. Place the Port on the sheet in location as per the figure.
5. From the
Info group, click
 Set Datum
 and place the origin to be at the center of Port 1.
Placing Labels
1. Ensure nothing is selected and from the
Create group click
 Add Label
.
2. In the Create Label Group Variable Connector dialog, ensure:
◦ Format is set to <name>
◦ Text height is set to 2
3. Place the label as per the figure.
Defining Cells
1. In the ribbon, click Geometry.
2. From the
Construction group, click the arrow next to
 Vertical
 and choose
 Horizontal
.
3. Place 6 Lines as per the figure.
4. Close the sheet.
5. In the ribbon, click Diagramming.
6. From the
Insert group, click
 Instance Group
.
7. In the Catalog Selector dialog box, select Variable Connector and click OK.
8. In the Reorder Members dialog box, edit the total ports to 5 and Update.
9. Click OK.
10. Place the new group onto design sheet.