Assigning a Material
1. Click
Applications >
 Simulate
 to open
Creo Simulate Lite mode.
|  If you have a Creo Simulate license, a message regarding licensing opens and prompts you to convert the model and enter standard Creo Simulate. Click No to open Creo Simulate Lite without converting the model. |
2. The Process Guide dialog box opens.
|  If the Simulate Icon  is not available then rerun the installation procedure and install Creo Simulate. |
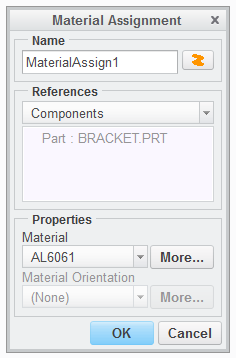
3. Click Materials in the Process Guide dialog box and then click assign in the instruction area. The Material Assignment dialog box opens.
4. Note that the material assigned is AL6061. Click OK to close the Material Assignment dialog box.
|  To assign a material of your choice, click File > Prepare > Model Properties. The Model Properties dialog box opens. Click change adjacent to Material. The Materials dialog box opens. In an assembly, you can assign different materials to different parts. |
5. In the Process Guide dialog box, notice the green check mark indicating the material assigned has been updated. Click Next to proceed to constraints.
|  In Creo Simulate, you can achieve more accurate results for some deformations by assigning nonlinear materials of user-defined stresses and responses. |
 Simulate to open Creo Simulate Lite mode.
 Simulate to open Creo Simulate Lite mode.
 Simulate to open Creo Simulate Lite mode.
 is not available then rerun the installation procedure and install Creo Simulate.