Changing and Updating Outside Diameters
Use the sample files provided at
<Creo load point>\Common Files\help\sample_models\piping when working in this exercise. It is recommended that you create a copy of the
piping folder on your computer and
set up piping data before you start working with the tutorial.
Workflow
1. Create a pipe segment.
2. Change pipe diameter in the Pipe catalog.
3. Update pipe diameter in the model.
Create a Pipe Segment
1. On the
Home tab, click
 New
New. The
New dialog box opens.
2. Under
Type, click
 Assembly
.
3. Click OK to create a new assembly.
4. Click
Applications >
 Piping
. The
Piping tab opens.
5. On the Piping tab, select the Spec Driven check box.
6. Click
 Create Pipe
. The
Create Pipeline dialog box opens.
7. In the Number box, type a.
8. Click OK. The Create Pipeline dialog box closes.
9. Click
 Set Start
. The
Define Start dialog box opens.
10. Select ASM_DEF_CSYS in the graphics window.
11. Click OK. The Define Start dialog box closes.
12. Click
 Extend
. The
Extend dialog box opens.
13. Drag a dragger handle along the z-axis and click Apply. A pipe segment is created.
14. Click Cancel. The Extend dialog box closes.
Change Pipe Diameter in the Pipe Catalog
1. In the piping folder, double-click the piping_data folder, and open the master_catalog folder.
2. Double-click the pipe folder and open the pipe_steel.csv file.
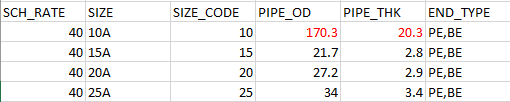
3. Update the following pipe diameter and pipe thickness values in the catalog:
SCH_RATE | SIZE | SIZE_CODE | PIPE_OD | PIPE_THK | END_TYPE | SCH_RATE |
40 | 10A | 10 | 170.3 | 20.3 | PE,BE | 40 |
In the following image, new values are in red:
4. Change the MATERIAL_DENSITY value to 0.78.
5. Save the Pipe master catalog file.
Update Pipe Diameter in the Model
1. Click Piping > Setup > Update Model. The Update Model dialog box opens.
2. Under
Model Information, click

to select all the options to update.
3. Click OK. The Confirm Cancel dialog box opens. Click Yes to confirm the update. The dialog boxes close and Spec-Driven Piping updates the active assembly information.
4. Click
 Piping Info
. The
Report Pipeline dialog box opens.
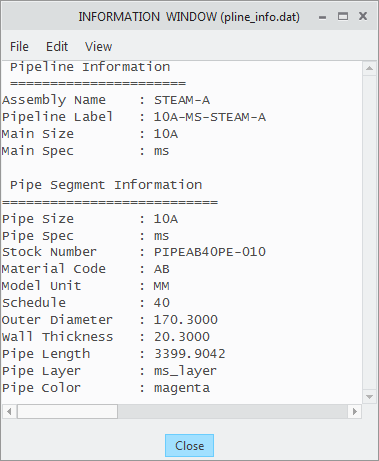
5. Select the segment 10A-MS-STEAM-A in the graphics window and click OK on the Select dialog box. The INFORMATION WINDOW opens.
|  The values of outer diameter and wall thickness are as entered in the Pipe MCAT file. |
6. Close the INFORMATION WINDOW and the Report Pipeline dialog box.