Example: Creating an Annotation Feature
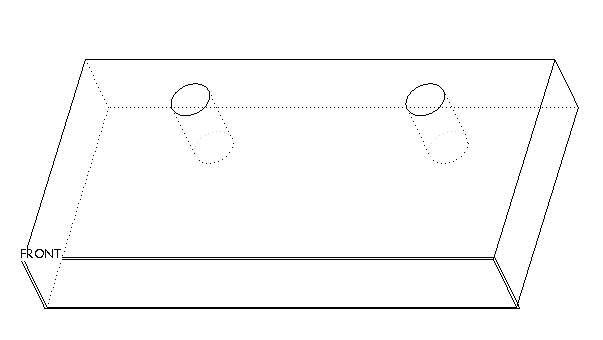
This example describes creating an Annotation feature with one Annotation Element of type Note in the model shown in the following illustration.
1. Define the datum plane named FRONT as the annotation plane.
2. Click

on the
Annotate tab. The
ANNOTATION FEATURE dialog box opens.
3. Click

. The
Note dialog box opens.
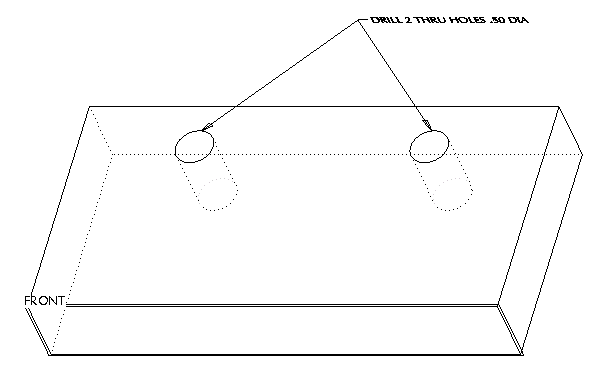
4. In the Text box, type DRILL 2 THRU HOLES .50 DIA.
5. Click the Place button in the Placement box.
6. On the NOTE TYPES menu, click With Leader, Standard, and Done.
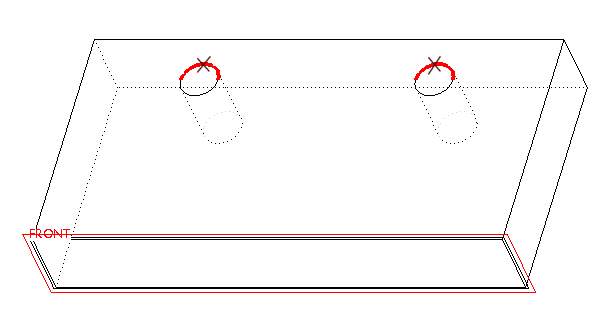
7. Select edges of both holes as attachment points, as shown in the next illustration, then click Done on the ATTACH TYPE menu.
8. Click on the screen to select where the note should be placed. The system places the note, as shown in the following illustration.
9. Click OK to return to the ANNOTATION FEATURE dialog box. The system creates the Annotation Element with the FRONT datum plane as a Strong reference and two edges of the holes as Weak references.
10. Click OK to create the Annotation feature.