Show Stackup
The Show Stackup tool allows you to easily visualize the Stackup defined in Creo EZ Tolerance Analysis. This tool shows the Stackup components in the locations defined by the Stackup. This is useful when visualizing any places where a gap between components in the assembly has been closed (See Assembly Closure for details), or when visualizing the impact of setting the assembly shift to Maximize or Minimize.
The Show Stackup tool is not available for a Stackup with a failed reference
1. On the EZ Tolerance tab, select Stackup Table to open the Summary of 1D Tolerance Stackups table. Click to open the Stackup Details table for a particular Stackup.
The Show Stackup tool is not available from the Summary of 1D Tolerance Stackups table. The table must be showing the details of a Stackup. |
2. Click on the Stackup Details table. The Stackup Table is closed and the Show Stackup dialog box opens.
on the Stackup Details table. The Stackup Table is closed and the Show Stackup dialog box opens.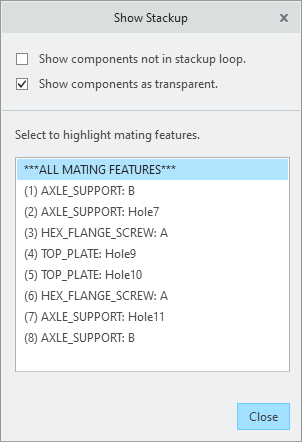
3. The components which are part of the Stackup loop, are shown in their locations defined by the Stackup.
The Show Stackup tool positions the parts according to the mating features definition. This includes any offsets that have been defined between components. The assembly shift is accurately represented by centering the two components if the assembly shift is set to Float or Center, or shifting the components to one side or the other if set to Maximize or Minimize. |
4. Any components not included in the Stackup loop are hidden by default. Click the checkbox next to Show components not in stackup loop to turn on the display of these components.
5. All components that are not hidden are shown as transparent. Click the checkbox next to Show components as transparent to deactivate the transparent display and show the components according to the model display setting.
6. The list at the bottom of the Show Stackup dialog box lists all mating features for the components that are part of the Stackup. The format is
<COMPONENT NAME>:<FEATURE NAME>.
Select any row to highlight that mating feature.
The first line in the list highlights all mating features in the Stackup. Each subsequent row highlights only the individual feature listed. |
The first line below the***ALL MATING FEATURES*** line corresponds to the Start feature of the Stackup. The last line in the list corresponds to the End feature of the Stackup |
7. Click Close to close the Show Stackup dialog box and return the components to their regular assembly locations and regular display.