Example: Verifying a Geometric Tolerance
You can use the CMM model or a drawing of the reference part to select the geometric tolerance to verify.
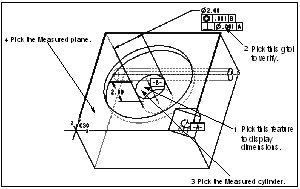
The following example shows verifying a geometric tolerance using the CMM model.

To verify a geometric tolerance as shown above:
1. Click > . The TOLERANCE menu appears.
2. When defining the Tolerance element, choose CurrentModel from the TOLERANCE menu, and pick the hole. The system displays dimensions associated with the selected feature.
3. Pick the geometric tolerance you want to verify.
4. Define the Feature(s) element. Pick the Measured cylinder.
5. Define the Datum(s) element. Pick the Measured plane.
6. Press OK to create the Verify step.
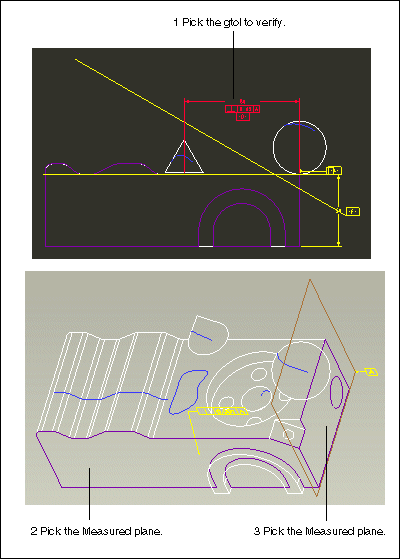
The following example shows verifying a geometric tolerance from a drawing.

To verify a geometric tolerance as shown above:
1. Click > . The TOLERANCE menu appears.
2. Choose From Drawing from the TOLERANCE menu. The system prompts you to enter the name of the drawing; entering a question mark (?) opens the browser to let you search for the drawing.
3. Select the drawing you want to use. The system retrieves it in the Creo Parametric window.
4. Pick the geometric tolerance you want to verify.
5. Define the Feature(s) element. Pick the Measured plane.
6. Define the Datum(s) element. Pick the Measured plane.
7. Press OK to create the Verify step.
 Verify